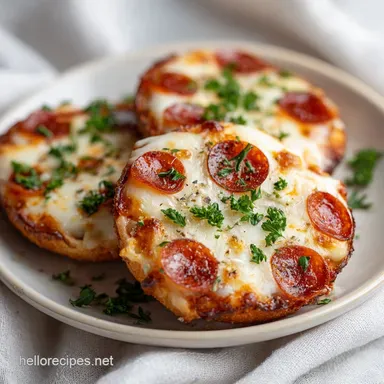
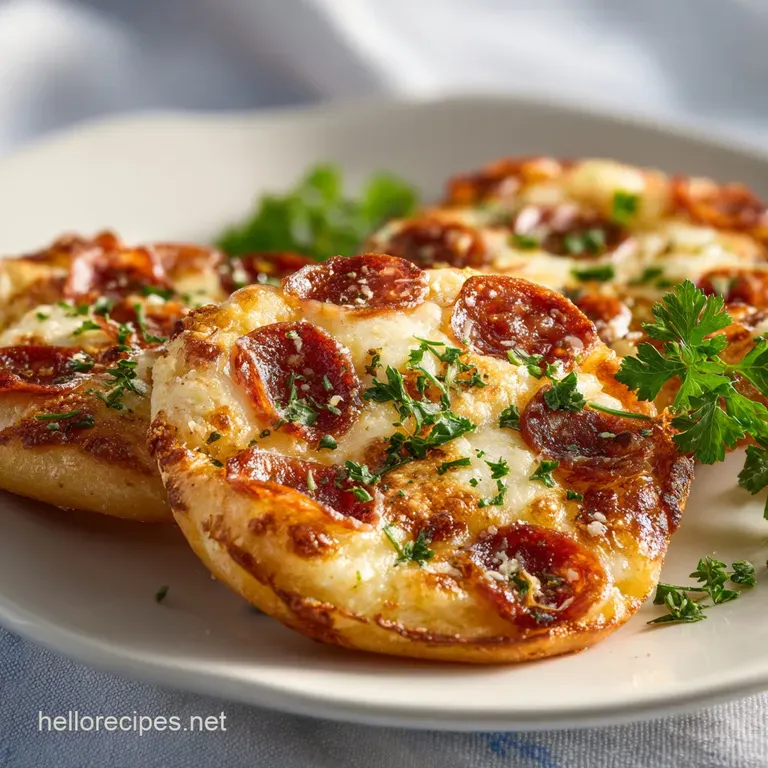
Pepperoni Pizza Balls: Golden and Gooey
- Time: 30 min active + 25 min cook = 55 min total
- Flavor/Texture Hook: Golden mahogany crust with a gooey, stretchy center
- Perfect for: Game day appetizers, party platters, or a fun weekend snack
That sharp, savory scent of garlic butter hitting a hot crust is honestly the best part of this whole process. I can still smell it now, wafting through my kitchen and bringing everyone running from the other room.
It's that specific aroma of toasted dough and melted fats that makes your mouth water before you even see the food.
Forget everything you've heard about needing a deep fryer or some fancy professional equipment to get that "poppable" snack vibe. Most people think you need to flash fry these things to get a crunch, but that's a total myth.
In my experience, the oven actually creates a better balance of textures, giving you a chew that's more like a real pizzeria crust rather than a greasy fair food ball.
I remember the first time I tried making these for a group. I spent way too much time worrying about the dough being too thick, thinking it would stay raw in the middle. But once I realized that a tight roll and a high heat are the secrets, everything changed.
These Pizza Balls are all about that contrast between the crisp exterior and the lava like cheese inside.
Pizza Balls
Right then, let's get into how we actually make these. You'll find that the beauty of this recipe is in its simplicity, but there are a few little tricks to ensure you don't end up with a tray of "cheese leaks" (which is basically a kitchen disaster).
Trust me, once you nail the sealing technique, you'll be making these every time you have guests over.
The key is using room temperature dough. If you try to work with cold dough straight from the fridge, it'll fight you. It'll snap back like a rubber band and leave you frustrated. I've been there, spending ten minutes fighting a piece of dough that refuses to stay flat. Just let it sit out for a bit, and it'll behave.
If you're feeling adventurous with your dough, you might want to check out my Quick Easy Pizza Dough recipe if you're starting from scratch. But whether you're using homemade or store-bought, the process for these Pizza Balls remains the same. It's all about the assembly and that final buttery glaze.
Why This Recipe Works
I've spent a lot of time wondering why some versions of these turn out soggy while others stay crisp. It comes down to a few simple things that happen in the oven.
Dough Tension: Rolling the dough into a tight sphere creates a structural wall that holds the filling in place. This prevents the balls from flattening into "pizza pancakes" as the cheese melts.
Moisture Control: Using low moisture mozzarella is a non negotiable. According to Serious Eats, the water content in fresh mozzarella can steam from the inside out, which often leads to the dough tearing or the bottom becoming mushy.
The Glaze Timing: Brushing the garlic butter on after the bake ensures the butter soaks into the crust without burning in the oven. This gives you that velvety finish and an intense aroma.
Heat Distribution: Baking at 400°F creates a rapid rise in the dough (oven spring), which locks the filling in before the cheese has a chance to liquefy and escape.
| Method | Prep Time | Texture | Best For |
|---|---|---|---|
| Fast (Store Dough) | 10 min | Chewy & Soft | Quick weeknight snack |
| Classic (Homemade) | 90 min | Airy & Crisp | Impressive party spread |
| air fried | 15 min | Extra Crunchy | Small batches |
Ingredient Deep Dive
Not every ingredient is created equal here. Some are just there for bulk, but others are doing the heavy lifting to ensure the texture is right.
| Ingredient | Science Role | Pro Secret |
|---|---|---|
| Pizza Dough | Structure & Shell | Let it reach room temp to prevent shrinking |
| Low Moisture Mozzarella | Elasticity & Bind | Cube it small for even melting |
| Pepperoni | Fat & Salt | Quarter the slices so they fit snugly |
| Garlic Butter | Surface Finish | Add parsley at the end for a vibrant pop |
Shopping List Breakdown
When you're hitting the store, don't just grab the first cheese you see. The type of mozzarella you choose will literally make or break these Pizza Balls.
- 16 oz pizza dough, room temperature Why this? Room temp dough stretches without snapping back
- 2 tbsp unsalted butter, melted Why this? Controls salt levels for the garlic glaze
- 1/2 tsp garlic powder Why this? Distributes flavor more evenly than fresh garlic
- 1 tbsp fresh parsley, chopped Why this? Adds a fresh, herbal contrast to the heavy cheese
- 8 oz low moisture mozzarella cheese, cubed into 1/4 inch pieces Why this? Prevents "soggy bottom" syndrome
- 4 oz pepperoni slices, quartered Why this? Ensures a bit of meat in every single bite
- 1/4 cup marinara sauce Why this? Adds acidity and moisture to the center
For the dough, if you want a more traditional, slow risen feel, I highly recommend my homemade pizza dough for a better chew.
Equipment Needed
You don't need a professional kitchen for this, just a few basics. A sharp pair of kitchen shears is actually a secret weapon here - it's way faster than a knife for cutting dough.
- Baking sheet (standard rimmed)
- Parchment paper (essential to prevent sticking)
- Small microwave safe bowl (for melting butter)
- Pastry brush (or a spoon)
- Kitchen shears
- Rolling pin (optional, your hands work fine)
How to Make It

Right then, let's get cooking. Follow these steps closely, especially the sealing part, or you'll have a cheese covered baking sheet.
Phase 1: Preparing the Dough
- Lightly flour your work surface and use kitchen shears to cut your pizza dough into 12-16 equal portions. Note: Shears prevent the dough from being squashed by a knife blade.
- Press each piece of dough into a circle about 4 inches wide. If the dough resists stretching, let it rest for 5 minutes to relax the gluten.
Phase 2: The Seal and Roll
- Place one cube of mozzarella and 2-3 pieces of pepperoni in the center of each dough circle, adding a tiny dot of marinara sauce. Note: Don't overfill or they will burst.
- Pull the edges of the dough up and over the filling, pinching the seams tightly together to seal.
- Place the ball in your palm and roll it in a circular motion with light pressure until you have a smooth, tight sphere.
Phase 3: The Golden Bake
- Place the balls on a parchment lined baking sheet, leaving 1 inch of space between each.
- Bake at 400°F (200°C) for 12-15 minutes until the crust is a deep, golden mahogany color.
- While hot, brush the tops with the mixture of melted butter, garlic powder, and parsley.
Chef's Note: I once forgot the parchment paper and spent twenty minutes scrubbing baked on cheese off my pan. Don't be like me. Use the paper.
Common Mistakes & Troubleshooting
Even the best of us mess up. Usually, the problem with Pizza Balls is either the seal or the temperature. If they look more like flat disks than balls, you likely didn't roll them tight enough in the palm of your hand.
| Issue | Solution |
|---|---|
| Why Your Cheese Is Leaking | This usually happens because the seal wasn't tight enough or the mozzarella had too much moisture. When the cheese hits that 400°F heat, it expands. If there's a tiny gap, it'll find it. Ensure you pi |
| Why Your Dough Is Tough | If the crust feels like rubber, you probably over handled the dough or didn't let it rest after cutting. Gluten develops when you work the dough, and too much of it makes the snack tough. |
| Why Your Bottoms Are Burnt | This is usually a rack placement issue. If you bake on the lowest rack, the bottom hits the heat too directly. Stick to the middle rack for an even bake. |
Mistake Free Checklist:
- ✓ Dough is room temperature before stretching
- ✓ Seams are pinched tightly with no gaps
- ✓ Balls are rolled into tight spheres
- ✓ Baking sheet is lined with parchment
- ✓ Oven is fully preheated to 400°F
Flavor Variations to Try
Once you've mastered the basic pepperoni version, you can really start playing with the fillings. The dough is a neutral canvas, so feel free to get creative.
For a Spicy Kick
Swap the pepperoni for spicy calabrese or add a thin slice of jalapeño to each ball. I love adding a pinch of red pepper flakes to the garlic butter glaze for an extra layer of heat.
For a Veggie Twist
Skip the meat and use diced baby spinach and roasted red peppers. Since veggies can be watery, pat them dry with a paper towel first so your Pizza Balls don't get soggy.
For a dairy-free Version
Use a high-quality vegan mozzarella that is specifically labeled for melting. You can substitute the butter in the glaze with a melted plant based butter or a drizzle of olive oil.
For a gluten-free Option
You can use a store-bought gluten-free pizza dough, but be careful - these tend to be more fragile. Don't stretch them as thin, and give them an extra 2-3 minutes in the oven to ensure the center is cooked.
Adjusting the Batch Size
If you're cooking for a crowd or just for yourself, you'll need to tweak a few things. Scaling isn't always a straight line, especially with oven heat.
When scaling down to a half batch, use 8 oz of dough and keep the temperature the same. You might find they cook slightly faster - check them at the 10 minute mark. For the egg or butter measurements, just divide by two.
If you're doubling or tripling the recipe, don't crowd the pan. If the balls are touching, they'll steam instead of roast, and you'll lose that mahogany crust. Work in batches or use two separate baking sheets.
| If you want... | Do this... | Result |
|---|---|---|
| Extra Crisp | Bake 2 mins longer | Harder shell, more crunch |
| Gooey Center | Use a mix of Mozzarella and Provolone | More "pull" and deeper flavor |
| Lighter Crust | Use a higher hydration dough | More air bubbles in the bread |
Common Misconceptions
Let's clear a few things up. There are some myths floating around that just don't hold water in a real kitchen.
"You have to fry these to get them crispy." This is simply not true. A high temperature oven (400°F) creates plenty of crispness through the Maillard reaction without the mess of oil.
"Fresh mozzarella is better for filling." In a pizza, yes. In a ball, absolutely not. Fresh mozzarella releases too much water, which turns your dough into a soggy mess from the inside. Low moisture is the way to go.
"You can't freeze these." You totally can. In fact, they're one of the best freezer friendly appetizers you can make.
Storage Guidelines
To keep these Pizza Balls fresh, you've got a few options. Because of the cheese and butter, they're best when fresh, but they hold up well if stored correctly.
Fridge Storage: Place them in an airtight container once completely cooled. They'll stay good for about 3 days. To reheat, avoid the microwave if you can, as it makes the dough rubbery. Use a toaster oven or a regular oven at 350°F for about 5-8 minutes.
Freezer Storage: These are great for meal prep. Freeze them on a tray first so they don't stick together, then toss them into a freezer bag. They'll last for up to 2 months. To cook from frozen, just pop them straight into the oven at 375°F for about 15-20 minutes.
Zero Waste Tip: If you have leftover marinara sauce, don't toss it! Simmer it with a bit of extra garlic and a splash of balsamic vinegar to create a thick dipping sauce. If you have leftover dough, roll it into a small focaccia or a few dinner rolls for the next morning.
What to Serve This With
Since these are quite rich and salty, you want sides that cut through that heaviness. Something bright and acidic works best.
I love serving these with a crisp arugula salad tossed in a lemon vinaigrette. The bitterness of the greens and the zing of the lemon balance out the molten mozzarella and buttery crust perfectly. It turns a simple snack into a full blown meal.
Another great option is a side of creamy garlic aioli or a spicy ranch dip. If you're hosting a party, put a large bowl of these Pizza Balls in the center of a platter, surround them with sliced cucumbers and cherry tomatoes, and let everyone dig in. Trust me, they'll be gone in minutes.
Recipe FAQs
Why does my dough resist stretching after balling?
Let the dough rest for 5 minutes. This allows the gluten to relax, making it much easier to press the dough into a 4 inch circle.
How do you store dough balls?
Place them in an airtight container. Store them in the refrigerator for up to 3 days; if you've mastered dough storage here, apply the same method to our homemade crust.
Can I freeze dough balls after shaping?
Yes, this is a great meal prep option. Freeze them on a tray first so they don't stick together, then transfer them into a freezer bag.
What does overproofing mean?
It occurs when dough rises for too long. The yeast consumes too much sugar, which weakens the gluten structure and can cause the dough to collapse.
What if my dough balls overproof?
Gently press the air out. Reshape the dough and proceed with filling and baking at 400°F.
Why is my cheese leaking out during baking?
The seal likely wasn't tight enough. When mozzarella hits 400°F, it expands and will escape through any tiny gaps in the dough.
Why are my pizza balls flat instead of round?
You likely didn't roll them tight enough. Use your palm in a circular motion with light pressure to create a smooth, tight sphere before baking.
Pepperoni Pizza Balls