Nobake Pumpkin Marshmallow Pie the Effortless Autumn Delight
Effortless Autumn Dessert Magic: Why This Pie Works
Okay, so we all love autumn flavors, right? But seriously, who has time to wrestle with flaky pastry and monitor an oven when the leaves are turning golden? I’m here to tell you that this NoBake Pumpkin Marshmallow Pie is the answer to your prayers.
It’s the ultimate Thanksgiving secret weapon, or really, just the perfect Sunday treat. We are talking maximum flavor payoff for minimum kitchen effort. I promise, once you try this Easy No Bake Marshmallow Pumpkin Pie, you’ll stop fighting with traditional pumpkin pie entirely.
It’s ridiculously creamy, spiced perfectly, and feels like eating a cloud.
Ditching the Oven: The Joy of a Chill and Only Pie
Listen, the oven is reserved for the turkey and maybe a couple of necessary side dishes during the holidays. Why add stress to your life? This is a chill and only operation. The stability comes entirely from the magic of the marshmallow and the patience of the fridge.
This means two things: First, you aren't heating up your whole house. Second, you can make this pie entirely ahead of time. I usually prep mine the night before a party. It’s truly set and it and forget and it baking, which is my favorite kind of baking.
No bake pumpkin pie with marshmallow fluff is just the dream.
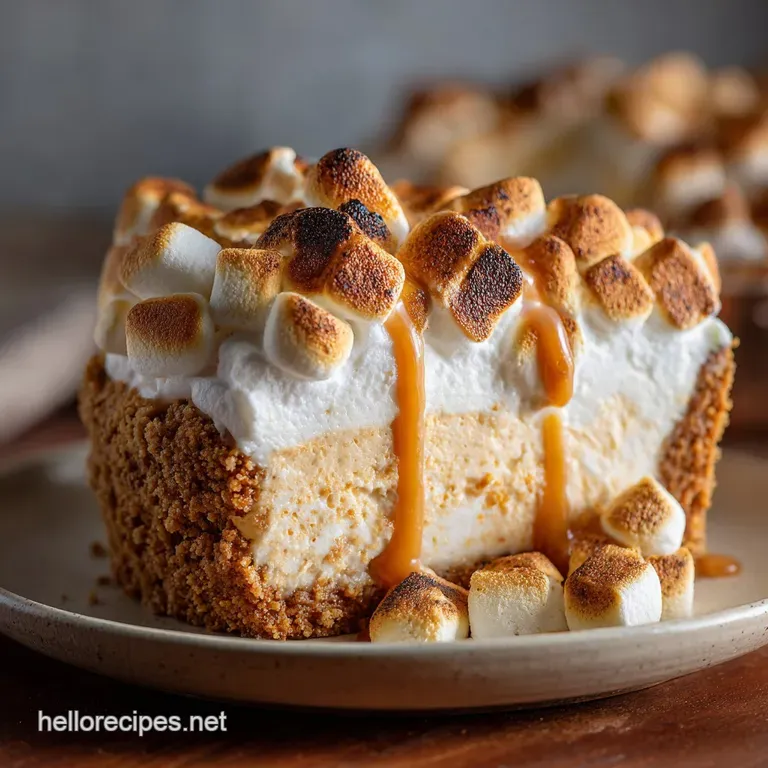
The Marshmallow Secret: Achieving Perfect Cloud and Like Texture
If you’ve ever tried to make a pumpkin mousse with just gelatin, you know it can get grainy or rubbery fast. This is why we use the secret ingredient: marshmallows. When you melt down the marshmallows slowly with a splash of milk, they turn into a super sticky, super glossy base. This isn't just a sweetener.
It acts as a stabilizer and an aerating agent. When you fold in that massive quantity of freshly whipped cream, the marshmallow mixture holds all those tiny air bubbles captive. The result? A perfectly stable, ridiculously light, Cool Whip pumpkin pie texture that doesn’t collapse when you slice it.
It's truly structural genius.
Quick Prep Time vs. Epic Flavor Payoff
I'm serious when I say the active work takes less than 20 minutes. You crush the biscuits, melt the butter, press the base. That's five minutes. Then you melt the marshmallows, stir in the pumpkin and spices, and fold in the cream. Another fifteen minutes, tops. You’re done.
You literally walk away and let the refrigerator do the rest. This effortless autumn dessert recipe tastes like you spent hours fiddling with custard temperatures and blind baking. I love serving this because people are always shocked that something so simple can deliver such deeply spiced, rich flavor.
Essential Supplies for the Perfect NoBake Pumpkin Marshmallow Pie
Pantry Checklist: Spices, Fillings, and Dairy Needs
Alright, before you get started on your No Bake Pumpkin Marshmallow Pie journey, we need to check the pantry. The most critical item is the canned pumpkin puree. Please, please, triple check the label to ensure it says "100% Pure Pumpkin" and not "Pumpkin Pie Filling." That filling is already sweetened and spiced, and it will throw the entire recipe off balance, making it way too sweet.
Trust me, I made that mistake once years ago the results were sticky and tragic. For the spices, I just use a standard pumpkin pie spice blend, but if you want to be extra, make sure your spices are fresh. Stale spices mean bland pie.
| Ingredient Tip | Why It Matters |
|---|---|
| Mini Marshmallows | They melt faster and smoother than large ones. |
| Heavy Cream (Cold) | Must be cold to whip up properly into stiff peaks. |
| Brown Sugar | Adds that deep, caramelized molasses note that granulated sugar misses. |
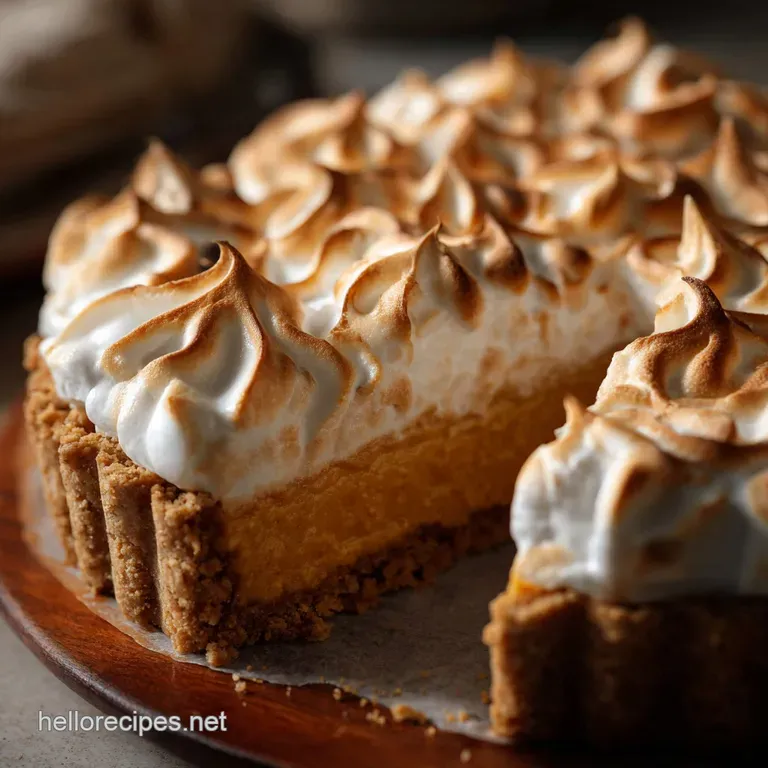
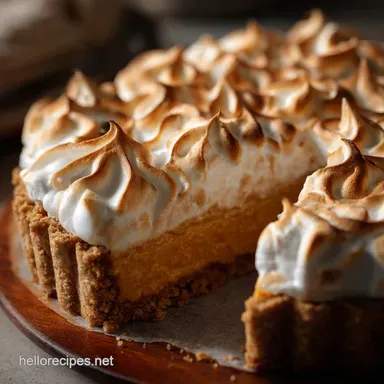
Crumb Base Options: Beyond the Traditional Ginger Snap
My absolute favorite crust for this is the ginger snap. The warmth and sharp spice of the ginger cut through the sweetness of the marshmallow filling beautifully. But you have options!
- Classic Option: Graham Crackers (add an extra pinch of cinnamon to the crumbs).
- Decadent Option: Chocolate wafers (like Oreos, filling and all, crushed up).
- Nutty Option: Pecan sandies (a bit crunchier, lovely texture).
Whichever route you go, remember that tight pressing is key. And honestly? Don't skimp on the butter. That’s what holds it all together when it hits the fridge.
Must and Have Tools for Blending and Setting
You don’t need anything fancy here. A 9 inch pie plate is mandatory, obviously. A heavy and bottomed saucepan is best for melting the marshmallows because it distributes heat evenly and prevents scorching (which turns your sugar into cement).
But the one tool that makes this a breeze is a hand mixer or a stand mixer. Whipping the heavy cream by hand takes forever, and you need that cream to hit stiff peaks to hold the structure of the filling. Save your arms, use a machine.
Related Recipes Worth Trying
- Mini Pumpkin Pies Easy Recipe for Perfectly Spiced Mini Desserts — Make perfect Mini Pumpkin Pies every time with this easy recipe These individual treats are baked right in a cupcake tin featuring a flaky crust and richly...
- Pumpkin Bread Recipe Easy Moist and Perfectly Spiced Autumn Loaf — This classic Pumpkin Bread is unbelievably moist and spiced taking only 15 minutes of prep time Use this Easy Pumpkin Bread Recipe for a perfect onebowl...
- Autumn Harvest Turkey Pumpkin Chili Recipe Smoky Lean Ready in an Hour — This easy Turkey Pumpkin Chili is the perfect culinary hug for cold evenings Packed with deep smoky flavour and warming autumn spices its ideal for Fall...
Guided Assembly: Creating Your NoBake Pumpkin Marshmallow Pie
Mastering the Crust: Pressing for Stability
Once you’ve got those gingersnap crumbs wet with melted butter, you need to be aggressive with the pressing. This isn't a gentle patting situation. If the crust isn’t packed tightly, it will crumble when you slice it, and no one wants to eat their pie with a spoon because the structure failed.
CRUCIAL TIP: Use the flat bottom of a clean measuring cup or a small glass. Press firmly, focusing on the corners and the sides first. You want the sides of the crust to be almost as thick and robust as the base.
Once it looks solid, give it at least 30 minutes in the fridge before adding the filling.
The Marshmallow Melt: Preparing the Lightest Filling Base
This is where I messed up a lot early on. You need low heat! Combine the mini marshmallows and the evaporated milk in the saucepan and keep the heat on medium and low. You want them to gently sigh their way into oblivion, not boil or bubble furiously. Keep stirring, even when it looks like a white, gooey mess.
The second it’s completely smooth and glossy, pull it off the heat immediately. That smooth, warm base is what you stir the pumpkin, spices, and brown sugar into. Get it nice and uniform, then let it cool slightly while you tackle the cream.
Folding and Flavoring: Achieving the Velvety Mousse Consistency
While the pumpkin base is chilling a little (maybe 10 to 15 minutes is fine, it shouldn’t be piping hot), whip your very cold heavy cream until it holds beautiful, stiff peaks. Now, this next bit is essential for the lightest possible texture: the lightening step.
Take about a third of the whipped cream and dollop it into the pumpkin base. Stir that in quite vigorously. This loosens the thick, sticky marshmallow base. Then , you gently fold in the remaining cream. Use a large rubber spatula and cut down the middle, then sweep up the side.
Do this until there are no white streaks left. Be gentle, we are trying to keep that glorious air in there.
The Waiting Game: Chill Time Requirements for Firm Setting
Right, the pie looks perfect, you’ve smoothed the top, and now you want a slice. Stop. Put the fork down. The waiting game is the hardest part of the No Bake Pumpkin Marshmallow Pie recipe, but it is non and negotiable. While four hours technically works , I highly recommend chilling it overnight.
Overnight chilling ensures that every bit of that marshmallow structure locks into place, giving you clean, photogenic slices. Cover it loosely with plastic wrap don’t let the wrap touch the surface of the filling, or you’ll peel off the gorgeous top layer when you unveil it.
Customizing and Troubleshooting Your Autumn Pie
Addressing Common Errors: Why Your Filling Might Not Be Setting
If you cut into your pie after a four hour chill and it sloshes or slouches, it usually comes down to two issues:
- Too Hot: You added the whipped cream while the marshmallow pumpkin base was still too warm. The heat immediately melted the whipped cream, robbing it of its air and volume. Wait until the pumpkin base is just warm, maybe even slightly cool to the touch.
- Improper Folding: If you knocked all the air out of the whipped cream during the final fold, the mixture won’t have the necessary volume to stabilize properly. You must be gentle. If the whipped cream starts to look runny before it hits the filling, you’ve over whipped it, or it was too warm. Start over with the cream if needed.
Scaling Up: Tips for Making a Crowd and Pleasing Sheet Pan Version
Thanksgiving dessert ideas for kids (and adults!) often require serving huge groups. This recipe scales beautifully into a 9x13 inch sheet pan, perfect for cutting into little squares or bars.
- Increase the crust ingredients by 50%.
- Increase the filling ingredients by 75% (nearly double the original recipe, but not quite).
- The chill time remains the same plan for overnight.
- Line your sheet pan with parchment paper, leaving an overhang. This makes lifting and slicing much easier once set.
Ideal Refrigerator Life: Keeping Your Pie Fresh
Because this Easy No Bake Marshmallow Pumpkin Pie contains whipped cream and dairy, it needs to be stored in the refrigerator, always. It keeps surprisingly well for a no bake confection. You can comfortably store this for 3 to 4 days, uncovered (or covered very loosely) once cut.
After the fourth day, the crust starts to lose some of its crispness, and the filling might lose a tiny bit of its structural integrity, but it’s still totally safe and delicious.
Presentation Ideas: Garnishes to Elevate the Experience
Don't let your beautiful No Bake Pumpkin Pie Recipe stand naked! A little garnish goes a long way.
- Piping: Use a piping bag fitted with a star tip and pipe a decorative border of extra whipped cream around the edge.
- Dusting: A quick sift of powdered sugar or cinnamon just before serving looks professional.
- Texture: Scatter chopped candied pecans, shaved dark chocolate, or a few caramelized ginger pieces over the top. A little crunch is essential with such a soft filling.

Recipe FAQs
My pie filling seems a bit wobbly did I mess up the marshmallow step?
Don't panic! The key to structural integrity is thorough chilling (at least 4 hours, ideally overnight). Rushing this process is a proper faux pas; ensure your marshmallow base wasn’t overheated, as that can make the sugars seize and inhibit a proper set.
Can I use Marshmallow Fluff instead of mini marshmallows in this NoBake Pumpkin Marshmallow Pie?
Absolutely! You can substitute 2 cups (200g) of Marshmallow Fluff for the mini marshmallows; if you do this, skip the evaporated milk entirely as the fluff is already perfectly smooth and doesn't require melting assistance.
I’m out of store-bought pumpkin pie spice blend. What’s the quick fix?
A quick homemade blend is spot on: mix equal parts ground cinnamon, ground ginger, and ground nutmeg, plus a tiny pinch of cloves or allspice for that authentic autumn warmth and depth of flavour.
This pudding is massive how long will leftovers keep in the fridge?
This pie keeps splendidly! Store it loosely covered in the fridge for up to 3 days, though for the very best light and airy texture, it’s best enjoyed within 48 hours of setting.
I need this for a dinner party. Can I prep the whole thing a day early?
Yes, and it’s highly encouraged! This is the perfect make-ahead dessert, as preparing it 24 hours in advance ensures the filling is completely set and will slice beautifully when you come to serve it.
Nobake Pumpkin Marshmallow Pie Recipe
Ingredients:
Instructions:
Nutrition Facts:
| Calories | 500 kcal |
|---|---|
| Fat | 28 g |
| Fiber | 3 g |
