Gluten Free No Bake Desserts: the Ultimate Peanut Butter Chocolate Silk Tart
- Effortless Elegance: Why This Gluten Free No Bake Dessert is the Summer Star
- Flavor Dynamics: Balancing Salty Peanut Butter and Decadent Chocolate
- Essential Components: Detailed Breakdown of Peanut Butter Silk Tart Ingredients
- Assembly Guide: Crafting Your Ultimate No-Bake Peanut Butter Tart
- Troubleshooting and Expertise: Elevating Your Gluten Free No Bake Desserts
- Longevity and Prep: Storing Your Peanut Butter Tart
- Recipe FAQs
- 📝 Recipe Card
Effortless Elegance: Why This gluten-free No Bake Dessert is the Summer Star
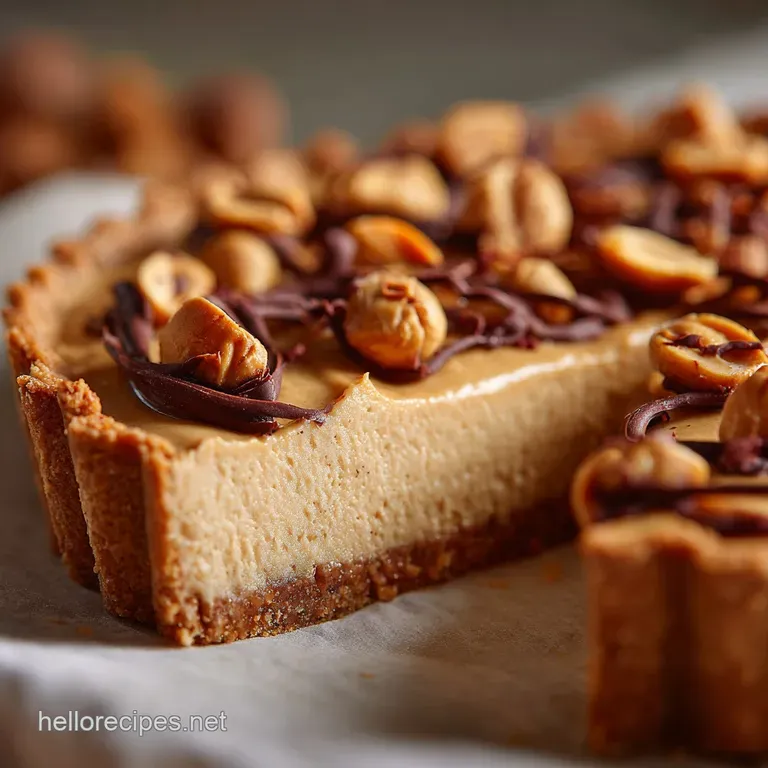
When the temperature gauge hits "ridiculous," the last thing I want is to turn my oven into a tiny, fiery sun. This Ultimate No-Bake Peanut Butter Chocolate Silk Tart swoops in like a proper hero.
Imagine a cool, deeply satisfying slice with a crunchy, salty base giving way to a filling so light it practically floats that’s the sensory payoff here.
Seriously, this recipe is a lifesaver, especially if you’re suddenly hosting or just need an impressive treat without the fuss. It’s one of my favorite easy gluten-free no bake desserts because it takes maybe 15 minutes of actual work and costs a fraction of what a bakery charges.
Plus, we avoid the dreaded gluten-free crumbly bake entirely because we don't bake it!
I’ve spent years tinkering with fillings, trying to achieve that perfect set without resorting to gross stabilizers. Trust me, this version is the gold standard for best gluten-free no bake desserts , delivering maximum flavour with minimal effort.
Let's crack on and get this beauty chilling, because the fridge does all the hard work for us.
Flavor Dynamics: Balancing Salty Peanut Butter and Decadent Chocolate
This dessert is magic because it plays off that classic salty sweet tension, using high-quality ingredients to build intense flavour layers. The crust gets a generous pinch of salt, which acts as a flavour multiplier, ensuring the peanut butter filling doesn't taste flat or overly sugary.
We're aiming for that deeply satisfying umami that keeps people coming back for another slice.
The Science of Silk: Achieving Maximum Creaminess Without Gelatin
The key to that gorgeous, airy "silk" texture is relying on the power of cold, high fat dairy. We don’t use gelatin or condensed milk here; we rely on properly whipped heavy cream combined with softened cream cheese. The cream acts as a stabilizer when folded gently into the peanut butter base.
The result is a light, mousse like texture that still holds its shape perfectly when chilled, melting delightfully in your mouth.
Cracking the Crust: Secrets to a Firm, Flavorful gluten-free Base
Forget those pale, flimsy crusts that shatter the moment you slice them. We need a base that provides structural integrity and a depth of flavor. By using melted butter and pressing the crumbs aggressively, we create a dense, moisture resistant barrier. If you're looking for other solid gluten-free bases, sometimes starting with a robust flour blend is key similar to how we get structure in my recipe for gluten-free Chocolate Chip Quick Bread: Ultra Moist Easy GF Bread Recipe . Here, though, we just rely on the biscuit crumbs and butter.
Beyond the Oven: The Appeal of No-Bake Summer Treats
Honestly, who wants to preheat anything when it’s 90 degrees out? The biggest appeal of easy gluten-free no bake desserts with few ingredients is the sheer convenience and consistent results. There’s no risk of burning, sinking, or over baking.
Just mix, chill, and serve something incredibly impressive.
The Perfect Set: Understanding Fat Content in No-Bake Fillings
In no-bake recipes, fat is your friend, specifically the saturated fat found in cream cheese and heavy cream. This is why you must use full fat cream cheese and high fat heavy cream (sometimes called double cream).
This high fat content solidifies quickly when chilled, providing the necessary structure for slicing. Lower fat alternatives simply won’t give you the stable, sliceable result you need.
Texture Contrast: Crunchy Crust Meets Airy Silk
The magic isn't just the flavour; it's the interplay of textures. The crunchy, dense, slightly chewy crust contrasts beautifully with the airy, light filling. That sprinkle of flaked sea salt at the end? That adds one last micro crunch and an intense burst of flavour right before serving.
Temperature Control: The Importance of Chilling Time
I know, waiting is the hardest part of any dessert recipe. However, the chilling time is non-negotiable for this silk tart. Four hours is the absolute minimum, but I always tell my friends to make this overnight.
A full night in the fridge ensures the fats have properly bonded, giving you those razor sharp slices that look totally professional.
Essential Components: Detailed Breakdown of Peanut Butter Silk Tart Ingredients
We keep the ingredient list tight, focusing on quality because there’s nothing to mask the core flavours. This recipe is naturally gluten-free no bake desserts friendly, but we can easily adapt it for dairy issues too.
Selecting the Best gluten-free Biscuit for the Crust
Avoid anything too thin or highly flavored. I prefer a solid GF digestive biscuit or GF graham cracker. They absorb the melted butter perfectly and create a robust, almost shortbread like crust when pressed firmly.
If you use a very oily biscuit, you might need slightly less butter, so watch the consistency it should resemble wet sand, not mud.
dairy-free Alternatives for a Vegan Friendly Filling
Want to make this a gluten dairy-free no bake desserts star? No problem. Swap the cream cheese for a high-quality vegan cream cheese alternative (Miyoko's is my favorite for texture).
Crucially, substitute the heavy cream with full fat coconut cream (chilled overnight and scooped from the top of the can) or a professional grade vegan whipping cream.
| Component | Standard Ingredient | dairy-free Alternative |
|---|---|---|
| Cream Cheese | Full Fat Cream Cheese | Vegan Cream Cheese Alternative |
| Heavy Cream | Heavy/Double Cream (cold) | Solid Coconut Cream or Vegan Whipping Cream |
The Role of Powdered Sugar vs. Granulated Sugar in Achieving Silkiness
This is a classic rookie mistake: using granulated sugar in a no-bake filling. Don't do it! Granulated sugar won’t fully dissolve and will leave your filling grainy. We use icing sugar (confectioners’ or powdered sugar) because it blends seamlessly with the fats, contributing to that flawless, silky texture we’re chasing.
Always sift your powdered sugar to guarantee a lump free filling.
Assembly Guide: Crafting Your Ultimate No-Bake Peanut Butter Tart
This is where your inner culinary artist emerges. Keep your ingredients ready, and the whole process flows smoothly.
Pressing the Crust: Achieving Uniform Thickness and Edges
Uniformity is vital for a clean slice. After mixing the crumbs and butter, dump them into the tin and start pressing the sides first, then the base. Use the flat bottom of a measuring cup or a straight sided glass to achieve dense, perfectly perpendicular edges.
This strong boundary prevents the filling from sticking to the pan once it's chilled.
Whipping the Filling: Key Stages for Light and Fluffy Texture
Start by beating the cream cheese and peanut butter mixture until it’s unbelievably smooth there should be zero lumps before you move on. Whip the heavy cream in a separate bowl until stiff peaks form; the peaks should hold their shape without flopping.
Now, the folding: add the cream in three parts, turning the bowl as you gently sweep the spatula under the mixture. Stop mixing the second the white streaks disappear, maintaining maximum air.
Chef’s Note: The texture should be airy and mousse like, not thick and dense. If you accidentally deflate it, your tart will still taste great, but it will be closer to fudge than silk.
The Setting Process: Optimizing Chill Time for a Clean Slice
As mentioned, overnight is your friend. Place the tart on the middle shelf of the fridge where the temperature is most stable and reliable. Cover it loosely, allowing a little air circulation so no moisture collects on the surface. Resist the urge to peek or move it prematurely!
Troubleshooting and Expertise: Elevating Your gluten-free No Bake Desserts
Every cook makes mistakes, myself included. I once tried to rush the chill time and ended up with a gorgeous looking tart that flowed onto the plate like a sad puddle. Learn from my impatience!
Preventing a Soggy Crust: A Butter Ratio Checklist
If your crust is soggy, you likely didn't chill it long enough before adding the filling, or your butter ratio was slightly off. The initial 20 minute freezer chill is crucial to firm up the butter, creating a hydrophobic layer that stops moisture from the filling soaking in.
If the crust is too crumbly, you didn't use enough butter or didn't press hard enough it needs structural density.
Solving the "Runny Filling" Problem
A runny filling is almost always due to one of two things: your cream wasn't cold enough when whipped, or you used runny, natural style peanut butter. Natural peanut butter separates and has a much lower fat-to-oil ratio, making it unstable for no-bake setting.
Stick to standard, smoother peanut butter brands (like Jif or Skippy) for guaranteed structure.
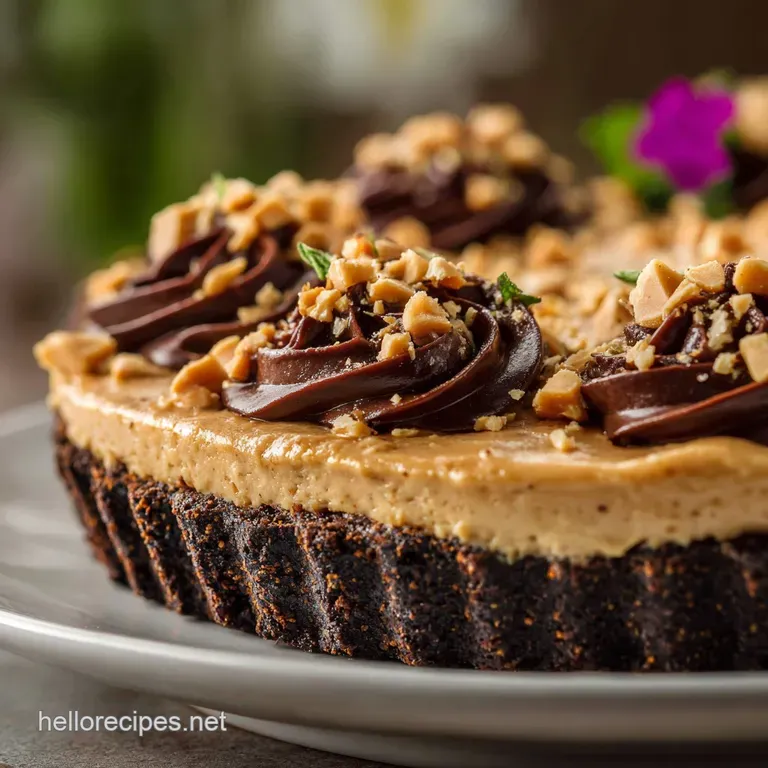
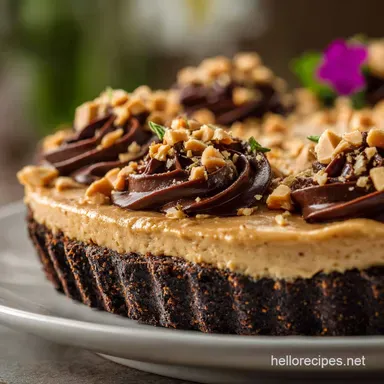
Mastering the Chocolate Drizzle Finishes
If you want a professional touch, melt 1/4 cup of chocolate chips with 1 teaspoon of coconut oil until smooth. Let it cool slightly before drizzling it over the chilled tart. For clean lines, use a small piping bag or simply use a fork and zig-zag quickly across the surface.
A fine dusting of cocoa powder is always an elegant choice, too.
Longevity and Prep: Storing Your Peanut Butter Tart
This is one of the joys of gluten-free treats —they often store beautifully, especially when frozen.
Fridge Life vs. Freezer Stability
Your silk tart is at its absolute best 12– 24 hours after making it, once the flavours have really melded. It will keep beautifully in the fridge, covered, for up to 5 days. If you need to prep this way ahead of time, the freezer is your best bet.
Best Practices for Thawing and Serving Frozen Desserts
You absolutely can freeze this tart! Wrap the fully set tart tightly (after removal from the pan) in plastic wrap, followed by a layer of foil. It will last up to 3 months. When ready to serve, thaw it overnight in the refrigerator.
Do not thaw at room temperature, as this can cause condensation, leading to a watery filling. Serve it chilled, directly from the fridge.
Complementary Beverage Pairings (Coffee, Dessert Wine, Milk)
Because this tart is rich and creamy, you need something that cuts through the fat. A strong black coffee or espresso is fantastic. If you’re going the wine route, a slightly chilled, fortified wine like a Ruby Port is sublime, providing a necessary robust counterpoint.
Of course, a cold glass of milk (dairy or almond!) is the ultimate classic pairing for peanut butter and chocolate.

Recipe FAQs
Why is my Peanut Butter Silk filling not setting up properly?
The most common issue is improper blending of the fats and stabilizers. Ensure the cream cheese and butter are adequately softened before whipping, as cold ingredients will not incorporate fully, leading to a runny filling.
Also, make sure you allow the full chilling time at least 4 hours, or ideally overnight for the tart to achieve its proper, sliceable texture.
Can I use a different type of gluten-free cookie or biscuit for the crust?
Absolutely. While the recipe suggests a robust biscuit, you can substitute with gluten-free graham crackers, vanilla wafers, or even chocolate sandwich cookies. The key is maintaining the ratio of melted butter to cookie crumbs to ensure the crust holds its structure; you may need to slightly adjust the butter quantity depending on the dryness of your chosen crumb.
How far in advance can I make this tart, and what is the best way to store leftovers?
Because this dessert relies on dairy products and chilling, it must be stored in the refrigerator at all times. Properly covered with plastic wrap or stored in an airtight container, the tart will keep beautifully for 3 to 4 days.
If the chocolate topping is already applied, loosely cover it to prevent condensation from dulling the shine.
Is it possible to make this Ultimate Silk Tart completely dairy-free or vegan?
Yes, you can easily adapt the filling by substituting the cream cheese with a high-quality vegan cream cheese alternative, ensuring it is a block style rather than a spread. Similarly, swap the butter for a solid, unsalted vegan butter stick.
These substitutions usually yield excellent results without compromising the creamy texture.
My crust crumbled when I tried to slice the tart. What did I miss?
A crumbling crust often indicates that the crust was not adequately compressed or did not chill long enough. Ensure you firmly press the crumb mixture into the base and sides of the tart pan using the bottom of a glass or a measuring cup.
Additionally, the crust should chill for at least 30 minutes before the filling is added to help the butter re-solidify.
Can I freeze this No-Bake Peanut Butter Tart for longer storage?
You can freeze the assembled tart prior to adding any fresh whipped cream or decorative chocolate drizzles. Wrap the fully chilled tart tightly in two layers of plastic wrap followed by a layer of aluminum foil, and store for up to one month.
To serve, thaw it slowly in the refrigerator overnight to prevent condensation from ruining the texture.
No Bake gluten-free Peanut Butter Tart
Ingredients:
Instructions:
Nutrition Facts:
| Calories | 834 kcal |
|---|---|
| Protein | 23.3 g |
| Fat | 57.5 g |
| Carbs | 55.8 g |
