Gluten Free Japanese Milk Bread: the Secret Tangzhong Way
- The Impossible Made Possible: gluten-free Shokupan Explained
- The Science of Softness: Achieving the Perfect Crumb Structure
- Essential Components for Your Milk Bread Dough
- Baking Perfection: Detailed Guide to Making gluten-free Milk Bread
- Troubleshooting Your Bake: Ensuring a Fluffy Loaf
- Keeping Your Shokupan Fresh: Storage Solutions
- Beyond Toast: Creative Ways to Enjoy This Bread
- Recipe FAQs
- 📝 Recipe Card
The Impossible Made Possible: gluten-free Shokupan Explained
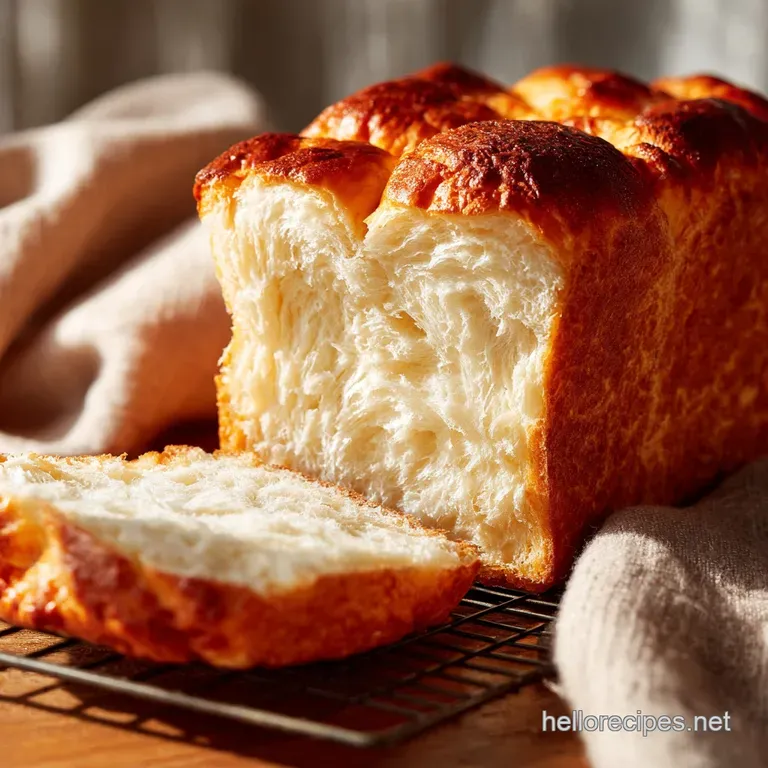
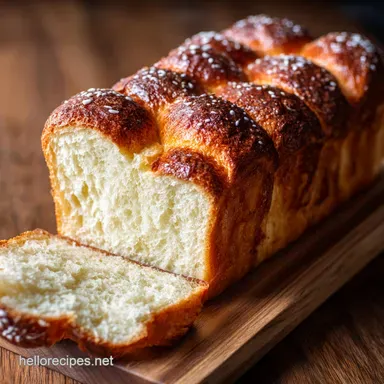
Okay, stop what you’re doing. Imagine the scent of warm, buttery brioche filling your whole kitchen right now. This isn't just any bread; this is Shokupan , the impossibly soft, cotton fluffy gluten-free Japanese Milk Bread .
It usually takes expert gluten development to achieve this texture, but we finally cracked the code for a perfect gluten-free version.
For years, every gluten-free Bread Recipe I made felt like a literal brick, heavy enough to sink a small ship, truly disheartening stuff. This Easy gluten-free Milk Bread recipe is the opposite; it's airy, light, and actually stays incredibly soft for days a total lifesaver for sandwich lovers.
It relies on a very specific technique, which is shockingly easy once you know the secret, promise.
Ready to ditch the dense, crumbly loaves forever and embrace cloud soft slices? Grab your digital scale and let’s make the best gluten-free Japanese Milk Bread you have ever tasted. I promise this baking experience is truly magnificent.
Why Achieving a Cotton Soft Texture is a Challenge
Traditional Japanese Shokupan gets its famous chew and loft from high protein wheat flour, which develops incredible gluten networks during kneading. When you remove gluten, you lose that structure, leading straight to a flat, dry loaf.
We have to be clever and introduce alternative binders that can hold moisture and mimic elasticity.
The Magic of the gluten-free Tangzhong Technique
Most gluten-free breads rely solely on binder gums, which often yields a tough or slightly springy crust. The game changer here is the Tangzhong roux, sometimes called the Yudane method in Japan.
By cooking a portion of the flour with liquid until it gelatinizes, you essentially lock in moisture before the dough even starts. This massive increase in hydration, paired with the structure provided by psyllium, keeps the crumb incredibly soft and delays staling drastically.
What Makes This Milk Bread Recipe Unique
This isn’t just a simple mix and bake GF loaf; this is an enriched dough, meaning it includes egg and butter for richness, just like brioche. We skip the messy bulk kneading of traditional bread and rely on a stand mixer to fully hydrate the psyllium.
This technique gives us a uniquely soft texture, making this the ideal gluten-free Breakfast Bread or sandwich base.
The Science of Softness: Achieving the Perfect Crumb Structure
The final structure of this gluten-free Milk Bread Recipe hinges on three pillars: hydration, enrichment, and binding. The high fat content from the butter keeps the bread tender, while the Tangzhong ensures those high levels of moisture are evenly distributed.
Crucially, the long, slow, two-stage rise is essential for creating the delicate air pockets we crave.
Essential Components for Your Milk Bread Dough
Accuracy is totally vital here, folks. Grab that kitchen scale, because eyeballing flour volume is the fastest route to a dry loaf.
Chef's Note: Remember, unlike many of my other baking projects, temperature matters hugely when activating yeast for this fluffy loaf. Use a thermometer!
The Role of Psyllium Husk in Mimicking Gluten
Psyllium husk powder is absolutely non-negotiable for this recipe. It functions as the primary binder, creating a viscous gel when hydrated that miraculously mimics the elasticity of gluten. We need the powder, not the whole husks, as the powder absorbs liquid much faster and more uniformly.
| Ingredient | Role | Viable Substitution |
|---|---|---|
| Psyllium Husk Powder | Structure & Elasticity | None recommended. The recipe fails without it. |
| GF All-Purpose Flour | Bulk & Starch Base | Use a blend containing xanthan gum. |
| Whole Milk | Hydration & Richness | Oat milk or Soy milk (for dairy-free Japanese Milk Bread ). |
| Butter | Tenderness & Flavor | high-quality vegan butter sticks. |
Maximizing Hydration for Extended Freshness
The Tangzhong roux allows us to include more liquid than a standard bread recipe, sometimes up to 10 15% more. This high hydration level is why this gluten-free Shokupan stays soft and usable for four to five days instead of drying out on day two.
It makes the dough initially quite sticky, but trust the process.
Building Your Ideal gluten-free Flour Blend
I use a standard commercial cup-for-cup GF blend that already includes xanthan gum. If your blend does not include gum, add an extra 1 teaspoon of xanthan gum to the dry ingredients. Different blends (especially rice heavy ones) can affect the final crumb, but the psyllium stabilizes everything nicely.
Choosing the Right Milk and Fat
Whole milk provides the best richness and browning capability for this enriched dough. If you need a dairy-free Japanese Milk Bread , unsweetened soy or oat milk works best.
Make sure your butter is truly soft, almost squishy, so it incorporates fully during the mixing stage without chilling the dough.
Ingredient Temperatures: The Unsung Hero of Yeast Activation
If your milk is too hot, you kill the yeast, and your loaf won't rise. If it's too cold, the yeast is sluggish, and the proofing takes forever. Aim for the yeast milk to be between 105°F and 115°F (40°C 45°C). Plus,, ensure your egg and butter are at room temperature.
Cold ingredients shock the yeast!
Veganizing This gluten-free Japanese Milk Bread
Going vegan is surprisingly easy here. Swap the whole milk for oat milk and the butter for vegan sticks. For the egg, you can use a flax egg replacement (1 Tbsp ground flax + 3 Tbsp water, rested for 5 minutes). The texture changes slightly but remains delightfully soft.
Baking Perfection: Detailed Guide to Making gluten-free Milk Bread

Preparing the Tangzhong Roux (Yudane Method)
This is step one, and you cannot skip it. Whisk your 25g of GF flour and 125ml of milk/water in a tiny saucepan over medium heat. Keep stirring constantly don’t walk away! Cook until it turns into a thick paste and drags a clean trail behind your spoon.
Transfer it immediately to a bowl, press plastic wrap directly onto the surface, and let it cool completely while you prep everything else.
Kneading and The First Proof (Bulk Fermentation)
Proof the yeast mixture until it’s beautifully foamy, signaling it's active and ready to work. Once all the wet and dry ingredients (including the cooled Tangzhong) are in the mixer, mix on low. Add the softened butter last, bit by bit. Run the mixer on medium speed for a full 8 minutes.
This step is critical for psyllium hydration.
Mistake I Once Made: I tried to knead this dough by hand, like I would for my Naan Recipe: Get Pillowy Soft, Restaurant Quality Flatbread at Home . It was a sticky, horrible mess. The mixer does the heavy lifting, ensuring the dough develops its necessary "stretch" without tearing your muscles.
Mastering the Signature Shokupan Rolling Method
Once the dough has doubled (which might take up to 90 minutes because of the psyllium), gently turn it out. Divide it into three equal pieces. Don’t just plop the dough in the pan! This rolling technique creates internal layers and ensures that towering, square shape.
Roll each piece into an oval, fold the two long sides to the middle, then roll the whole thing up tightly from the short end, like a mini Swiss roll. This creates tension.
Final Proofing and Achieving the Golden Crust
Place the three rolls into your pan, cover them, and let them rise until they almost crest the lip of the pan about 45 to 60 minutes. Before baking, brush very lightly with an egg wash (or just milk for dairy-free) for that beautiful, rich, golden brown crust.
Bake until the internal temperature hits 200°F (93°C).
Troubleshooting Your Bake: Ensuring a Fluffy Loaf
Why Is My Dough Too Sticky? (Hydration adjustments)
The dough must be sticky. It should pull away from the sides of the mixer bowl cleanly after mixing, but it will feel looser than wheat dough. Do not add extra flour. Extra flour guarantees a dense, dry Quick gluten-free Bread .
If you must adjust, lightly oil your hands for the shaping step instead of dusting the counter with flour. This is similar to handling the dough for gluten-free Flour Tortillas: The Ultimate Pliable Recipe , where hydration is key to pliability.
Recognizing Under Proofed vs. Over Proofed Dough
Under proofed dough won't nearly double in size and will feel dense and firm before baking; it will "spring" back immediately when gently poked. Over proofed dough (less common with psyllium) looks excessively bubbly, smells overly acidic, and collapses slightly when poked or when it hits the heat of the oven.
A perfectly proofed loaf will slowly spring back halfway when gently touched.
Getting the Most Out of Your Loaf Pan
Use a standard 9x5 inch metal loaf pan. Lightly grease and line it with parchment paper so that the paper hangs over the long sides. This makes lifting the piping hot, soft loaf out immediately after baking incredibly easy.
Keeping Your Shokupan Fresh: Storage Solutions
How to Store Freshly Baked Milk Bread
Listen up, this is a rule: Cool Completely First! If you slice the gluten-free Milk Bread while warm, all that beautiful internal moisture turns to steam, which condenses and creates a gummy, sticky center.
Once fully cool ( 2 hours minimum), store the loaf tightly wrapped in plastic wrap or sealed in an airtight bread bag at room temperature for up to four days. The softness is shocking.
The Best Method for Freezing Slices
Yes, this freezes wonderfully! Slice the cooled loaf thickly, place parchment paper between each slice to prevent sticking, and store the entire stack in a freezer safe zip-top bag. It lasts three months easily. When ready to eat, simply pop a slice straight into the toaster.
Reviving Day-Old Milk Bread
If the crust has stiffened slightly after a couple of days, you can easily revive the slices. Wrap a slice loosely in foil and warm it in a 350°F (175°C) oven for about five minutes. It reactivates the moisture in the starches, making it wonderfully soft again.
Beyond Toast: Creative Ways to Enjoy This Bread
This bread is fantastic on its own, but its enriched, sturdy crumb handles fillings perfectly.
- Ultimate French Toast: Because it’s so rich, it makes the most decadent, soakable French Toast you can imagine. Pair it with a warming cup of my 5Ingredient CaffeineFree Chai Mix: Speedy, Aromatic Spice Blend .
- Sandwich Sensation: Slice it thick and use it for classic deli sandwiches. It holds up far better than most gluten-free options, making it perfect for packing alongside a light lunch like a Healthy gluten-free Recipes: Lemon Herb Salmon Bowl .
- Simple Buttered Joy: Toast a thick slice, smear it with butter and maybe a little high-quality jam. Perfection.

Recipe FAQs
Why did my gluten-free milk bread come out dense and fail to achieve that cloud like fluffiness?
Density is usually due to insufficient mixing or improper proofing. Ensure you allow the full two proofing periods in a very warm, draft free spot to maximize lift.
Also, verify that your yeast is active and the water/milk used to bloom the yeast was within the optimal temperature range (105-115°F).
The recipe relies on the Tangzhong method. How do I know if I cooked the roux correctly?
The Tangzhong (the initial cooked flour and liquid mixture) should be cooked until it forms a thick, pudding like paste, ideally reaching 149°F (65°C) on a thermometer.
If it is undercooked, it won't effectively bind the liquid, resulting in a stickier dough; if it is overcooked, the starch structure can break down, impacting the final texture.
Is it possible to skip the psyllium husk powder in this recipe?
No, psyllium husk powder is a vital ingredient for this gluten-free bread as it replaces the elasticity and structure normally provided by wheat gluten.
Without this binder, the dough would not hold its shape during the kneading or proofing processes, resulting in a flat, crumbling, or very squat loaf.
Can I easily make this gluten-free Japanese Milk Bread dairy-free or vegan?
Yes, substitution is straightforward. Replace the dairy milk with an enriched non-dairy milk, such as oat or full fat soy milk, which provides necessary protein and fat content.
For the butter component, simply use a high-quality vegan butter stick suitable for baking, making sure it remains chilled before mixing.
My crust is beautiful, but the loaf seems dry after a day. How can I retain moisture?
gluten-free enriched breads tend to lose moisture quickly. First, ensure you are not overbaking; the internal temperature should be 200 205°F when removed from the oven.
Once the bread is completely cool, wrap it immediately and tightly in plastic wrap, then store it inside an airtight container or bread box to lock in humidity.
How should I store leftover milk bread, and can I freeze it?
For short term storage (1 3 days), the bread should be wrapped tightly and kept at room temperature, not refrigerated, as refrigeration accelerates staling.
To freeze, slice the completely cooled loaf, wrap the slices securely in plastic wrap, and place them in a heavy duty freezer bag; thaw individual slices in a toaster or on the counter.
What types of gluten-free flour blends work best for this recipe?
Using a blend that is primarily composed of white rice flour, tapioca starch, and potato starch is ideal for achieving the soft Shokupan texture.
Avoid blends that contain large amounts of bean flours or whole grains, as these can make the bread heavier and impact the delicate rise necessary for milk bread.
gluten-free Japanese Milk Bread
Ingredients:
Instructions:
Nutrition Facts:
| Calories | 250 kcal |
|---|---|
| Fat | 7 g |
| Fiber | 3 g |
