How to Make Gluten Free Hawaiian: Fluffy Rolls
- Fluffy & Sweet: The Ultimate Gluten Free Hawaiian Rolls Recipe
- Essential Ingredients and Substitutions for Tropical GF Rolls
- Nutrition Information
- Step-by-Step Guide: How to Make Gluten Free Hawaiian Rolls
- Expert Tips and Common Mistakes to Avoid When Baking GF Rolls
- Storing and Freezing Your Freshly Baked Gluten Free Hawaiian Rolls
- Perfect Pairings: Serving Suggestions for GF Sweet Rolls
- Recipe FAQs
- 📝 Recipe Card
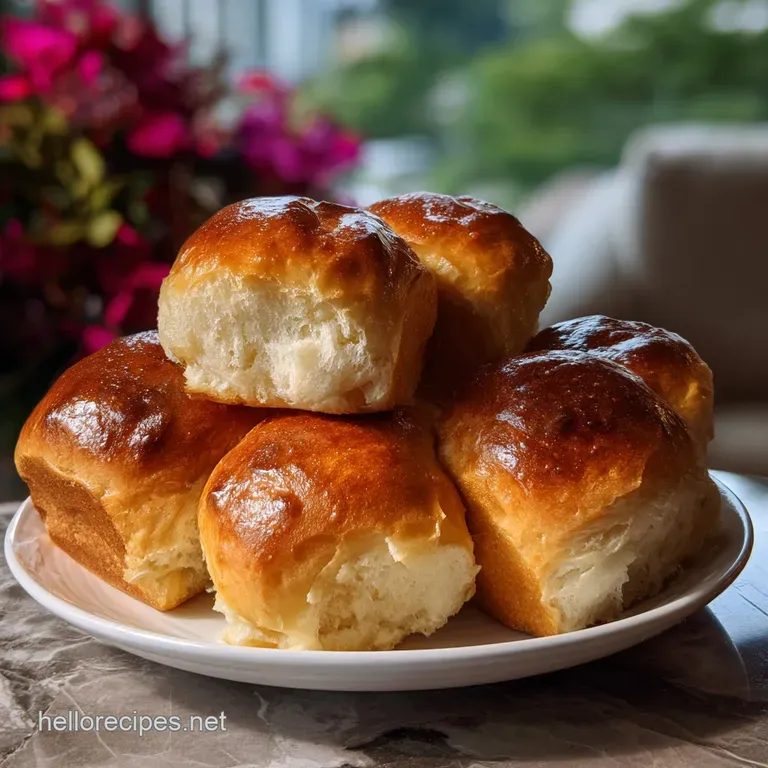
Fluffy & Sweet: The Ultimate gluten-free Hawaiian Rolls Recipe
When those warm, sticky sweet rolls hit the table, still slightly steaming, and that buttery glaze is shimmering... man. That is the exact vibe we are chasing, and for years, achieving that iconic melt-in-your mouth fluffiness with a gluten-free flour blend felt impossible.
GF bread always ends up dense, dry, or tasting vaguely of cardboard.
But guess what? I cracked the code on How to Make gluten-free Hawaiian rolls that are genuinely pillowy, tender, and taste like the real deal not just for the holidays, but for weekly sandwich prep too! The secret isn't just about the flour; it's about the liquid.
By swapping traditional milk for pineapple juice, we introduce a perfect balance of acid and sugar that helps create structure without the gluten.
This is the easiest gluten-free Hawaiian Rolls Recipe you will ever encounter, delivering nine perfect, golden rolls that will fool even your gluten loving relatives. Seriously, prep is only 20 minutes, and then the oven does the heavy lifting.
Get ready to learn How to Make gluten-free Hawaiian bread that everyone can enjoy.
Why This Works: The Science of Sweetness and Light
This recipe thrives because we leverage specific food science tricks to mimic the elastic strength of gluten.
- The Pineapple Punch: Using warm pineapple juice instead of plain milk does two things: First, the slight acidity helps tenderize the protein in the dough (even GF flour blends have some minor protein). Second, it brings a natural, subtle tropical sweetness that is essential to the Hawaiian profile without needing a ton of added sugar.
- The Flour Formula: We rely on a high-quality GF bread blend that already contains xanthan gum. Xanthan gum is the MVP here; it acts as the binder, trapping the yeast produced carbon dioxide gas and stopping the rolls from collapsing into hockey pucks.
- Extended Rise Time: gluten-free dough needs more time than traditional dough to hydrate fully. The long total time (nearly 9 hours, mostly passive proofing) allows the starches to swell and the flavors to deepen. If you rush the proof, your rolls will be dense and gummy.
Essential Ingredients and Substitutions for Tropical GF Rolls
Getting the right ingredients is 90% of the battle when figuring out How to Make gluten-free Hawaiian rolls. Pay close attention to the temperatures, especially for the yeast activation!
| What You Need | Quantity | Why It’s Important |
|---|---|---|
| high-quality gluten-free Bread Flour Blend (must contain xanthan gum) | 320 grams | Provides structure; must contain xanthan gum for elasticity. |
| Granulated Sugar | 50 grams | Feeds the yeast and adds essential sweetness. |
| Salt | 6 grams | Controls yeast growth and enhances flavor. |
| Tapioca Starch (or Potato Starch) | 16 grams | Adds chewiness and helps the crumb stay soft. |
| Large Egg (room temperature) | 1 | Acts as a binder and adds richness. |
| Unsalted Butter, melted (cooled slightly) | 60 grams | Moisture and flavor. Cooling prevents yeast death. |
| Vanilla Extract | 5 milliliters | A subtle flavor boost that complements the sweet butter. |
| Instant Dry Yeast | 7 grams | Leavening agent the fluffy maker! |
| Pineapple Juice (or Milk, warmed to 105°F 115°F) | 240 milliliters | Liquid binder, tenderizer, and essential tropical flavor. |
| Unsalted Butter, melted (for glaze) | 30 grams | For the mandatory, shiny, post bake glaze. |
| Honey or Brown Sugar (optional, for glaze) | 5 grams | Adds deep caramelized flavor to the glaze. |
Ingredient Swaps: Ensuring Success (Even with Dietary Needs)
Sometimes you just don't have everything on hand. Here are the best substitutions for this gluten-free Hawaiian Bread Recipe .
| Original Ingredient | Best Substitute | Why It Works |
|---|---|---|
| Pineapple Juice | Warm Dairy Milk (105°F 115°F) or Warm Almond Milk | Provides necessary moisture and warmth for yeast activation. Trade Off: You lose the signature tang and tropical flavor notes. |
| Unsalted Butter | high-quality Plant Based Butter Sticks | Maintains the necessary fat content and richness. Trade Off: Ensure the blend has low moisture to prevent a wet dough. |
| Large Egg | 1 Flax Egg (1 Tbsp ground flax + 3 Tbsp warm water, rested 5 mins) | Acts as a binder. Trade Off: May result in a slightly denser roll due to the fiber. |
| Granulated Sugar | Coconut Sugar (1:1 ratio) | Provides necessary food for the yeast. Trade Off: Adds a slight molasses/caramel flavor and can darken the dough slightly. |
Nutrition Information
| Nutrient | Amount |
|---|---|
| Calories | 263 kcal |
| Protein | 3.4 g |
| Fat | 9.3 g |
| Carbs | 42.1 g |
| Sugar | 10.3 g |
| Sodium | 258 mg |
step-by-step Guide: How to Make gluten-free Hawaiian Rolls

Prep Time: 20 minutes | Cook Time: 25 minutes | Total Time (Includes Rise): 8 hours 45 minutes | Yield: 9 Rolls
1. Preparing the Yeast Mixture (The 'Sponge' Method)
In a large mixing bowl (or the bowl of a stand mixer), combine the warmed pineapple juice and the instant yeast. The liquid should feel like warm bathwater, between 105°F and 115°F. If it's too hot, you kill the yeast, and your rolls will fail.
Let it sit for 5 to 10 minutes until a foamy ‘sponge’ forms. This proves your yeast is alive and ready to work!
2. The Mix and Knead
Add the 50 grams of sugar, the salt, the tapioca starch, vanilla extract, and the lightly beaten, room temperature egg to the yeast mixture. Pour in the slightly cooled melted butter. Whisk quickly to combine.
Gradually add the 320 grams of GF flour blend. Mix on low speed (or by hand with a sturdy spoon) for about 2 minutes, then scrape down the sides. Increase the speed to medium and mix for another 3 to 4 minutes.
GF dough will not pull away from the sides like wheat dough; it will be sticky, soft, and much more like a thick cake batter than a traditional stiff dough.
3. The First Rise (The Long Wait)
Lightly grease a large bowl. Scrape the sticky dough into the bowl, turning once to coat. Cover the bowl tightly with plastic wrap and let it rise in a warm, draft free spot. This rise is crucial for the structure of your gluten-free Sweet Rolls Recipe.
Let it rise for a minimum of 4 hours, or up to 8 hours, until it has significantly puffed up (it won't double like regular bread, but it should look soft and domed).
4. Shaping and Forming the Iconic Rolls
Gently punch down the dough to release the air. Lightly dust your hands with tapioca starch avoid adding excess flour to the dough itself. Turn the dough out onto a lightly greased surface. Divide the dough evenly into 9 pieces.
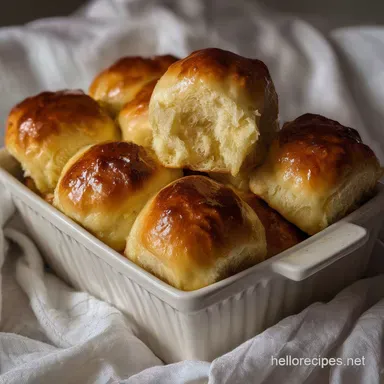
Roll each piece gently into a smooth ball. Place the rolls touching each other in a lightly greased 9 inch square baking pan. Placing them close ensures they bake up into that classic, tear apart cluster of Hawaiian Rolls (perfect for holiday leftovers!).
5. The Final Proof and Bake
Cover the pan loosely with plastic wrap or a kitchen towel. Let the rolls rest for their final rise in a warm spot for about 60 minutes. They should look noticeably puffy.
Preheat your oven to 375°F (190°C). Brush the tops of the rolls with a light egg wash (1 egg beaten with 1 teaspoon of water) this helps achieve that gorgeous, golden brown crust.
Bake for 25 minutes, or until the tops are a deep, uniform golden color.
6. The Glaze Finish
While the rolls are baking, combine the 30 grams of melted butter with the honey or brown sugar for the glaze. As soon as the rolls come out of the oven, brush the warm glaze generously over the tops. The butter will sizzle slightly, soaking into the crust and creating that irresistible sheen.
Let the rolls cool slightly before tearing them apart.
Expert Tips and Common Mistakes to Avoid When Baking GF Rolls
Baking this gluten-free Bread Recipe is simple, but there are a few pitfalls that will ruin the texture instantly.
Troubleshooting: Fixing Common GF Roll Mistakes
| Common Mistake | Root Cause | The Fix |
|---|---|---|
| Rolls are dense and gummy | Dough was either under mixed (starch not hydrated) or under proofed (not enough time to rise). | Ensure you mix for the full 4 minutes, and let the first rise go for the full 4 hours or more. |
| Rolls rose beautifully, then collapsed in the oven | Yeast mixture was too weak, or the oven temperature was too low. The structure couldn't set before the trapped gases escaped. | Confirm your oven temp with a thermometer. Ensure your yeast was active (foamy) before adding the flour. |
| Rolls are dry and crumbly | Too much dry flour was added during the mixing or shaping stage. | Rely on the weight measurements (320g) precisely. When shaping, use tapioca starch on your hands, not flour, to prevent drying out the dough. |
| Glaze slid right off the roll | The rolls cooled too much before the glaze was applied. | Apply the glaze the second the rolls come out of the oven, while they are still extremely hot, so the butter melts and soaks in immediately. |
Temperature Control: The Single Biggest Factor in GF Baking Success
If you want to know How to Make gluten-free Hawaiian rolls that don't disappoint, you must control the temperature of the liquid. If the liquid is too cold, the yeast never activates. If it’s too hot (above 120°F), you kill the yeast.
A quick check: if it feels hotter than a warm baby bottle, it’s probably too hot. Use a digital thermometer!
Storing and Freezing Your Freshly Baked gluten-free Hawaiian Rolls
This batch of gluten-free Thanksgiving Rolls (or any day rolls!) is best eaten fresh, but they store beautifully, too.
- Counter/Fridge Storage: Once completely cooled, store the rolls in an airtight container at room temperature for up to 3 days. After that, they may start to dry out.
- Freezing Instructions: To preserve that fresh texture, flash freeze the cooled rolls on a baking sheet for 1 hour. Once solid, transfer them to a freezer safe bag or container. They last well for up to 3 months.
- Reheating Instructions for Optimal Softness: Place the rolls in aluminum foil and wrap tightly. Bake in a preheated oven at 300°F (150°C) for 10- 15 minutes. The foil traps moisture, keeping the rolls soft and steamy. Alternatively, a quick 30 seconds in the microwave works, but eat them immediately, as they will stiffen quickly once cooled.
Perfect Pairings: Serving Suggestions for GF Sweet Rolls
These sweet, savory, melt-in-your mouth Hawaiian Rolls (perfect for holiday leftovers!) are incredibly versatile.
We love using these rolls to make small sandwiches they hold up wonderfully to heavy fillings like shredded pork or Turkey à la King: The Ultimate Creamy Leftover Makeover . For a simple appetizer, slice them horizontally, load them with ham and Swiss cheese, brush with extra butter glaze, and bake until the cheese is bubbling.
If you’re planning a big dinner, these are hands down the best gluten-free Hawaiian Rolls Recipe to put on your table. Now that you know How to Make gluten-free Hawaiian rolls, you can kiss those dry, crumbly store-bought versions goodbye forever!
Enjoy this incredible gluten-free Bread Recipe .

Recipe FAQs
Why do most gluten-free rolls turn out dense or dry compared to traditional Hawaiian rolls?
The main issue is the lack of gluten structure, which traps gases and creates loft. This recipe solves that by carefully balancing starches and incorporating specific binders to mimic the elasticity that wheat flour naturally provides. This technique is similar to the structure we achieve when making soft breads like the gluten-free Japanese Milk Bread: Cloud Soft Shokupan Recipe.
Can I substitute the specific GF flour blend mentioned in the instructions?
No, substituting the blend is not recommended for the best results, as the proprietary mix includes starches necessary for texture. If you must substitute, ensure your new blend contains xanthan gum and a good balance of brown rice and tapioca flour to prevent excessive crumbling.
How long do the gluten-free Hawaiian Rolls stay soft after baking?
Ideally, they are best eaten the day they are baked for peak fluffiness and moisture. To keep them soft for up to three days, store them in an airtight container at room temperature, but avoid refrigeration, which accelerates staling in gluten-free baked goods.
What is the secret to achieving that signature sticky sweet glaze?
The secret lies in applying the warm butter glaze immediately after the rolls come out of the oven while they are still steaming hot. This allows the sugar and melted butter to soak deeply into the crust, creating that characteristic gooey shine, unlike surface level frosting.
Can I make these rolls ahead of time and freeze them?
Yes, freezing them works very well to preserve quality, especially since GF breads can dry out quickly. Bake the rolls fully, let them cool completely, then freeze them tightly wrapped in plastic wrap followed by foil; reheat them briefly in a warm oven to restore softness.
Do these rolls need proofing time, and how does GF dough react differently?
Yes, they still require a final proof, but the time is often shorter than wheat dough because there is no complex gluten network developing. gluten-free dough relies on yeast activity and heat activation rather than kneading strength, so watch the dough rise gently rather than relying strictly on the clock.
I accidentally added too much liquid; can I salvage the sticky dough?
Temporarily, you can try adding 1-2 tablespoons of your dry gluten-free flour blend to absorb the excess moisture. If the dough becomes too wet and soupy, however, it is best to treat it more like a thick batter and bake it in a small loaf pan, similar to how we handle wetter mixtures in recipes like the gluten-free Carrot Cake: Ultra Moist GBBO Ready.
gluten-free Hawaiian Rolls Recipe
Ingredients:
Instructions:
Nutrition Facts:
| Calories | 263 kcal |
|---|---|
| Protein | 3.4 g |
| Fat | 9.3 g |
| Carbs | 42.1 g |
| Sugar | 10.3 g |
| Sodium | 258 mg |
