Garlic Butter Green Beans: the Ultimate Tender-Crisp Skillet Side
- Achieving the Perfect Tender-Crisp Garlic Butter Green Beans
- Essential Ingredients for Superior Garlic Butter Green Beans
- Detailed Instructions: How to Cook Garlic Butter Green Beans to Perfection
- Expert Tips for Flavor Boosting and Troubleshooting Common Errors
- Storing and Reheating Leftover Garlic Butter Green Beans
- Versatile Serving Ideas for the Ultimate Side Dish
- Recipe FAQs
- 📝 Recipe Card
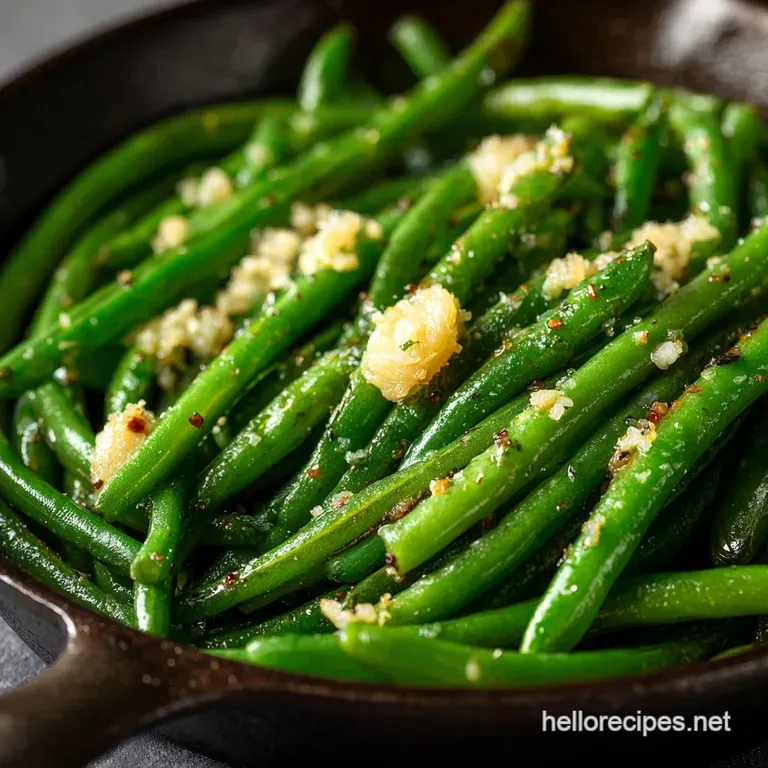
You know that smell when sweet butter hits a hot skillet, and then you add fresh garlic? It’s pure kitchen magic, signaling that something truly savory and delicious is about to happen.
These beans capture that feeling perfectly, delivering a salty, fragrant crunch that even vegetable skeptics will devour instantly.
Honestly, this Garlic Butter Green Beans recipe is my ultimate weeknight hero side dish, but it works equally well for holidays like Thanksgiving Recipes. It’s faster than ordering takeout, uses simple pantry ingredients, and instantly upgrades a tired weeknight dinner into a Yummy Side.
If you think green beans have to be dull or mushy, prepare for a textural revelation.
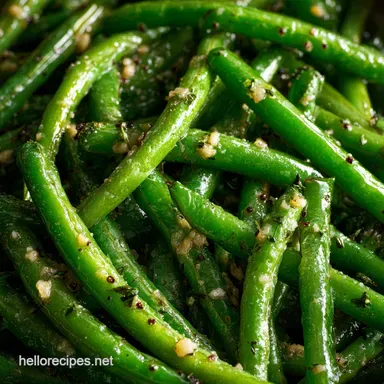
Forget those pale, squeaky steamed vegetables you suffered through as a kid. We are aiming for tender crisp perfection and that vibrant emerald green color that screams freshness and vitality. Ready to crack the code on how to make the best stovetop skillet green beans every single time? Let's crack on.
Achieving the Perfect Tender Crisp Garlic Butter Green Beans
Why Blanching and Shocking is Non-Negotiable for Texture
This quick technique is the key to culinary success, and you simply cannot skip it. Blanching activates the chlorophyll in the green beans, instantly locking in that stunning, vibrant color we all crave.
The instant plunge into the ice water stops the cooking process dead in its tracks, giving us the perfect al dente snap, which means "to the tooth."
How This Recipe Beats Steamed or Boiled Beans
Steaming leads to a dull, muted flavor because you aren't seasoning the vegetables intensely enough. We heavily salt the blanching water, essentially seasoning the Green Beans from the inside out before they even hit the pan.
On top of that,, sautéing in rich butter adds a depth and richness that plain steaming can never, ever achieve.
Equipment Check: Tools for over High heat Sautéing
You absolutely need a good, heavy bottomed skillet for this to work right, preferably cast iron or stainless steel. Cast iron holds heat consistently, which is necessary for developing those lovely brown, caramelized spots.
Make sure your spider or slotted spoon is right next to the stove for the ultra fast transfer to the ice bath timing is crucial here.
The Critical Timing for Adding Garlic (Preventing Burns)
Garlic is incredibly sneaky; it goes from raw to perfect to burnt in approximately four seconds flat. We add the minced garlic to the melted butter/oil mix after the initial butter foam subsides, cooking it for just about 60 to 90 seconds until fragrant and lightly golden.
If you see it turn brown, you must discard the fat and start over. Burnt garlic tastes bitter, and it will totally ruin your beautiful Garlic Butter Green Beans.
The Magic of Maillard Reaction on Green Beans
This process sounds super fancy, but it just means we are giving the beans a beautiful little kiss of high heat. When the dried, blanched beans hit the hot fat, the residual sugars on the surface start to caramelize. This creates that desirable, roasted, nutty depth that plain boiled vegetables totally lack.
Selecting the Right Butter: Salted vs. Unsalted Debate
Always, always choose unsalted butter for cooking this particular Garlic Butter Green Beans recipe. This gives you total control over the seasoning level. Since we already heavily salted the blanching water to season the beans, using salted butter in the sauté could easily make the final dish overwhelmingly salty.
Essential Ingredients for Superior Garlic Butter Green Beans
Choosing the Freshest Green Beans (Haricot Verts vs. Standard)
Haricot Verts are those skinny, delicate French green beans, and they are usually superior if you can find them. They cook faster, look elegant, and stay incredibly crisp. If you use standard green beans, make sure they snap cleanly when bent no floppy or limp beans allowed in this skillet!
A Guide to Garlic Preparation: Minced, Smashed, or Sliced?
Fresh garlic is absolutely mandatory; please skip the jarred, preserved stuff entirely for this specific dish. I find that finely mincing or grating the garlic provides the best and most even flavor distribution for the buttery coating.
If you prefer a much milder, more subtle taste, you can smash the cloves slightly and remove them just before serving.
Oil Choices for High Temperature Cooking
We use a tiny splash of olive oil mixed in with the butter. Why bother? Butter has a low smoke point and burns easily, but the addition of olive oil actually raises the overall temperature threshold.
This small, simple trick buys you those crucial extra seconds needed to sauté the garlic to fragrant perfection without scorching it.
Flavor Enhancers and Optional Twists (e.g., lemon zest/chili flake)
While the core recipe for Garlic Butter Green Beans is fantastic on its own, a few additions really make it pop:
| Enhancer | Purpose | Substitute/Alternative |
|---|---|---|
| Lemon Zest | Brightens, cuts richness (Must have) | A squeeze of fresh lemon juice at the end |
| Red Pepper Flakes | Adds a subtle, welcome background heat | A pinch of cayenne powder |
| Parmesan Cheese | Salty, sharp, umami finish | Nutritional yeast (for vegan option) |
Detailed Instructions: How to Cook Garlic Butter Green Beans to Perfection

Prep Stage: Trimming and Washing Fresh Green Beans Efficiently
Wash your fresh green beans well under cold water and focus on trimming the tough, woody stem end. I used to painstakingly snap both the top and the tail ends, but now I just line them up neatly and slice the hard stem end off in bunches. It saves serious prep time for your Weeknight Dinner routine.
Phase One: Mastering the Blanch and Shock Technique
- Boil and Salt: Bring a large pot of water to a rolling boil and season it heavily with salt. You want it to taste like the sea (seriously).
- Prep Shock: Fill a large bowl with ice and water. Place it right next to your stove.
- Blanch: Drop the trimmed beans into the boiling water for precisely 3 to 4 minutes until they turn a brilliant emerald color.
- Shock: Use a slotted spoon or spider to transfer the beans immediately from the boiling water into the ice bath. This stops the cooking process instantly.
- Dry: Drain the beans completely. Crucially, pat the beans bone dry with paper towels or a clean kitchen towel. Wet beans will steam, not sauté.
Phase Two: Creating the Golden Garlic Butter Base
- Heat Skillet: Place your large skillet over medium heat. Add the unsalted butter and the olive oil.
- Melt and Foam: Let the butter melt and watch for the white foam to subside slightly; that’s your signal it’s ready.
- Add Garlic: Add the minced fresh garlic to the melted fat. Sauté gently for 60 to 90 seconds, stirring constantly, until incredibly fragrant and slightly golden.
Final Sauté: Combining Beans and Butter for Optimal Coating
- Increase Heat: Once the garlic is fragrant, increase the heat to medium high.
- Sauté Beans: Add the totally dried, blanched green beans to the pan. Toss them vigorously for 2 to 3 minutes, coating them thoroughly in the Garlic Butter. You want a light caramelization or char to develop in places.
- Finish: Remove the pan from the heat. Stir in the lemon zest (if using) and season generously with flaky sea salt and freshly ground black pepper. Serve immediately.
Chef's Note: If you are nervous about burning the garlic during the final sauté, remove the garlic once it is golden and set it aside. Add the beans to the pan, cook them down, and then stir the garlic back in at the very end to ensure maximum flavor without the risk of bitterness.
Expert Tips for Flavor Boosting and Troubleshooting Common Errors
Mistake 1: Why Your Garlic Butter is Burning (Heat Management)
Most people start the skillet too hot. Use medium heat initially to melt the butter/oil mixture, then add the garlic, pulling the pan off the burner instantly if it starts sizzling too aggressively. Remember the goal is fragrant, not crunchy charcoal. Keep it moving!
Rescuing Overcooked Beans (If the Shock Fails)
If your beans look dull and feel soft right out of the ice bath, honestly, they’re past saving for a crisp side dish. Don’t waste them, though! You can still salvage them by folding them into a long cooked soup or perhaps incorporating them into the base for a creamier dish, like our Creamy Green Bean Casserole Scratch Made Without Soup preparation.
The Difference a Pinch of Acid Makes (Finishing with Lemon)
Acid is a powerful flavor amplifier, full stop. The tiny bit of lemon zest or juice added at the very end cuts through the richness of the butter and the salinity of the salt. This makes the whole dish taste cleaner, brighter, and much more complex. Never skip this professional secret.
Storing and Reheating Leftover Garlic Butter Green Beans
Best Practices for Refrigerated Storage (3 5 Days)
Store the cooked and fully cooled Garlic Butter Green Beans in an airtight container immediately after dinner. They keep beautifully for 3 to 5 days in the fridge and actually make fantastic, healthy leftovers for lunch the next day.
Can You Freeze Cooked Green Beans? (Texture Warning)
You technically can freeze any cooked vegetable, but I strongly advise against it for this specific Garlic Butter Green Beans preparation. Freezing severely disrupts the cell structure, and when thawed, those beautiful tender crisp beans will inevitably turn soft and mushy. Save the freezer space for things that freeze well, like maybe the onion topping components for our Green Bean Casserole Recipe: The Grown-Up Version with Crispy Shallots .
Reheating Without Losing the "Al Dente" Snap
Never, ever microwave these unless you enjoy rubbery, squeaky beans. The absolute best way to reheat is to toss them quickly in a dry, hot skillet for 1- 2 minutes until warmed through. Then, add a tiny splash of fresh butter right at the end to refresh the luxurious coating.
Versatile Serving Ideas for the Ultimate Side Dish
These vibrant Garlic Butter Green Beans are incredibly versatile, making them a perfect accompaniment for almost any meal. They are spectacular alongside rich holiday classics, providing a light, fresh contrast to heavier dishes. If you are serving them for Thanksgiving Recipes, they are a nice, zesty break before you dive into the Thanksgiving Desserts: Ultimate Brown Butter Bourbon Pecan Pie you’ve been dreaming about. They also pair flawlessly with grilled fish, roasted pork tenderloin, or a simple baked potato. They are a genuinely dependable, elegant, and delicious Yummy Side dish.

Recipe FAQs
Why did my green beans turn out mushy or soggy?
Soggy beans are almost always the result of overcooking during the initial blanching phase. Ensure you only boil the beans for 2 to 4 minutes, depending on their thickness, and immediately plunge them into an ice bath to halt the cooking process.
Be mindful not to over sauté them when adding the butter and garlic, as this is simply a warming step.
What is the secret to keeping the beans a vibrant, bright green color?
The secret lies in the blanching and shocking technique. The rapid high heat of the boiling water sets the chlorophyll, while the immediate transfer to the ice bath (shocking) stops the enzymes that cause colour dulling. Do not skip the ice bath if you want that signature emerald hue.
Can I make this recipe dairy-free or vegan?
Yes, this recipe is easily adaptable by substituting the butter with a high-quality vegan butter stick or refined coconut oil. If using oil, make sure to add an extra pinch of salt, as most oil alternatives do not contain the sodium found in salted butter. The cook time remains the same.
I only have jarred minced garlic. Can I use that instead of fresh?
While technically possible, fresh garlic is strongly recommended for the best flavour profile. Jarred minced garlic contains preservatives that can alter the taste, and it tends to burn much faster in the hot butter, potentially giving the final dish a bitter flavour.
If you must use jarred, stir it in only during the very last 30 seconds of the sauté.
How far in advance can I prepare the green beans?
You can complete the blanching and shocking steps up to 24 hours before serving the meal. After shocking, ensure the beans are completely dry, then store them covered in the refrigerator. When you are ready to serve, proceed immediately to the butter and garlic sauté.
How should I store leftovers, and can I freeze them?
Store leftovers in an airtight container in the refrigerator for up to 3 to 4 days. While technically freezable, the texture of green beans degrades significantly upon thawing, making them mushy. Freezing is generally not recommended for optimal quality.
What additions can I include to enhance the flavor profile?
To brighten the dish, finish the beans with a generous squeeze of fresh lemon juice or a teaspoon of white wine vinegar before serving. For added texture and richness, toast 1/4 cup of slivered almonds in the butter before adding the garlic, or include a pinch of red pepper flakes for heat.
Garlic Butter Green Beans Recipe
Ingredients:
Instructions:
Nutrition Facts:
| Calories | 139 kcal |
|---|---|
| Protein | 2.3 g |
| Fat | 10.6 g |
| Carbs | 10.7 g |
