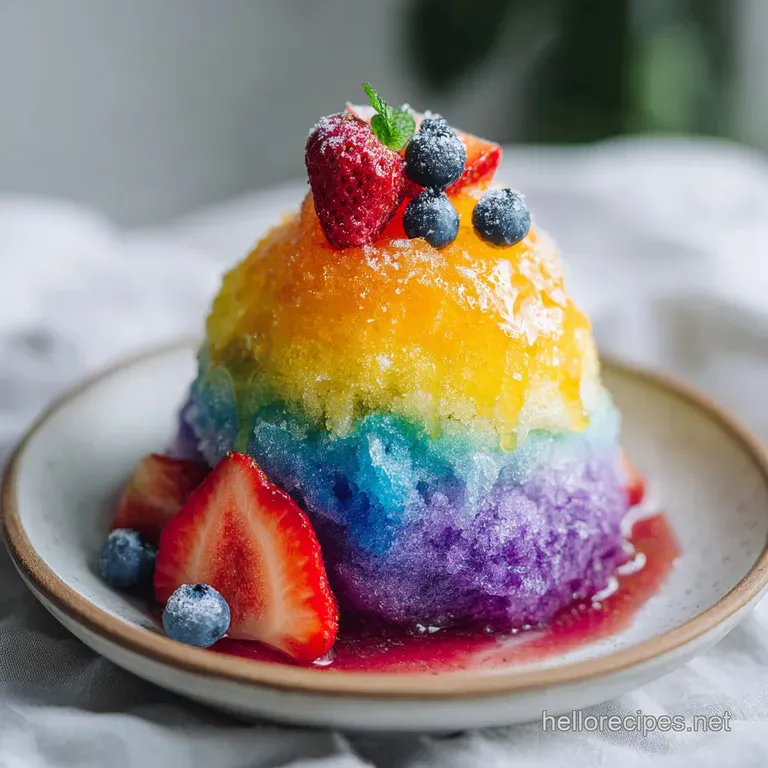
Disney Rainbow Candytopped Slush with Fruit Syrup
- Time: Active 20 minutes, Passive 30 mins, Total 50 minutes
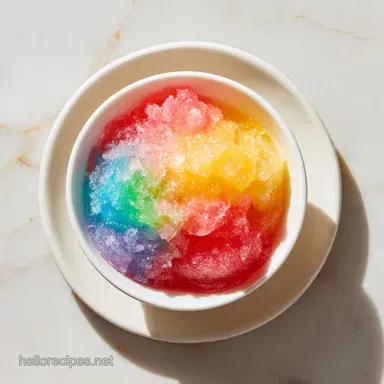
- Flavor/Texture Hook: Crystalline, icy snow paired with chewy neon gummy textures
- Perfect for: Summer garden parties and high energy kids' celebrations
- The Physics of the Crystalline Pulse
- Preparation Metrics and Serving Logic
- Component Analysis for Crystalline Texture
- Essential Pantry Elements for Vibrant Slushies
- Critical Gastronomy Tools for Frozen Desserts
- The Multi Stage Architecture of Frozen Layers
- Troubleshooting Common Frozen Dessert Structural Failures
- Sustainable Scaling for Larger Social Gatherings
- Innovative Storage and Zero Waste Methods
- Aesthetics of the Neon Candy Crown
- Debunking Frozen Treat Myths
- Recipe FAQs
- 📝 Recipe Card
The Physics of the Crystalline Pulse
Freezing Point Depression: Adding ultra fine caster sugar to the ice base lowers the freezing point, which creates a softer, "velvety" slush texture rather than hard, jagged shards.
Viscosity Control: The concentrated fruit syrups have a higher density than the water based slush, allowing them to sit in distinct layers when poured with precision.
Preparation Metrics and Serving Logic
| Servings | Ingredient Adjustments | Glass Size | Prep Strategy |
|---|---|---|---|
| 2 people | 4 cups ice, 1/4 cup each syrup | 12 oz glass | Single blender batch |
| 4 people | 8 cups ice, 1/2 cup each syrup | 12 oz glass | Two batches; keep syrups chilled |
| 8 people | 16 cups ice, 1 cup each syrup | 8 oz glass | Prep syrups 1 day early; use 2 blenders |
Getting the ratio of ice to liquid right is the difference between a drinkable slush and a spoonable dessert. For larger groups, I recommend pre chilling your glasses in the freezer for at least 20 minutes.
This technology simple trick prevents the thermal transfer from the room from collapsing your icy structure before the first sip.
Component Analysis for Crystalline Texture
| Ingredient | Science Role | Pro Secret |
|---|---|---|
| Filtered Ice | Thermal Mass | Use filtered water to avoid "freezer" off flavors. |
| Caster Sugar | Solute Stabilizer | Dissolves instantly to prevent a gritty mouthfeel. |
| Lime Juice | pH Balancer | Cuts through the heavy glucose of the candy toppings. |
| Fruit Syrups | Flavor Density | Chill to 40°F (4°C) to maintain layer separation. |
Essential Pantry Elements for Vibrant Slushies
The magic of this Disney Rainbow Candy Topped Slush with Fruit Syrup lies in the contrast between the sharp acidity of the lime and the deep sweetness of the syrups. We aren't just throwing things in a blender; we are layering flavors to create a sensory experience.
- Filtered ice (4 cups): high-quality water ensures the cleanest flavor profile.
- Cold water (1/2 cup): Acts as the lubricant for the blender blades.
- Ultra fine caster sugar (2 tbsp): Necessary for that smooth, non gritty finish. Why this? Caster sugar dissolves much faster in cold liquids than standard granulated sugar.
- Freshly squeezed lime juice (1 tbsp): Provides the necessary brightness to balance the syrup.
- Blue Raspberry syrup (1/4 cup): The classic "electric blue" base layer.
- Wild Strawberry or Cherry syrup (1/4 cup): Provides the deep red middle tone.
- Mango or Passionfruit syrup (1/4 cup): Adds a tropical, golden top layer. Why this? Mango syrup has a higher natural pectin content which helps it "grip" the ice.
- Rainbow gummy rings and ribbons (1/2 cup): The textural contrast.
- Sour sanding sugar (1 tbsp): For a final hit of crystalline acidity.
- Neon colored maraschino cherries (2): The quintessential visual anchor.
Substitution Table
| Original Ingredient | Substitute | Why It Works |
|---|---|---|
| Blue Raspberry Syrup | Blue Curacao Syrup (non alc) | Provides the same neon hue with an orange peel finish. |
| Ultra fine Caster Sugar | Simple Syrup (1.5 tbsp) | Skips the dissolving step entirely. Note: Reduce cold water by 1 tbsp. |
| Lime Juice | Lemon Juice | Similar acidity, though slightly less "punchy" than lime. |
Critical Gastronomy Tools for Frozen Desserts
You really need a high speed blender for this. I once tried making this in a food processor, and let's just say it was more "crunchy ice soup" than velvety slush. A blender like a Vitamix or a Ninja creates enough centrifugal force to pulverize the ice into that snow like consistency we are after.
If you are looking for a more innovative way to serve these, try using chilled mason jars. For another fun colorful project, you might enjoy my Rainbow Layered Jello recipe which uses similar color blocking techniques but in a gelatinous format.
The Multi Stage Architecture of Frozen Layers

1. The Syrup Calibration
Chill all your syrups in the refrigerator for at least 30 minutes before starting. Note: Cold syrups are denser and will not bleed into the ice layers as quickly.
2. Achieving the Crystalline Pulse
Place the 4 cups of filtered ice, 1/2 cup cold water, 2 tbsp caster sugar, and 1 tbsp lime juice into the blender. Pulse on high in short, 5 second bursts until the ice looks like fine, dry snow. Do not over process or it will turn to water.
3. The Structural Layering Technique
Pour 2 tablespoons of the Blue Raspberry syrup into the bottom of two chilled glasses. Carefully spoon 1/3 of your ice mixture over the blue syrup until it forms a solid white barrier.
4. Color Integration
Gently pour the Wild Strawberry syrup over the first ice layer. Add the next third of the ice, pressing down slightly with the back of a spoon to stabilize the layer.
5. Final Gradient
Repeat with the Mango syrup and the final portion of ice. The result should be three distinct bands of color visible through the side of the glass.
6. The Candy Crowning
Top the slush with the 1/2 cup of rainbow gummy rings and ribbons. The ice should be firm enough to support the weight of the candy.
7. Sensory Finishing
Sprinkle the 1 tbsp of sour sanding sugar over the top for a glittery effect.
8. The Anchor
Place one neon colored maraschino cherry on top of each glass.
9. Immediate Service
Serve immediately with a wide diameter straw to accommodate the slush and the occasional small gummy piece.
Chef's Tip: If your ice feels too wet, toss it with a teaspoon of the sour sanding sugar before layering. The citric acid in the sugar helps keep the ice crystals from fusing together.
Troubleshooting Common Frozen Dessert Structural Failures
The biggest mistake I see people make is using "old" ice that has been sitting in the freezer for weeks. That ice has absorbed odors and has started to sublimate, making it less effective at holding its shape. Always use fresh cubes!
Why Your Slush Layers Blended Together
If your colors turned into a muddy purple mess, it’s usually a temperature or speed issue. If the ice is too warm or the syrup is poured too quickly, gravity wins and everything mixes.
| Problem | Root Cause | Solution |
|---|---|---|
| Watery base | Too much water added | Reduce water to 1/3 cup; pulse more aggressively. |
| Sinking candy | Ice is not packed | Use a spoon to gently tamp down the top ice layer. |
| Muted colors | Low quality syrups | Use "concentrated" fruit syrups rather than flavored waters. |
Common Mistakes Checklist
- ✓ Using room temperature syrups (this melts the ice on contact)
- ✓ Blending on a continuous high setting (this creates heat through friction)
- ✓ Forgetting to chill the glasses (warm glass = instant melting at the edges)
- ✓ Using large, chunky ice cubes (these take too long to break down, warming the mixture)
Sustainable Scaling for Larger Social Gatherings
When scaling this recipe up for a party, do not try to double the ice in one blender. Most home blenders can't handle 8 cups of ice without leaving large chunks at the top and turning the bottom into water. Work in batches of 4 cups of ice at a time.
For an innovative twist on these flavors, you could also check out the Rainbow Riot My recipe which captures this same vibrant aesthetic in a baked form.
- Up to 4 people
- Follow the recipe twice; store the first batch of slush in the freezer while making the second.
- 5-10 people
- Pre measure all syrups into small pouring pitchers. Have one person blending and one person layering to maintain the "assembly line" speed.
- Spices and Acids
- If doubling the recipe, keep the lime juice at 1.5x rather than 2x to ensure it doesn't overpower the fruit flavors.
Innovative Storage and Zero Waste Methods
Frozen slushies are notoriously difficult to store because the ice crystals eventually fuse into a solid block. However, if you have leftovers, you can pour the mixture into a silicone muffin tin and freeze them as "slushie pucks." When you're ready for another drink, just pop two pucks into the blender with a splash of water and pulse.
Storage Timeline:Fridge: Not recommended. It will be juice in 15 minutes. Freezer: Up to 1 month in an airtight container. Note: You will need to re blend it before serving to restore the texture.
Zero Waste Tip: Don't throw away the leftover syrup in the bottom of the bottles! Use it to flavor your morning yogurt or mix it with sparkling water for a quick homemade soda. Even the stems from the maraschino cherries can be composted.
Aesthetics of the Neon Candy Crown
Presentation is everything with a Disney inspired treat. To get that "authentic" look, don't just dump the candies on top. Think about height and contrast.
Comparison of Syrup Methods
| Method | Time | Texture | Best For |
|---|---|---|---|
| Stovetop Reduction | 15 minutes | Thick, syrupy, rich | Achieving deep "jammy" flavor layers. |
| Oven Roasting | 30 minutes | Concentrated, caramelized | A more "adult" or sophisticated fruit profile. |
I find that for the most innovative visual impact, the stovetop method is better because it preserves the bright, neon colors that are essential for this specific slushie.
Debunking Frozen Treat Myths
Many believe that "more ice equals a thicker slush." In reality, more ice often just leads to more friction in the blender, which generates heat and causes the ice to melt faster. The secret isn't more ice; it's the ratio of ice to sugar.
Sugar acts as an antifreeze, keeping the crystals small and "shatter able" rather than allowing them to clump into a frozen boulder.
Another common misconception is that you need a "slushie machine" to get that specific park style texture. By using the "pulse" method on a high powered blender, you are essentially mimicking the shave and churn motion of a professional machine.
It's about breaking the ice down into uniform microspheres rather than jagged shards. Trust me, the pulse button is your best friend here!

Recipe FAQs
What is the critical step to achieve a soft, non-gritty slush texture?
Use ultra fine caster sugar. This solute dissolves instantly in the cold liquid, which lowers the freezing point just enough to prevent jagged ice shards from forming.
How do I prevent the colorful fruit syrups from immediately mixing into a single color?
Chill all fruit syrups to 40°F (4°C) before pouring. Colder syrups are denser, allowing them to settle into distinct layers upon careful spooning over the pre-blended ice base.
How to make a larger batch of this slush without ending up with watery runoff?
Process the ice in multiple 4-cup batches using a high speed blender. Overloading the machine generates friction and heat, which melts the ice before it is properly pulverized; if you enjoyed controlling ingredient ratios here, see how we apply similar precision in our 5Minute Fruit Smoothie recipe.
Is it true that I must use a professional slushie machine to get the right ice consistency?
No, this is a common misconception. You can mimic the machine's churn by using a high speed blender and aggressively pulsing it in short bursts to achieve that fine, snow like texture.
What is the best substitute for the highly acidic lime juice if I prefer a milder flavor?
Substitute lemon juice, but reduce the amount slightly. Lemon juice offers similar acidity, though it is slightly less punchy, so use about 3/4 the amount of lime called for in the recipe.
How far ahead of time can I prepare the components for this layered drink?
Prepare the fruit syrups up to 3 days in advance. Keep them tightly sealed and chilled; the ice base must be made immediately before assembly or it will become too watery to support the candy toppings.
How do I ensure the heavy gummy candies stay balanced on top of the slush?
Tamp down the final layer of ice firmly with the back of a spoon. The dense, packed ice structure provides the necessary stability to support the weight of the candy crown.
Disney Rainbow Candy Slush
Ingredients:
Instructions:
Nutrition Facts:
| Calories | 534 kcal |
|---|---|
| Protein | 1.5 g |
| Fat | 0.5 g |
| Carbs | 136 g |
| Fiber | 0.6 g |
| Sugar | 122 g |
| Sodium | 48 mg |
