Pad Thai Spring Rolls: the Crispy Thai Parcels You Need for Dipping
- Taking the Street to the Handheld: Why You Need These Pad Thai Spring Rolls
- Essential Ingredients for Authentic Pad Thai Spring Rolls: Beyond the Wrapper
- Rolling Perfection: A Step-by-Step Guide to the Crispiest Finish
- The Flavor Science: Mastering the Sweet, Sour, Salty, and Nutty Balance
- Troubleshooting Your Rolls: Chef's Tips for Avoiding the Soggy Middle
- Prep Ahead: Storage and Freezing Your Uncooked Pad Thai Spring Rolls
- Perfect Pairings: Dipping Sauces and Sides for Your Appetizer
- Recipe FAQs
- 📝 Recipe Card
Taking the Street to the Handheld: Why You Need These Pad Thai Spring Rolls
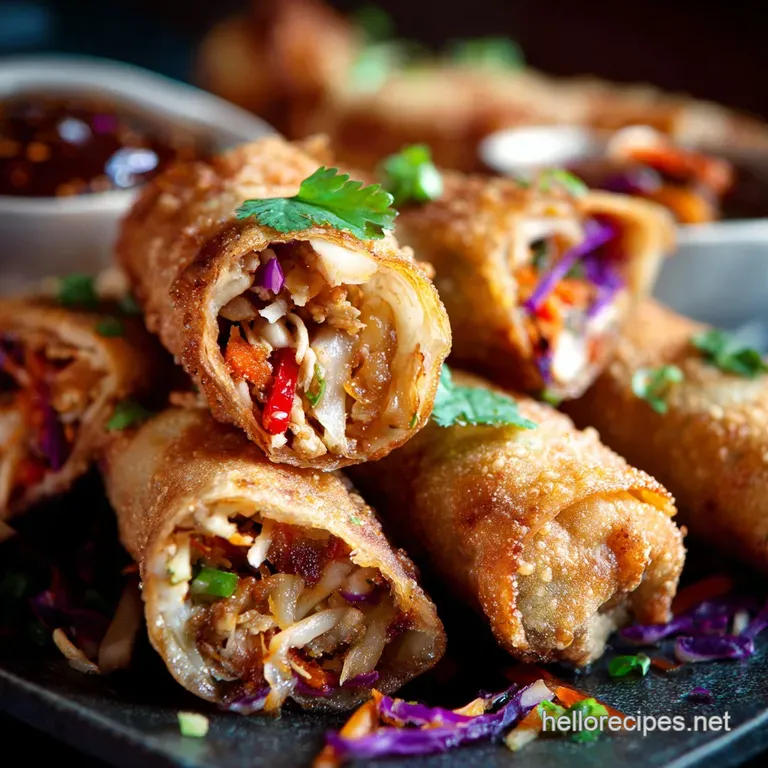
Forget everything you know about Pad Thai being a messy noodle dish that requires forks and serious slurping. This recipe takes that amazing, explosive flavour profile sweet, sour, salty, and nutty and wraps it up in the crispiest, most shatteringly delicate spring roll package imaginable.
That first bite is pure texture chaos: warm, chewy filling followed by a stunning, perfect crunch.
Look, making a full, traditional Pad Thai takes time and heat management, but turning it into an appetizer makes entertaining ridiculously simple and fast. It’s cheap, you can prep the filling days ahead, and suddenly you look like a catering genius.
I promise you, these [Pad Thai Spring Rolls] disappear faster than free samples at Costco. If you’re building a Thai themed menu, these pair perfectly with a fresh, light starter, maybe something like my [Thai Chicken Salad: The Zesty, Addictive 15 Minute Prep Recipe] for contrast.
I’ve spent way too long perfecting the balance of the filling, especially the key to preventing blowouts and leaks during frying. We are aiming for crispy gold, not soggy sadness, and the secret lies in consistency, not complexity.
Let’s crack on and master this ultimate fusion appetizer that guarantees compliments.
The Culinary Fusion: Why Pad Thai Works Perfectly as an Appetizer
The whole trick here is the texture and the binding properties of the noodles. Pad Thai sauce, thickened naturally by the palm sugar and concentrated tamarind, gets gorgeously sticky when it cools down.
Unlike loose fillings often found in egg rolls, those slightly sticky rice noodles bind everything up, holding the shape perfectly and minimizing air pockets. This means zero leakage when they hit the hot oil, ensuring you get maximum crispness from the wrapper.
What Makes These Crispy Parcels a Showstopper for Entertaining
What really sells these is the make-ahead factor it’s pure magic for a busy host. You can roll them up early in the day or even freeze them raw (we’ll get to that later, it’s a lifesaver).
If you are planning a whole appetizer spread, these rolls are miles better than something fussy like those savory [Thanksgiving Appetizers and Finger Foods: Easy Sage Cranberry Rolls] because they fry up so quickly.
When guests arrive, it’s just 5 minutes of frying, and you have a stunning, restaurant quality appetizer that uses simple ingredients. Plus, everyone loves something you can dip, especially when it packs that intense, signature sweet, sour, salty punch that screams authenticity.
An Overview of the Filling Prep: Cooling Down for Optimal Rolling
I once tried rolling the filling while it was still warm because I was impatient. Disaster. It turned the wrapper into wet tissue paper instantly, and the whole thing fell apart. The filling needs to be spread thinly on a baking sheet or wide plate and cooled completely, 30 minutes in the fridge is mandatory .
This step ensures the moisture evaporates and the starches solidify, which is the non-negotiable key to preventing weeping and guarantees you get truly crispy parcels.
Essential Ingredients for Authentic Pad Thai Spring Rolls: Beyond the Wrapper
Building the Signature Sauce: The Tamarind and Palm Sugar Base
Don't skimp on the tamarind paste; it delivers the unique, deep sourness that lime juice alone can't replicate. Palm sugar gives a smoother, deeper sweetness than regular white sugar, but light brown sugar works too if you’re stuck.
We need that intensely balanced sweet sour-salty foundation for the perfect [pad thai spring rolls recipe] remember, the wrapper adds no flavour, so the filling must be bold.
Noodle Prep and Protein Options (Tofu and Dried Shrimp Focus)
We are using thin rice noodles (vermicelli), soaked until they are just al dente they finish cooking in the wok and absorb the sauce beautifully without becoming mush. I love the traditional addition of dried shrimp for that deep, funky umami flavour, but diced firm tofu is also a fantastic, chewy texture addition.
If you use prawns or chicken, make sure they are finely diced into small pieces so they don't puncture the delicate wrapper.
Vegan and Allergy Swaps for Fish Sauce and Key Components
If you need a vegan option, ditch the fish sauce and the egg, obviously. Fish sauce provides salt and umami, so substitute it with tamari or a high-quality light soy sauce. Unlike heavy starches, like the ones in my [gluten-free Bread: The Best Soft Springy Sandwich Loaf], the rice noodles stay delicate, making this dish naturally gluten-free if you use tamari.
| Ingredient | Substitution | Reason/Notes |
|---|---|---|
| Tamarind Paste | Lime Juice + Brown Sugar | Mix 2 parts lime juice to 1 part sugar for tartness. |
| Fish Sauce | Tamari or Light Soy Sauce | Use the same volume; Tamari keeps it gluten-free. |
| Prawns/Shrimp | Shredded Cooked Tofu or Pork | Ensure protein is finely minced or diced for easy rolling. |
| Palm Sugar | Light Brown Sugar | Provides similar moisture and depth of flavour. |
Rolling Perfection: A step-by-step Guide to the Crispiest Finish
Stage 1: Cooking and Cooling the Pad Thai Filling Safely
Remember, we are slightly under -cooking the noodles when soaking because they continue to cook in the wok as they absorb the sauce. The goal is to cook the Pad Thai until it looks almost too dry for eating out of a bowl seriously, if you see residual liquid, cook it longer.
Any excess liquid means steam, and steam means soggy, burst rolls.
Chef's Note: Cooling is non-negotiable. Spread the filling thinly and evenly across a wide sheet pan and place it in the fridge for at least 30 minutes. This is where the starches bind and the liquid disappears, ensuring structural integrity.
Stage 2: The Art of the Tight Roll and Sealing the Edges
Rolling needs to be firm but gentle. Lay your spring roll wrapper diamond style (a point facing you). Place about 2 to 3 tablespoons of the cooled filling near the point closest to you, forming a log, but do not overfill. Fold the bottom point up over the filling.
Next, fold the left and right corners inward, meeting neatly in the middle, and roll the package tightly toward the final top corner. Use the cornflour slurry (your culinary glue!) liberally on that final flap to seal it. If the roll isn't tight, air pockets form and cause tears and leakage when frying.
Stage 3: Achieving Golden Crispy Results (Frying vs. Air Frying)
Deep frying at 350°F (180°C) is the gold standard for that shattering, intense crispness. You must use a thermometer here; guessing the temperature is a recipe for greasy rolls. If you want a less messy, lighter version, try the air fryer!
Place the rolls in a single layer in your air fryer basket, spray them generously with oil, and cook at 380°F (195°C) for about 12– 15 minutes, flipping halfway. That’s how you achieve flawless [pad thai spring rolls in air fryer].
The Flavor Science: Mastering the Sweet, Sour, Salty, and Nutty Balance
Authentic Pad Thai relies entirely on the precise dance between those four key components. The tamarind gives us the crucial, deep sourness, the palm sugar provides complexity in sweetness, and the fish sauce delivers salinity and irresistible funk.
The chopped peanuts and fresh chives add the final essential layer of earthy nuttiness and freshness. Before you roll anything, always taste your cooled filling. If it tastes slightly too strong, that’s actually perfect the intensity mellows when encased in the neutral wrapper and fried.
Troubleshooting Your Rolls: Chef's Tips for Avoiding the Soggy Middle
Preventing Wrapper Blowouts During Frying
Blowouts happen primarily because of two things: rolling too loosely, or the oil is too hot, causing internal steam to escape violently. Make sure your rolls are sealed tight with that cornstarch slurry. If you see rapid, aggressive bubbling that suggests tearing, pull the rolls out and turn the heat down immediately.
Consistency in rolling size also ensures consistent cooking time.
The Ideal Oil Temperature for Frying Success
I learned the hard way that guessing oil temperature is a recipe for heavy, oil-soaked rolls. If the oil is below 325°F (160°C), the rolls soak up the fat and become greasy. We need 350°F (180°C) hot enough to instantly crisp the exterior but cool enough to gently warm the filling through.
Invest in a deep fry thermometer; it’s essential for achieving perfect, non-greasy [Thai Spring Rolls].
Saving the Batch: What to Do If Your Filling is Too Wet
If you tasted your filling before rolling and realized it's weeping or too saucy, do not panic! You have two simple fixes. Option one: Put the filling back in the wok on high heat and stir fry aggressively, pushing out the moisture until the liquid is entirely gone.
Option two: Stir in one teaspoon of cornstarch mixed with a tiny bit of water (a slurry) and cook until thickened. Problem solved, and you are ready to roll.
Prep Ahead: Storage and Freezing Your Uncooked Pad Thai Spring Rolls
Best Practices for Refrigerating Cooked Rolls
Cooked rolls are always best served immediately, but if you have leftovers, store them in an airtight container in the fridge for up to 3 days. To reheat them, forget the microwave! That nukes the beautiful crunch.
Instead, pop them back into the air fryer or oven at 350°F (175°C) until they are hot and crispy again.
Flash Freezing Raw Rolls for Later Use
This is the real party trick. Roll your spring rolls completely and seal them, then lay them in a single layer on a parchment lined baking sheet. Flash freeze them for about an hour until they are solid. Once hard, transfer them to a freezer bag or container. They keep beautifully for 2 3 months!
You can fry them directly from frozen just add 2 minutes to your cooking time and ensure the oil maintains its temperature. Brilliant for last minute entertaining.
Perfect Pairings: Dipping Sauces and Sides for Your Appetizer
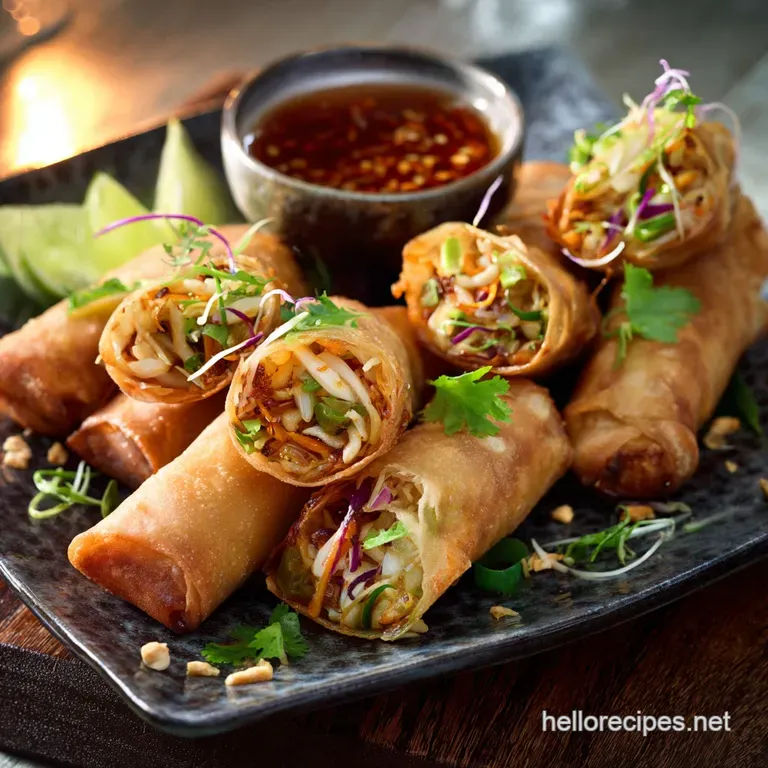
The joy of these rolls is the contrast. You have the soft, flavourful noodles inside, which is why the wrapper needs to be so aggressively crisp. Serve these simply, maybe with a scattering of fresh cilantro and a crucial wedge of lime the fresh lime juice cuts through the richness of the frying perfectly.
Don't forget to serve a small bowl of the reserved Pad Thai sauce (warmed slightly) right alongside them for dipping, and perhaps a classic bottled sweet chili sauce for variety.

Recipe FAQs
Can I bake or air fry these Pad Thai Spring Rolls instead of deep frying?
Absolutely. Baking or air frying is a fantastic, lighter alternative. Preheat your air fryer to 400°F (200°C) or your oven to 425°F (220°C), and brush the assembled rolls lightly with oil for optimal crispness.
Cook for 10-15 minutes, flipping halfway, until they are golden brown and fully cooked through.
Why do my spring rolls burst or tear while frying?
This issue usually stems from internal moisture or poor sealing. Ensure the Pad Thai filling is completely cooled and drained before wrapping, as steam buildup will cause the wrapper to fail under high heat. Also, use a strong slurry (flour and water) or whisked egg to create a tight, durable seal on the edges.
How can I adapt this recipe to be fully vegan or vegetarian?
Substitute the fish sauce entirely with good quality soy sauce or tamari, increasing the amount slightly to maintain the savory depth, and balance it with extra lime juice. Replace any meat or shrimp with firm, pressed tofu that has been marinated and sautéed separately before adding it to the Pad Thai filling base.
What is the best substitute for tamarind paste in the Pad Thai filling?
Tamarind provides a unique, sweet sour tang that is difficult to replicate perfectly, but a mixture of lime juice and brown sugar works well as a close alternative. Aim for a ratio of about 2 parts lime juice to 1 part sugar to mimic the required acidity and sweetness.
You can also use a small amount of rice vinegar combined with concentrated lemon juice.
Can I assemble the spring rolls ahead of time for entertaining?
Yes, you can assemble the rolls up to 12 hours in advance, which is perfect for party preparation. Place the rolls on a parchment lined tray, ensuring they do not touch each other, and cover them loosely with plastic wrap before refrigerating. Fry them straight from the fridge for the best results.
My Pad Thai filling feels too wet, making wrapping difficult. How do I fix this?
A soggy filling compromises the structural integrity of the roll. Return the Pad Thai mixture to the pan and stir fry it on medium high heat for an additional 2 to 3 minutes until the excess liquid completely evaporates.
Always ensure the filling is chilled completely before it touches the spring roll wrappers, as heat also releases moisture.
How should I store and reheat leftover cooked spring rolls?
Store cooked leftovers in an airtight container in the refrigerator for up to 3 days. To restore their crispiness, the best method is to reheat them in a preheated oven or air fryer at 350°F (175°C) for 5-7 minutes. Avoid microwaving, as this will inevitably make them soft and rubbery.
Crispy Pad Thai Spring Rolls Recipe
Ingredients:
Instructions:
Nutrition Facts:
| Calories | 433 kcal |
|---|---|
| Protein | 16.1 g |
| Fat | 13.2 g |
| Carbs | 62.7 g |
