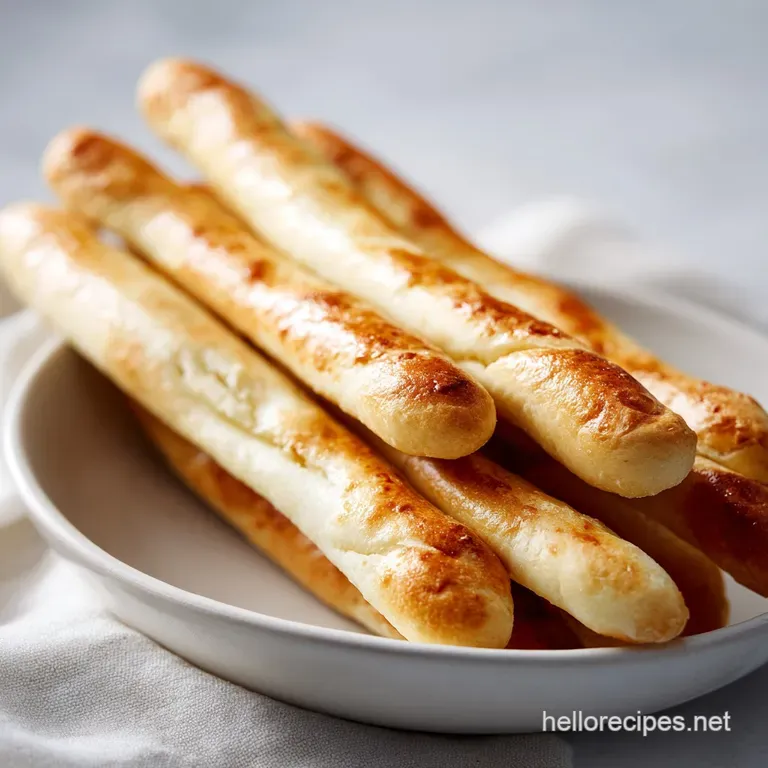
Copycat Olive Garden Breadsticks: Pillowy and Garlicky
- Time: Active 30 minutes, Passive 92 minutes, Total 122 minutes
- Flavor/Texture Hook: Pillowy soft interior with a salty, aromatic garlic butter finish
- Perfect for: Large family gatherings, cozy Italian nights, or weekend meal prep
- Baking Perfect Copycat Olive Garden Breadsticks
- Secrets to This Pillowy Texture
- Timing and Temperature Critical Success
- Analyzing Every Single Essential Ingredient
- Must Have Tools for Flour Success
- Building Flavor in Layered Stages
- Fixing Dough and Baking Issues
- Fusion Twists and Flavor Ideas
- Freezing and Efficient Reheating Methods
- Plating and Stunning Visual Presentation
- Recipe FAQs
- 📝 Recipe Card
Baking Perfect Copycat Olive Garden Breadsticks
The air in my kitchen is currently thick with the scent of blooming yeast and raw honey, a combination that always reminds me of big family dinners where the bread basket is the true guest of honor.
There is something fundamentally multicultural and vibrant about the ritual of breaking bread together, especially when that bread is as soft as a cloud and shimmering with melted grass fed butter.
I remember the first time I realized that the "secret" to these sticks wasn't just the garlic salt it was the humidity in the oven that transforms a simple dough into something velvety and ethereal.
We are not just making bread here; we are building layers of comfort that bridge the gap between a quick weeknight side and a centerpiece of a feast. When you pull these out of the oven, the sizzle of the garlic butter hitting the warm, golden crust is a sensory cue that dinner is officially served.
This recipe has become my go to for bringing a bit of that restaurant magic into our home, and honestly, the homemade version has a depth of flavor that the mass produced ones just can't touch.
Secrets to This Pillowy Texture
Honey Fermentation: The raw honey provides immediate glucose for the yeast, creating a more vigorous rise and a subtle floral undertone.
Steam Injection: Placing water in the oven creates a humid environment that prevents the crust from setting too early, allowing for maximum expansion.
Enriched Hydration: Using extra virgin olive oil within the dough coats the gluten strands, ensuring the crumb remains tender rather than chewy.
Protein Precision: Bread flour provides the necessary structure to support the air bubbles created during the 110 minutes of total rise time.
| Servings | Ingredient Adjustments | Pan Size | Cook Time |
|---|---|---|---|
| 6 people | 118ml water, 1 tbsp honey, 203g flour | 1 half sheet | 12 minutes |
| 12 people | 236ml water, 2 tbsp honey, 406g flour | 2 half sheets | 12 minutes |
| 24 people | 472ml water, 4 tbsp honey, 812g flour | 4 half sheets | 15 minutes |
Choosing the right method for your schedule is key. While we are focusing on the classic, layered approach for the best texture, sometimes you need a faster path to carb heaven. If you are serving these alongside a creamy Alfredo sauce, the structural integrity of the bread flour is essential for dipping without the bread falling apart.
| Feature | Fast Method | Classic Method |
|---|---|---|
| Total Rise | 30 minutes | 90 minutes |
| Texture | Dense and doughy | Airy and pillowy |
| Flavor | Yeast forward | Balanced honey garlic |
Timing and Temperature Critical Success
To ensure these turn out identical to the restaurant version every single time, I rely on three specific checkpoints that remove the guesswork from the process.
- Liquid Calibration: Your water must be exactly 43°C (110°F). If it is too cold, the yeast stays dormant; if it is too hot, you will kill the vibrant culture needed for the rise.
- Size Consistency: Roll each piece into an 18cm (7 inch) log. This ensures they all cook at the same rate and fit perfectly in a standard bread basket.
- The 12 Minute Mark: Set your timer for exactly 12 minutes at 200°C (400°F). The breadsticks should be a very pale golden color; over baking will lead to a dry, crunchy texture instead of the soft shatter we want.
Analyzing Every Single Essential Ingredient
The beauty of this copycat olive garden breadsticks recipe lies in the quality of the pantry staples. I always reach for grass fed butter for the topping because its higher fat content and vibrant yellow hue add a multicultural richness that standard butter lacks.
| Ingredient | Science Role | Pro Secret |
|---|---|---|
| Bread Flour | High protein gluten | Weigh it (406g) for accuracy |
| Raw Honey | Yeast accelerant | Adds a subtle golden crust color |
| Sea Salt | Gluten regulator | Enhances the floral honey notes |
| Dried Oregano | Aromatic layer | Rub between palms to release oils |
For the Enriched Dough
We use extra virgin olive oil here not just for flavor, but to create a velvety mouthfeel. The oil interferes with the gluten network just enough to keep the bread soft for days. This plant based fat source is a nod to traditional Mediterranean baking, where oil enriched doughs are the standard for flatbreads and rolls.
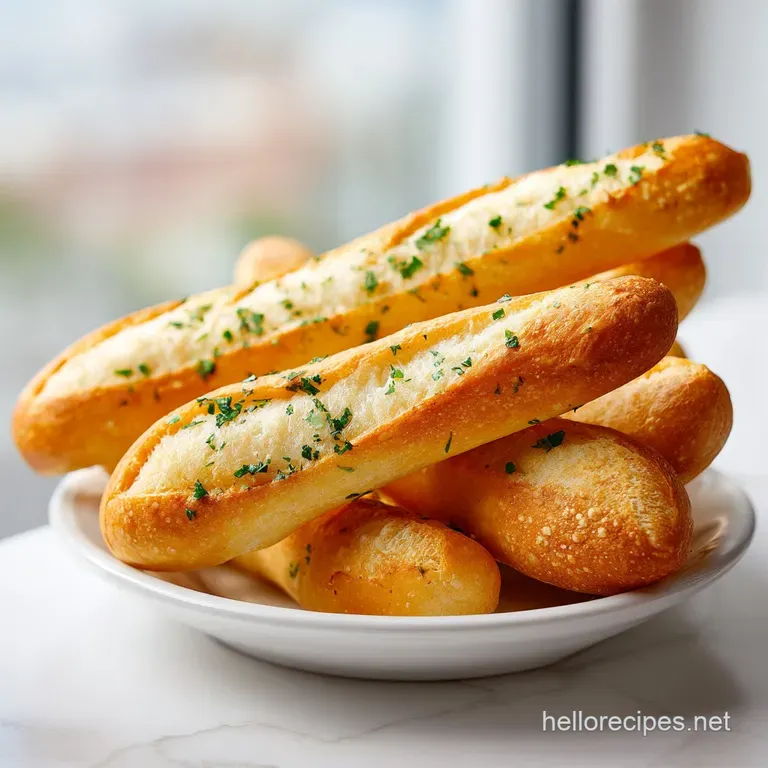
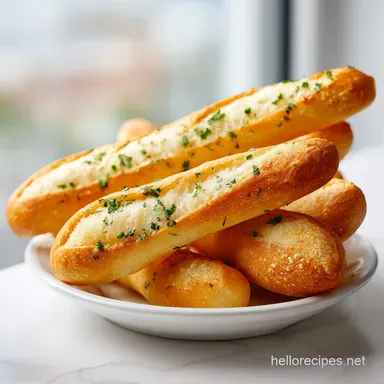
Signature Garlic Butter Topping
The final layer of flavor comes from the blend of melted grass fed butter and garlic salt. This isn't just a garnish; it is a seal that locks in the moisture. I’ve found that using a high-quality garlic salt with real dehydrated garlic bits provides a more intense, vibrant punch than using fresh garlic, which can sometimes turn bitter in the oven’s heat.
Must Have Tools for Flour Success
You don't need a professional bakery setup, but a few specific items make the 110 minutes of prep much easier. A stand mixer with a dough hook is my preferred tool because it handles the 5-7 minutes of kneading without making your arms ache, and it ensures the gluten is developed uniformly.
You will also need a kitchen scale for the 3.25 cups of bread flour. Measuring by volume is notoriously unreliable; a cup of flour can weigh anywhere from 120g to 160g depending on how it's packed. For this recipe, we are looking for approximately 406g of flour to hit that "tacky but not sticky" sweet spot.
Finally,, a shallow pan (like a brownie tin) is vital for the steam element in the oven.
Building Flavor in Layered Stages
Starting the Yeast Bloom
First, whisk your 236ml (1 cup) of warm water, 2 tbsp of raw honey, and 2.25 tsp of active dry yeast in your mixer bowl. Let it sit for 5 to 10 minutes. You are looking for a foamy, frothy head to develop on the surface.
This "bloom" is your insurance policy it proves the yeast is alive and ready to work. If it doesn't foam, stop and start over with fresh yeast.
Preparing the Enriched Dough
Once the yeast is bubbling, add the 45ml (3 tbsp) of olive oil, 1.5 tsp of sea salt, and the first 250g (about 2 cups) of flour. Using the dough hook on a low setting, begin incorporating the ingredients. This stage is where the "flavor layers" start to form, as the oil distributes through the flour.
Kneading for Perfect Elasticity
Gradually add the remaining flour until the dough clears the sides of the bowl. Knead for 5 to 7 minutes on medium low speed. The dough should feel smooth and elastic, like a stress ball. If you poke it, it should spring back slowly.
This means the gluten network is strong enough to hold the air produced during the rise.
Proofing for Maximum Volume
Place the dough in a greased bowl, cover it with a damp cloth, and let it rise in a warm, draft free spot for 1 hour. I often use the "oven with the light on" trick. You are waiting for it to double in size. This slow fermentation is where the complex, bready flavors develop.
Shaping into Uniform Logs
Punch the dough down to release large gas bubbles. Divide it into 12 equal pieces (use your scale if you want to be precise each should be around 65g). Roll each piece into an 18cm (7 inch) log. Place them on parchment lined sheets, cover, and let them rise for another 30 minutes.
This second rise is what gives them that characteristic round, pillowy shape.
Baking to Golden Brown
Preheat your oven to 200°C (400°F) and place that shallow pan of water on the bottom rack. The steam will immediately fill the chamber. Slide your trays in and bake for 10 to 12 minutes.
You aren't looking for a deep brown; a light golden hue is what makes these look authentic.
Applying the Garlic Glaze
While the sticks are baking, whisk together the 42g (3 tbsp) of melted grass fed butter, 1 tsp of garlic salt, and 0.5 tsp of dried oregano. As soon as the breadsticks come out of the oven, brush them generously. The heat will cause the bread to "drink" the butter, pulling those aromatics deep into the crust.
Fixing Dough and Baking Issues
Solving Dense Bread Issues
If your breadsticks come out like heavy bricks, it is usually a sign of under proofing or using old yeast. The dough needs that full hour to double in size. If your kitchen is cold, this might take 90 minutes instead of 60. Always go by the visual of "doubled in size" rather than just the clock.
Fixing the Lack Rise
Sometimes the dough just won't move. Check your water temperature; 43°C (110°F) is the sweet spot. Also, make sure you aren't adding too much flour. The dough should be slightly tacky. If it is too dry, the yeast won't have the mobility to expand the structure.
| Problem | Root Cause | Solution |
|---|---|---|
| Crust is too hard | No steam in oven | Use water pan on bottom rack |
| Bottoms are burnt | Pan too close to heat | Move to center rack position |
| Dough is sticky | Not enough kneading | Knead 2 mins longer |
Common Mistakes Checklist
- ✓ Never use cold water; it stalls the yeast's metabolic activity.
- ✓ Do not skip the second rise; it is vital for the airy texture.
- ✓ Avoid over flouring the work surface when shaping logs.
- ✓ Brush the butter while the bread is screaming hot for better absorption.
- ✓ Ensure the oven is fully preheated before the trays go in.
Fusion Twists and Flavor Ideas
If you want to move away from the classic profile, try a multicultural fusion twist. I love adding a teaspoon of nutritional yeast to the dough for a plant based "cheesy" funk without the dairy. For a deeper, earthy layer, you could swap the oregano for za'atar or smoked paprika. These breadsticks are a fantastic companion to a hearty Pasta e Fagioli soup, which rounds out the meal with plant based protein and vibrant vegetables.
Quick Style Breadstick Option
If you're in a rush, you can use the "warm oven" trick to cut the first rise to 30 minutes. Turn your oven to its lowest setting for 1 minute, then turn it OFF. Place your dough inside. The trapped warmth accelerates the yeast, though you will sacrifice some of that complex honey fermented flavor.
The Parmesan Crust Twist
For those who love a bit of texture, sprinkle freshly grated Parmesan cheese over the butter glaze immediately after brushing. The cheese will partially melt and partially crisp up, creating a salty, savory crust that provides a wonderful contrast to the soft interior.
Freezing and Efficient Reheating Methods
These breadsticks freeze beautifully, which is perfect for solo diners or small families. Once they are fully cooled, wrap them tightly in foil and place them in a freezer bag. They will stay fresh for up to 3 months.
To use, don't thaw them just pop them into a 175°C (350°F) oven for 5 to 8 minutes until they are soft again.
For leftovers kept in the fridge (up to 3 days), avoid the microwave if possible, as it can make the bread rubbery. A quick 2 minute toast in a pan with a tiny bit of butter will revive the "shatter" of the crust and make the garlic aroma vibrant again.
Plating and Stunning Visual Presentation
To truly capture that restaurant vibe, serve these in a long basket lined with a clean white cloth napkin. The cloth helps retain the heat while the breadsticks sit on the table. If you're hosting a dinner party, I like to place a small ramekin of the garlic butter on the side for those who want an extra dip.
For a more modern, multicultural look, serve them on a wooden board alongside a vibrant bowl of herb infused olive oil and balsamic vinegar. The contrast between the golden bread and the dark, shimmering oil makes for a stunning visual centerpiece.
No matter how you serve them, remember that these are best enjoyed within the first 20 minutes of coming out of the oven!
Beautiful Dinner Party Spread
When setting the table, think about the "flavor layers" of the whole meal. These breadsticks act as the bridge between your appetizers and the main course. I often arrange them in a starburst pattern on a round platter, which allows guests to easily grab one without disturbing the whole pile.
The vibrant green of the oregano in the glaze should pop against the golden bread, signaling the freshness of your homemade creation.
Authentic Italian Style Pairing
While these are an American Italian classic, they pair wonderfully with more traditional Mediterranean dishes. Try serving them with a slow roasted tomato confit or a bright, citrusy gremolata.
The sweetness of the honey in the dough cuts through acidic sauces perfectly, making every bite a balanced experience of salt, fat, and sugar.

Recipe FAQs
What brand of breadsticks does Olive Garden use?
None; they make them from scratch. The restaurant prepares their dough in-house daily rather than using a pre-made commercial brand.
Is breadstick dough the same as pizza dough?
No, this is a common misconception. Breadstick dough requires a specific ratio of bread flour and olive oil to achieve that signature soft, airy interior compared to the chewier, structure heavy nature of pizza crust.
What store-bought breadsticks are like Olive Garden?
Most store-bought versions lack the authentic texture. Commercial freezer aisle breadsticks generally use preservatives that prevent the light, cloud like crumb you get from making them at home with fresh yeast and honey.
Can I buy just breadsticks from Olive Garden?
Yes, they are available for purchase. Most locations allow you to order breadsticks a la carte for takeout, though the flavor is best when you brush fresh butter and garlic salt onto them at home.
How to ensure my breadsticks stay soft?
Brush with the melted butter mixture immediately after pulling them from the 400°F oven. Applying the butter while the bread is screaming hot allows the fats to penetrate the surface, locking in moisture and ensuring the crust stays tender rather than crunchy.
How to troubleshoot dough that won't rise?
Check your water temperature and yeast activity. Always use warm water at 110°F; if the water is cold, the yeast will not metabolize the honey, and if it is too hot, it will kill the yeast cells entirely.
How to get that airy texture inside the breadstick?
Do not skip the second 30-minute rise after shaping the logs. This second proofing stage is vital for the airy texture because it allows the gluten network to relax and expand before the high heat of the oven sets the structure.
Copycat Olive Garden Breadsticks
Ingredients:
Instructions:
Nutrition Facts:
| Calories | 192 kcal |
|---|---|
| Protein | 4.4 g |
| Fat | 6.2 g |
| Carbs | 28.7 g |
| Fiber | 0.9 g |
| Sugar | 2.8 g |
| Sodium | 458 mg |
