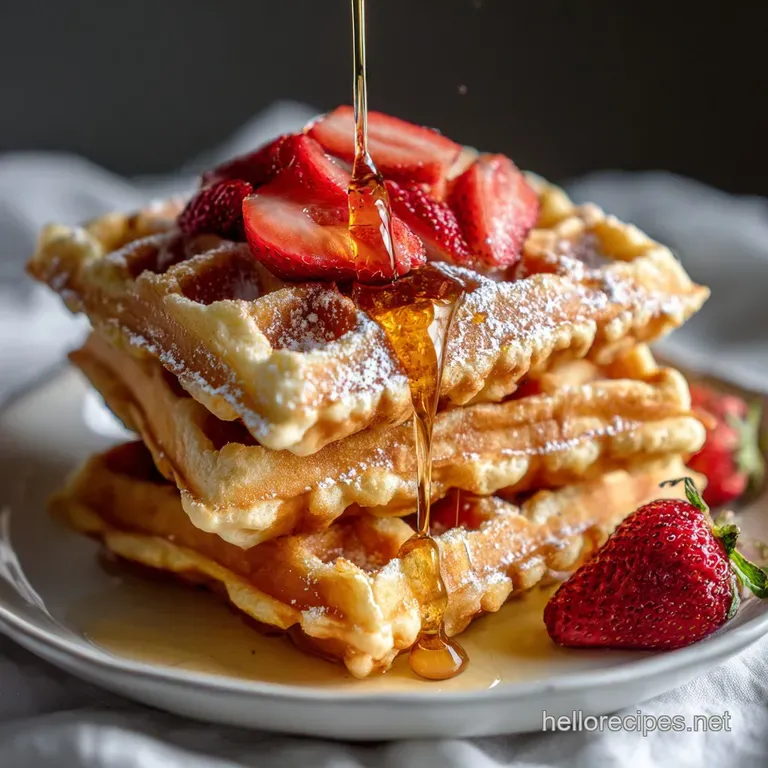
Classic Waffle Recipe: Shatter Crisp & Velvety
- Time: Active 15 minutes, Passive 15 minutes, Total 30 minutes
- Flavor/Texture Hook: Shatter crisp crust with a tangy, malted finish
- Perfect for: Slow weekend mornings or impressive brunch hosting
- Achieving Crunch with this classic waffle recipe
- Essential Science for Better Batter
- Component Analysis of the Batter
- Ingredients for Your Waffle Quest
- Essential Gear for Crispy Results
- Step-by-Step Guide to Gold
- Troubleshooting Your Breakfast Woes
- Smart Swaps for Dietary Needs
- Storage and Zero Waste Strategy
- Toppings to Finish the Plate
- Recipe FAQs
- 📝 Recipe Card
Achieving Crunch with this classic waffle recipe
You know that specific hiss when cold batter hits a scorching waffle iron? It is the sound of breakfast potential. For years, I struggled with waffles that looked beautiful for thirty seconds but turned into limp, sad sponges the moment they hit the plate.
I tried every "hack" in the book, from double toasting to adding extra sugar, but nothing gave me that restaurant style snap until I looked at the actual gastronomy of the batter.
We are moving past the basic diner stacks today. This classic waffle recipe is about precision and understanding how lipids and starches interact under pressure. By using a combination of avocado oil for crispness and grass fed butter for flavor, we create a complex profile that is sustainable and incredibly satisfying.
We are building layers of texture here, from the initial "crunch" to the soft, aerated crumb inside.
I once made the mistake of over beating the batter because I thought "smooth" meant "better." It was a disaster tough, rubbery, and totally lacking those beautiful air pockets. Now, I treat the batter with a bit more respect, folding instead of stirring. It makes all the difference.
If you have been looking for the one recipe that actually holds its shape under a mountain of maple syrup, you have found it. Let's get into the mechanics of why this works.
Essential Science for Better Batter
To get that specific texture, we have to manipulate the proteins and starches before they even see the heat. This is not just about mixing; it is about molecular structure.
- Amylopectin Optimization: Adding cornstarch interrupts gluten formation, creating a more brittle, "shatter crisp" exterior that resists softening from steam.
- Albumen Aeration: Beating egg whites separately traps air in a protein matrix, which expands rapidly when heated, creating the "fluff" factor.
- The Maillard Boost: Coconut sugar and buttermilk proteins react at high heat to produce a deep golden hue and nutty aroma.
- Lipid Stability: Using avocado oil alongside butter ensures the fat doesn't smoke too early while providing a clean mouthfeel that doesn't feel heavy.
| Method | Time | Texture | Best For |
|---|---|---|---|
| Electric Iron | 4 minutes | Uniform crispness | Ease of use and consistency |
| Stovetop Iron | 6 minutes | Deep, rustic char | Artisanal flavor and heat control |
| Oven Finish | 3 minutes | Ultra dry exterior | Keeping large batches crispy |
When you are deciding on your method, consider that an electric iron offers automated precision, but a stovetop version allows you to feel the weight of the batter as it sets. For those who want the best of both worlds, a quick flash in a 200°F oven after the iron is the pro move for moisture removal.
1. The Cornstarch Flour Synergy
By replacing a portion of the all purpose flour with cornstarch, we lower the overall protein content of the mix. This prevents the waffles from becoming bready or tough, even if you accidentally over mix a little. The starch also absorbs less moisture than flour, which is why the exterior stays crisp for longer.
2. The "Whipped Peak" Method
Don't just dump the eggs in. Whipping the whites to soft peaks before folding them in creates a foam that acts as a physical leavening agent. This works alongside the baking powder to give you a massive lift that feels light as air.
3. Steam Control Science
Waffles often go soft because steam gets trapped between the iron and the plate. To combat this, we ensure the iron is hot enough to convert water to steam instantly. This creates a pressurized environment that sets the outer crust before the interior can become dense. This is very similar to the temperature control needed for a Fluffy Classic Buttermilk recipe to ensure even rising.
Component Analysis of the Batter
| Ingredient | Science Role | Pro Secret |
|---|---|---|
| Cornstarch | Moisture Barrier | Keeps the crust crisp for 20+ minutes |
| Buttermilk | Acidic Leavening | Reacts with baking powder for a huge rise |
| Grass fed Butter | Flavor Carrier | Provides the "short" texture in the crumb |
| Avocado Oil | High Heat Stability | Prevents sticking and adds a clean crunch |
Ingredients for Your Waffle Quest
- 1.5 cups (190g) All Purpose Flour: The structural base of our classic waffle recipe. Why this? Provides enough gluten to hold the air bubbles without being heavy.
- Substitute: Whole wheat pastry flour for a nuttier, more sustainable fiber boost.
- 0.5 cup (60g) Cornstarch: Our secret weapon for that signature crunch. Why this? It limits gluten development and dries out the exterior.
- Substitute: Potato starch or arrowroot powder works similarly for crisping.
- 1 tbsp Baking Powder: The primary chemical leavener. Why this? Creates immediate lift when it hits the liquid and heat.
- Substitute: 1 tsp baking soda + 1 tsp cream of tartar if you are in a pinch.
- 0.5 tsp Salt: The flavor enhancer. Why this? Tightens the gluten structure and balances the sweetness.
- Substitute: Sea salt or pink Himalayan salt for subtle mineral notes.
- 1 tbsp Coconut Sugar: A more sustainable sweetener with a caramel like profile. Why this? Helps with browning without making the batter overly sweet.
- Substitute: Maple sugar or standard cane sugar.
- 2 Large Eggs (separated): The structure and the air. Why this? Separating them allows for the "whipped peak" aeration technique.
- Substitute: Flax eggs (though you will lose the fluffiness of the whipped whites).
- 1.75 cups (415ml) low-fat Buttermilk: The tangy liquid gold. Why this? Its acidity tenderizes the crumb and activates the leaveners.
- Substitute: 1.75 cups milk + 1 tbsp lemon juice, let sit for 5 minutes.
- 0.25 cup (60ml) Melted Grass fed Butter (cooled): Richness and aroma. Why this? Grass fed varieties have a higher beta carotene content and better flavor.
- Substitute: Refined coconut oil for a dairy-free fat option.
- 0.25 cup (60ml) Avocado Oil: The crisp factor. Why this? It has a high smoke point and creates a thinner, crispier crust than butter alone.
- Substitute: Grapeseed oil or any neutral over high heat oil.
- 1 tsp Pure Vanilla Extract: For that classic aromatic finish. Why this? Rounds out the flavors of the grain and the butter.
- Substitute: Almond extract or a pinch of ground cinnamon.
Essential Gear for Crispy Results

You don't need a professional kitchen, but a high-quality waffle iron is non negotiable. Look for one with adjustable heat settings and deep grids the deeper the grid, the more surface area you have for that beautiful crunch.
I personally love a Belgian style iron for this recipe because the larger pockets hold more syrup and allow the whipped egg whites to really expand.
A balloon whisk and a stainless steel bowl are also vital. You want to be able to whip those egg whites by hand or with a hand mixer until they look like soft, pillowy clouds. If the bowl has even a speck of grease in it, the whites won't stiffen, so give it a quick wipe with white vinegar before you start. It’s a trick I learned from an Omas Secret to recipe that has never failed me.
step-by-step Guide to Gold
1. Dry Base
Whisk 1.5 cups All Purpose Flour, 0.5 cup Cornstarch, 1 tbsp Baking Powder, 0.5 tsp Salt, and 1 tbsp Coconut Sugar in a large bowl. Note: This ensures even distribution of the leavening agent.
2. The Wet Emulsion
In a separate medium bowl, whisk together the 1.75 cups Buttermilk, 0.25 cup Avocado Oil, and 1 tsp Vanilla. Note: Mixing liquids first prevents "clumping" later on.
3. Separate the Eggs
Carefully separate the 2 eggs, placing the yolks into the wet mixture and the whites into a clean, small bowl.
4. Beat the Whites
Whip the egg whites until soft, billowy peaks form when the whisk is lifted. Note: Stop just before they become dry or grainy.
5. Dry Component Integration
Pour the wet mixture (with yolks) into the dry base.
6. The Two Part Wet Mix
Stir the mixture gently with a spatula until just combined and slightly lumpy. Note: Over mixing here will develop too much gluten and make the waffles tough.
7. Incorporate the Fat
Whisk in the 0.25 cup Melted Grass fed Butter. Note: Adding the butter last helps it coat the flour particles for a tender crumb.
8. The Folding Technique
Gently fold the whipped egg whites into the batter using a wide spatula. Stop when no large white streaks remain. Note: We want to preserve those air bubbles!
9. The Golden Sear
Pour about 1/2 cup of batter into your preheated iron. Cook for 3-5 minutes until steam stops rising and the edges are deep brown.
10. The 2 Minute Rest
Place the finished waffles on a wire rack for 2 minutes before serving. Note: This allows the exterior to firm up and prevents the "sweat" that makes them soggy.
Troubleshooting Your Breakfast Woes
Why Your Waffles Lack Crunch
If your waffles are coming out soft, the most likely culprit is either the temperature of the iron or the moisture in the batter. If the iron isn't hot enough, the batter steams rather than sears.
| Problem | Root Cause | Solution |
|---|---|---|
| Sticking to Plates | Iron not hot enough or too much sugar | Increase preheat time and lightly brush with avocado oil |
| Limp/Soft Texture | Trapped steam | Cool on a wire rack, never stack them while hot |
| Pale/Blonde Color | Low sugar or low heat | Add a pinch more coconut sugar or increase the iron setting |
Why Your Waffles Are Heavy
Dense waffles usually mean the leavening wasn't activated or the air was knocked out of the egg whites. Treat that batter like it's a delicate souffle!
The Sogginess Trap
The biggest mistake people make is stacking waffles on a plate as they come out of the iron. This creates a steam chamber that turns your crispy masterpiece into mush in seconds.
3 Signs It’s Done
- The Steam Test: When the visible steam pouring out of the sides of the iron mostly stops, the interior is set.
- The Resistance Test: If you try to open the iron and it "tugs" back, the waffle isn't ready.
- The Aroma: You should smell the toasted coconut sugar and butter it should smell like a waffle cone.
Common Mistakes Checklist:
- ✓ Ensure the waffle iron is fully preheated for at least 5 minutes.
- ✓ Don't peek! Opening the iron too early will tear the waffle in half.
- ✓ Use room temperature buttermilk to prevent the melted butter from seizing.
- ✓ Pat your waffle iron dry if you used too much oil spray; excess oil can fry the batter rather than baking it.
- ✓ Fold the egg whites with a "cut and roll" motion, not a stir.
Smart Swaps for Dietary Needs
Adjusting this classic waffle recipe for different needs is easier than you think, as long as you keep the ratios of fat and starch consistent.
- For ½ Batch: Use 1 egg, halved measurements for all ingredients, and a smaller bowl to maintain aeration.
- For 2x Batch: Double everything but keep the baking powder at 1.75 tbsp to avoid a metallic taste. Mix in two separate bowls to prevent the batter from sitting too long and losing air.
1. The Whole Grain Twist
Swap 50% of the AP flour for spelt flour. It has a lower gluten content and a sweet, nutty flavor that complements the coconut sugar beautifully. You may need to add an extra tablespoon of buttermilk as whole grains are thirstier.
2. 100% Plant Based Swap
Use a flax egg and full fat oat milk with a teaspoon of apple cider vinegar. Replace the butter with more avocado oil. The texture will be slightly denser, but the flavor remains excellent.
Chef's Note: If you are scaling up for a crowd, keep the finished waffles in a single layer on a rack in a 200°F oven. This acts as a dehydrator, making them even crispier while you finish the rest of the batch.
Storage and Zero Waste Strategy
Storage: These keep beautifully in the fridge for up to 3 days. Store them in an airtight container with a piece of parchment paper between each layer to prevent sticking.
Freezing: This recipe is perfect for "toaster waffles." Freeze them in a single layer on a baking sheet first, then transfer to a freezer bag for up to 3 months. To reheat, just pop them in the toaster on a medium setting no thawing required!
Zero Waste: If you have leftover batter, don't toss it. Cook it off anyway and use the extra waffles the next day. I love cutting them into strips, tossing them in cinnamon sugar, and air frying them for "waffle fries." You can also crumble dry waffles to use as a unique topping for yogurt or even as a base for a sustainable bread pudding.
Toppings to Finish the Plate
While maple syrup is the gold standard, this classic waffle recipe thrives with innovative toppings. Try a dollop of Greek yogurt with a drizzle of hot honey and toasted pepitas for a high protein, textural contrast. Or, for a savory twist, top with a fried egg and a dash of smoked paprika.
The cornstarch in the batter gives it enough structural integrity to handle even the heaviest toppings without collapsing.
If you want to keep it simple, a squeeze of fresh lemon juice and a tiny dusting of powdered sugar brings out the tang of the buttermilk perfectly. Whatever you choose, serve them immediately the contrast between the hot, crispy waffle and cold toppings is part of the magic. Happy cooking!

Recipe FAQs
What is the secret to making good waffles?
Proper batter aeration and high heat. Whip egg whites separately until soft peaks form and gently fold them into the batter to incorporate air. Ensure your waffle iron is thoroughly preheated before adding batter to achieve a crisp exterior.
What is the difference between a Belgian waffle and a classic waffle?
Belgian waffles are typically thicker with deeper grids. This results in a crispier exterior and a lighter, fluffier interior compared to the denser, thinner classic waffle.
How were waffles traditionally made?
Waffles were traditionally cooked in heavy, cast iron presses over an open fire. These irons often had ornate designs, and the cooking method required careful heat management to prevent burning.
What ingredient makes waffles fluffy?
Whipped egg whites are the key to fluffy waffles. Beating the egg whites separately and then gently folding them into the batter introduces air pockets that expand during cooking, creating a light and airy texture.
Can I make waffles ahead of time?
Yes, cooked waffles can be frozen for later. Cool them completely on a wire rack, then freeze in a single layer before transferring to a freezer bag. Reheat in a toaster or oven for best results.
Why are my waffles soggy instead of crispy?
Soggy waffles are usually caused by trapped steam or insufficient heat. Ensure your waffle iron is hot enough and allow cooked waffles to cool on a wire rack, not stacked, to let steam escape. Similar texture control is vital for achieving a crisp crust on our Chocolate Chip Sourdough Scones Recipe: Crispy Baked.
What's the best way to prevent waffles from sticking?
Preheat your waffle iron thoroughly and use a light coating of oil or melted butter. A well heated iron sears the batter quickly, preventing it from adhering. If you enjoyed mastering temperature precision here, apply it to our Blackened Salmon Recipe: Pan Seared to Perfection with Homemade Spice for perfect results.
Classic Waffle Recipe

Ingredients:
Instructions:
Nutrition Facts:
| Calories | 364 calories |
|---|---|
| Protein | 7.8 g |
| Fat | 19.7 g |
| Carbs | 38.8 g |
| Fiber | 0.8 g |
| Sugar | 5.5 g |
| Sodium | 505 mg |
