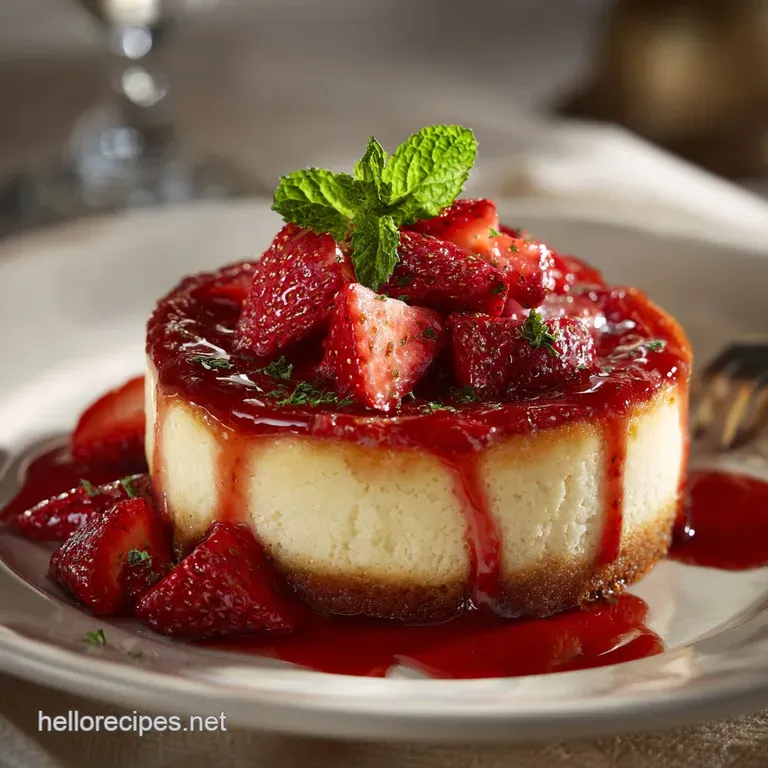
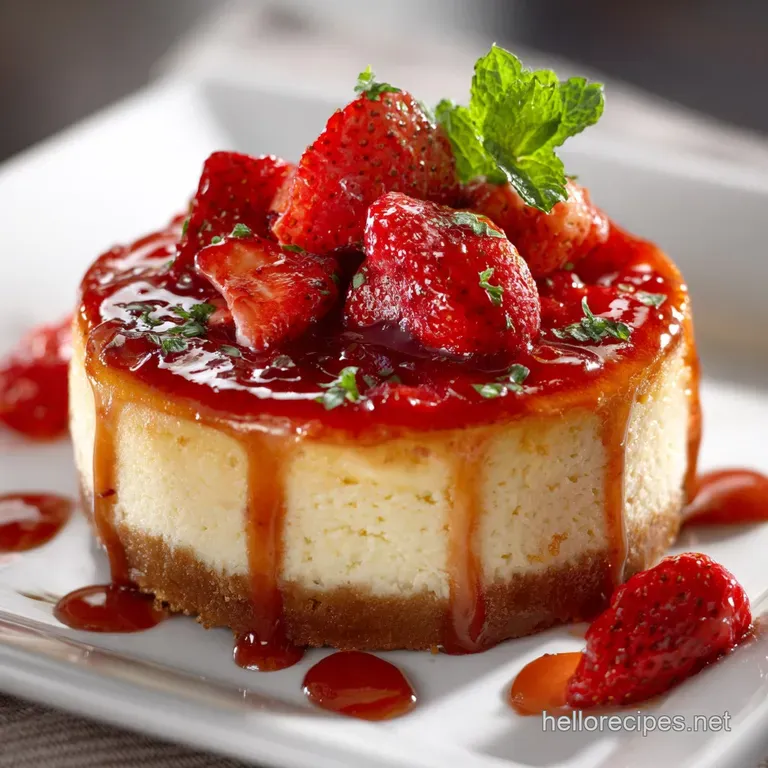
The Cracking Classic Baked Strawberry Cheesecake with Jeweltoned Topping
- Mastering the Creamy Perfection of Baked Cheesecake
- Elevating the Dessert: Our Signature Strawberry Cheesecake with Strawberry Topping
- Gathering the Trilogy: Crust, Filling, and Glaze Components
- Step-by-Step Blueprint for a Flawless Finish
- Troubleshooting and Expert Baking Insights
- Storage, Nutrition, and Variations on the Strawberry Cheesecake with Strawberry Topping
- Recipe FAQs
- 📝 Recipe Card
Mastering the Creamy Perfection of Baked Cheesecake
Okay, listen up. I love desserts, but nothing makes me feel quite as accomplished as slicing into a perfectly baked cheesecake. Not a crack in sight, edges set beautifully, and the filling? It’s dense, silky, and just melts.
We’re not talking about those sad, dry versions you get in a supermarket freezer aisle. We are achieving perfection today with this Strawberry Cheesecake with Strawberry Topping .
It requires patience yes, actual sitting and-waiting time but trust me, the reward is worth the wait.
The secret? We treat the cheesecake like the diva it is. Low heat, slow cooking, and zero sudden temperature shifts. This method stops the cheese proteins from seizing up and keeps the texture consistently creamy from top to bottom.
Elevating the Dessert: Our Signature Strawberry Cheesecake with Strawberry Topping
Why add strawberries? Because the tangy brightness of the fruit glaze cuts straight through the intense richness of the New York style filling. It’s a classic pairing for a reason, right?
I tried a lemon version once, and it was great, but give me the vibrant, jewel toned red of that glossy strawberry topping recipe any day. It just looks like a celebration.
The Difference Between Baked vs. No-Bake Styles
This is the eternal question, isn’t it? Baked cheesecake is miles ahead in texture. No-bake uses gelatin or agar to set, resulting in a lighter, sometimes mousse like texture. It’s lovely, sure, but it’s airy.
When we bake, we are achieving structural integrity through gentle heat, creating a custard like denseness. Think of the difference between a marshmallow (no-bake) and a crème brûlée (baked).
We’re going for the crème brûlée experience here rich, heavy, and satisfying.
Understanding the Essential New York Cheesecake Texture
When I say New York style, I mean three specific things: high sides, buttery crust, and a filling that holds its shape without being rubbery. It must be dense but creamy. How do we get there? Full fat dairy, absolutely zero substitution allowed here. Honestly, don't even bother with low-fat cream cheese.
It throws off the ratio of fat to water, and you end up with a chalky texture. We want velvety, smooth indulgence.
Why Patience is Your Secret Ingredient
You know how some recipes rush you? This one takes its sweet time. The baking itself is long, but the cooling is even longer. If you pull a hot cheesecake straight out of the oven and expose it to cold kitchen air, the centre, which is still liquid, contracts rapidly while the edges are already set.
Hello, massive canyon crack! So, cooling slowly in the oven, and then cooling on the counter, and then overnight in the fridge that’s not optional. It’s crucial. It gives the structure time to settle and ensures that dense, perfect slice when you finally cut it.
Gathering the Trilogy: Crust, Filling, and Glaze Components
Cheesecake is really a story in three acts: the sturdy foundation, the glorious heart, and the crowning glory. Getting these elements ready correctly is half the battle.
Essential Tools for Leak Proof Baking (Springform Pan Prep)
The water bath ( bain marie ) is the nemesis of the springform pan. Why? Because springform pans leak. End of story. I learned this the hard way when I ended up with a slightly soggy crust and an entire pan full of water.
Now, I swear by heavy duty aluminium foil the good stuff, not the flimsy kind.
A crucial note: Wrap your 9 inch pan in at least 3 layers of heavy duty foil, pressing tightly around the base and sides. Make sure the seam is well above the water line you plan to use in your roasting pan. You must create a watertight boat.
The Filling Lineup: Selecting the Right Cream Cheese and Dairy
We need 900g of full fat, brick style cream cheese. Philadelphia is my go-to, but whatever brand you use, the most important tip I can give you is this: It must be completely soft. Like, squishy soft.
If the cream cheese is cold, it won't blend smoothly with the sugar, and you’ll spend precious minutes trying to beat out the lumps, which inevitably leads to incorporating too much air. Air is the enemy! The sour cream and eggs also need to be at room temperature.
Seriously, pull them out an hour before you plan to mix.
Building the Foundation: Ideal Biscuit Choices for the Crust
I’m a huge fan of Digestives for this classic baked strawberry cheesecake . They have a neutral, slightly oaty flavour that plays well with the creaminess. If you’re stateside, Graham Crackers are the traditional choice and work beautifully too.
The trick here is thorough crushing and serious compaction.
- Crush them until they are fine crumbs. No chunky bits allowed.
- Mix them fully with the melted butter. Every crumb needs to be coated.
- When pressing into the pan, use the flat bottom of a measuring cup or glass to compact the crumbs tightly. I press them about half an inch up the side of the pan. This provides a clean border and keeps the filling contained.
Related Recipes Worth Trying
- The Glorious Lemon Blueberry Cake Recipe with Zesty Buttercream — This Lemon Blueberry Layer Cake recipe yields a light moist crumb and zesty buttercream A simple Diy Easy Recipe elevated for celebrations or afternoon tea
- The Sunday Best oven-roasted Beef Tenderloin with Rich Madeira Mushroom Sauce — Achieve perfect juicy oven-roasted Beef Tenderloin with Mushroom Sauce every time This impressive Roast Beef For Christmas Dinner features a silky Madeira...
- The Cracking NoMayo Pasta Salad Recipe with Tangy Italian Dressing — The ultimate bright and crunchy Pasta Salad perfect for summer group dinner ideas Skip the heavy mayo This easy recipe uses a zesty Italian dressing that...
step-by-step Blueprint for a Flawless Finish
Right then, let's crack on with the execution. Remember the mantra: low speed, gentle heat.
Constructing the Perfect Buttery Biscuit Base
After mixing the crust ingredients, I actually stick the pan in the freezer for 30 minutes. Why? It speeds up the chilling process and ensures the butter is solid before the filling goes in. This quick chill helps prevent the crust from becoming soggy during the bake.
Achieving the Silky Smooth Cheesecake Batter (Mixing Techniques)
This is where many people mess up and create a cracked surface. When you mix the filling, always start with the cream cheese and sugar first, beating until you can’t feel any grit of sugar left.
But once you add the eggs, you need to turn the mixer speed down to the lowest setting possible a gentle churn, almost.
Here is the exact method for avoiding air:
- Add vanilla and zest. Mix gently.
- Add sour cream. Mix until just incorporated.
- Add eggs, one at a time. Mix for 5-10 seconds after each egg, just until the yellow streak disappears. Stop immediately.
If you beat the eggs too much, you introduce air bubbles. Those bubbles rise during baking, they pop, and the structure collapses as it cools. That collapse equals a crater or a gigantic crack. Don't do it!
The Low and Slow Bake: Monitoring Temperatures and Doneness
Preheat to 160°C (325°F). Place the foil wrapped pan inside your roasting dish. Pour your perfectly smooth batter in, and then critically place the whole assembly into the oven before pouring the boiling water into the roasting pan.
Trying to transport a sloshing pan of boiling water and cheesecake batter is a recipe for disaster (and burns).
Bake for about 65 minutes. How do you know it’s done? Give the pan a gentle nudge. The outer 2 3 inches should look set and slightly puffed, but the centre the middle circle should still wobble like soft jelly. It won't look fully cooked. That’s perfect.
It will finish cooking with the residual heat.
Preparing the Fresh, Sparkling Strawberry Topping
We need this topping to be thick and glossy, not watery. The cornstarch slurry is our hero here.
You cook down half the strawberries with sugar and lemon juice until they are jammy. Then, you stir in the cornstarch mixed with cold water (the slurry). It will look cloudy, but once it boils for a minute, it becomes transparent and thick.
After it cools, fold in the remaining fresh, uncooked strawberries for texture and brightness. This blend of cooked and fresh makes the perfect strawberry glaze .
Troubleshooting and Expert Baking Insights
If you’ve followed the steps, you should have a gorgeous Strawberry Cheesecake with Strawberry Topping . But things happen! Here are my personal fixes.
| Issue | Likely Cause | Quick Fix/Prevention |
|---|---|---|
| Cracks Appear | Overmixing the eggs (too much air) or drastic temp changes during cooling. | Use the lowest speed; never skip the slow oven cool down. |
| Center Sinks | Undercooked initially, or center was too cold when baked. | Ensure all ingredients are room temp; bake until the centre wobbles just slightly. |
| Soggy Crust | Foil wrap leaked during water bath. | Use 3+ layers of heavy duty foil, seal tightly up the sides. |
Storage, Nutrition, and Variations on the Strawberry Cheesecake with Strawberry Topping
This dessert is rich, dense, and fantastic, but you’ll probably need to store leftovers. And trust me, you want to store them properly.
Preventing Cracking: Cooling the Cheesecake Safely
I mentioned the slow cool down in the turned off oven (door propped open). Once that hour is up, pull the pan out of the water bath and take off the foil immediately (to prevent moisture buildup).
While it cools completely on a wire rack, take a thin, sharp knife and run it gently around the edge of the cake inside the pan. This releases the cake from the pan walls. As the cheesecake cools and contracts, it pulls inward, and if it sticks to the edge, it will rip the surface right in the middle.
This simple knife trick solves that 90% of the time.
Freezing and Refrigerating: Maximum Storage Guidelines
Cheesecake is excellent for freezing! Just make sure you freeze it before adding the strawberry topping. Wrap the cooled, unmoulded cheesecake tightly in plastic wrap, then a layer of foil. It keeps for up to 2 months. Thaw overnight in the fridge.
If just refrigerating, it’s good for 5 days. Always keep the topping separate and only pour it over the cake right before serving.
Troubleshooting Sunken Centers and Dry Edges
If your centre sinks dramatically, you probably incorporated too much air when mixing the batter. Dry edges mean the heat was too high or the water bath wasn't effective (or you didn't use one!). The water bath provides steam, keeping the edges soft.
If you had dry edges, next time, ensure the water in the bath is boiling when you pour it in, and maybe add a little extra water halfway through the bake if you notice it evaporating quickly.
Flavor Swaps: Zest and Spice Variations for the Filling
If you are looking to jazz up your next cheesecake with strawberries bake, there are some easy swaps for the filling:
- Lime Zest: Use lime zest instead of lemon, and maybe add a tiny splash of lime juice to the filling.
- Warming Spices: Add 1/2 teaspoon of freshly ground nutmeg and a pinch of cinnamon to the cream cheese for a winter warmer feel.
- Amaretto Kick: Substitute 1 tablespoon of vanilla extract with Amaretto liqueur for a subtle almond background.
Go bake something amazing, you deserve it!

Recipe FAQs
I’m aiming for a silky smooth filling; what’s the real secret to avoiding lumps in the cream cheese?
The absolute key is room temperature ensure your cream cheese, eggs, and sour cream are properly softened before mixing. This allows the ingredients to combine effortlessly without overworking the batter, which is essential to keeping that glorious, lump free texture.
Why does my cheesecake always crack, and how can I stop it from looking like the pavement after a heatwave?
Cracks usually happen due to a drastic change in temperature! To prevent them, you must use the water bath (bain marie) for moist, even cooking, and crucially, leave the cake to cool slowly in the turned off oven for a full hour that slow cool down is the crack prevention magic.
How long will this luscious Strawberry Cheesecake with Strawberry Topping keep in the fridge once it's finished?
Once fully set, this rich pudding keeps brilliantly, covered, in the refrigerator for up to 4 or 5 days; however, for the freshest taste, it is best to store the cheesecake and the jewel toned strawberry topping separately until just before you intend to serve.
I fancy a change; can I use a different biscuit base or switch out the fresh fruit topping?
Absolutely! For a richer base, swap the Digestives for Oreos (creme removed) or buttery shortbread. If strawberries aren't your jam, a classic poached rhubarb and ginger compote makes a stunning, slightly tart alternative topping.
I'm making this for a big celebration; can I skip the water bath or speed up the chilling time?
It’s tempting, but skipping the water bath risks a dry cake and definite cracking it’s worth the faff! While you need a minimum of 4 hours, chilling the cheesecake overnight is highly recommended; rushing this stage will result in a soft, unset filling.
Can I freeze leftover slices of the baked cheesecake?
Yes, provided the slices haven't been topped yet! Wrap individual, plain slices tightly in cling film and then foil, and they will hold their flavour and texture for up to two months; just remember to thaw them overnight in the fridge.
Classic Baked Strawberry Cheesecake Recipe

Ingredients:
Instructions:
Nutrition Facts:
| Calories | 878 kcal |
|---|---|
| Protein | 5.0 g |
| Fat | 15.7 g |
| Carbs | 41.5 g |
| Fiber | 1.8 g |
| Sugar | 0.3 g |
| Sodium | 137 mg |
