Baked Mac and Cheese: the Ultimate Ultra-Creamy Comfort Classic
- Elevating the Classic: Why This Recipe Is Your New Mac & Cheese Standard
- The Essential Pantry Checklist for Rich Baked Mac and Cheese
- Step and by-Step Culinary Guide: Constructing the Ultimate Comfort Casserole
- Optimization and Serving Secrets for Your Signature Baked Mac and Cheese Dish
- Recipe FAQs
- 📝 Recipe Card
Elevating the Classic: Why This Recipe Is Your New Mac & Cheese Standard
Okay, we need to talk about baked mac and cheese. For years, I struggled. My sauce would seize up, or the finished casserole would emerge from the oven looking suspiciously dry, the consistency of which only served to make me sad. You know the kind, right? The corners are rock hard, and the middle is just oily sadness.
Forget all that. We are making a proper, creamy Baked Mac and Cheese Casserole today. This isn't just a basic stovetop job chucked into a dish. We are focusing on chemistry. We're building a béchamel so robust and silky that it holds up magnificently under heat.
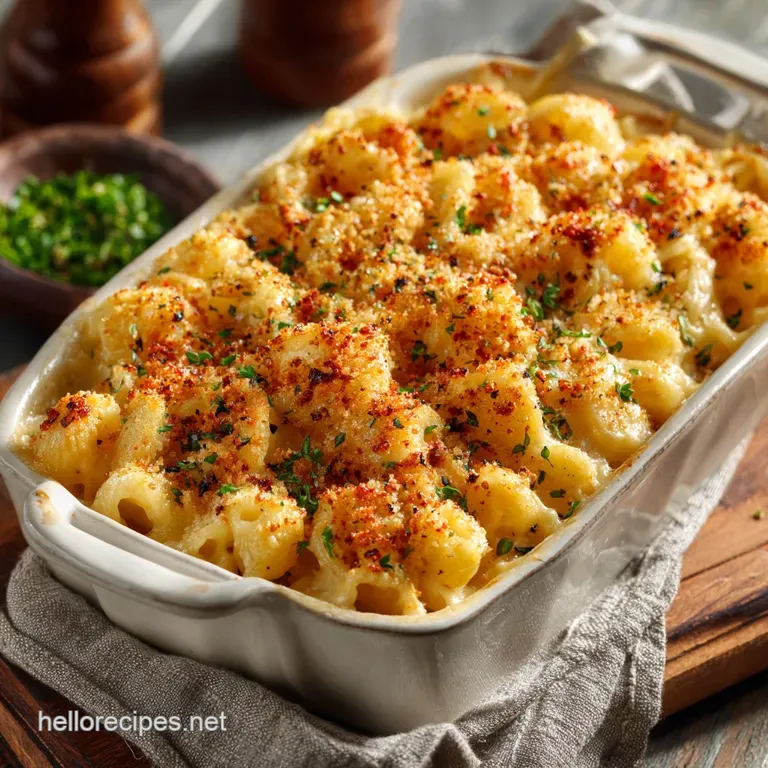
When this comes out of the oven, it will be bubbling, the sauce will be clinging beautifully to every piece of pasta, and the top will crunch like autumn leaves. It’s brilliant. It just works.
The Creamy Difference: Mastering the Béchamel Base
The secret to preventing dryness is a bombproof béchamel, which is just a fancy French way of saying "white sauce." This is where the whole milk, flour, and butter come into play. A good béchamel is your insurance policy.
If you skimp on the butter and flour ratio in the roux (which is the cooked butter and flour base), your sauce won’t thicken correctly, and it will eventually separate and weep fat in the oven. Nobody wants a weeping casserole.
The trick? Warming your milk before adding it. It sounds fussy, but trust me, it prevents lumps and keeps the thickening process moving swiftly and smoothly. Once that base is perfect, we hit it with a tiny bit of Dijon mustard and a whisper of freshly grated nutmeg.
Those two ingredients don't make the mac taste like mustard or Christmas; they just deepen the savoury profile and balance the overwhelming richness of the cheese.
A Study in Texture: Achieving the Perfect Crunchy Panko Top
Listen, if you’re using those finely ground, dusty breadcrumbs for the topping, stop it. Just stop. They burn easily and they turn into a sad, thin paste once the sauce bubbles up. We are using Panko breadcrumbs. Period.
Panko is the key to that audible crunch that makes people close their eyes and sigh happily. But simply sprinkling them on top isn’t enough. You have to toss them with melted butter first. Why?
Because the butter helps them toast evenly, rather than letting the dry crumbs absorb moisture from the air and the oven. Adding a little smoked paprika to the buttered Panko gives the topping a gorgeous amber color and a smoky aroma that signals true comfort food.
This Baked Mac and Cheese with Bread Crumbs approach is simply unbeatable.
The Essential Pantry Checklist for Rich Baked Mac and Cheese
Right then, let's look at the goods we need. We're aiming for richness and depth here, so this is not the moment for skim milk or low and fat anything.
The Signature Blend: Choosing the Best Cheeses for Melt and Flavor
This is non and negotiable: You must grate your own cheese. I know, your arm will hurt, but if you buy pre and shredded cheese, it is coated in cellulose or potato starch to prevent clumping. That starch prevents smooth melting and is the number one cause of grainy, sandy sauce. I learned that the hard way.
For the ultimate melt and flavor profile, you need a dynamic duo:
| Cheese Role | Example Cheese | Why It Works |
|---|---|---|
| Sharpness/Depth | Sharp Mature Cheddar | Essential robust, tangy flavor. |
| Melt/Stretch | Gruyère (or Monterey Jack) | High fat content creates an incredibly creamy, smooth texture. |
And yes, a little bit of finely grated Parmesan for that salty, umami kick is essential to round out the Baked Mac and Cheese Ingredients .
Beyond the Elbow: Selecting the Right Pasta Shape
Elbow macaroni is classic, sure. But is it the best ? Nope.
The best pasta shapes for this Baked Mac and Cheese Recipe have ridges or crevices that act like little sauce reservoirs. Think about shapes like Cavatappi (those corkscrew tubes), medium shells, or Campanelle. These shapes grab and hold the cheese sauce, ensuring maximum flavor in every single bite.
Whatever you choose, remember that size matters. Keep it short.
Tools of the Trade: Required Equipment for a Seamless Bake
Honestly, you don't need much. But there are two tools that streamline this process dramatically:
- A Box Grater: See the cheese section above. It's the most important tool you have today.
- A Heavy and Bottomed Saucepan or Dutch Oven: This is crucial for your béchamel. The heavy bottom distributes heat evenly, preventing the roux from burning and sticking, which is the fast track to a ruined sauce.
Related Recipes Worth Trying
- Pioneer Woman Mac and Cheese: Ultra Creamy Baked Casserole — Our best ever Pioneer Woman Mac and Cheese recipe uses evaporated milk for a flawless, creamy texture that wont separate. Get the secret to this perfect,...
- Tinis Viral TikTok Mac and Cheese: Silky Smooth Ultimate Baked Recipe — Tinis Viral TikTok Mac and Cheese delivers maximum comfort. Achieve the Ultimate Baked Mac and Cheese with our secret technique (evaporated milk cream...
- Million Dollar Bacon Crostini The Ultimate Candied Bacon Appetizer — Million Dollar Bacon Crostini is the epic party finger food you need Sticky spicy sweet bacon bites paired with honeywhipped goat cheese create a...
Step and by-Step Culinary Guide: Constructing the Ultimate Comfort Casserole
Phase One: Building the Robust Cheese Sauce Foundation
Start by boiling your pasta, but remember my golden rule: undercook it by two minutes . If the package says 8 minutes, cook for 6. It should be unpleasantly firm. Drain it and set it aside.
Next, the sauce. Melt the butter in your heavy pan, whisk in the flour, and cook for 90 seconds to remove that raw flour taste. That is your roux. Now, start whisking in the warm milk very slowly. Add maybe half a cup at a time, whisking until the mixture is smooth and lump and free before adding the next splash.
Once all the milk is in, simmer gently until the sauce coats the back of a spoon.
Remove the pan from the heat. This is non and negotiable. Stir in your mustard, nutmeg, and seasonings. Then, add your freshly grated Cheddar, Gruyère, and Parmesan. Stir gently until the sauce is glossy, perfectly smooth, and incredibly creamy. Taste and season again.
The sauce must taste slightly oversalted now, because the pasta will absorb the seasoning when it bakes.
Phase Two: The Assembly and Preparing for the Oven
Now, dump your aggressively al dente pasta into that glorious sauce. Stir it until every tube is drowning in cheesy goodness. Transfer the whole lot into your greased 9x13 baking dish. Pat it down gently.
For the topping, combine the Panko, melted butter, and paprika in a small bowl. Toss it with a fork. Sprinkle it evenly over the top, making sure you cover the entire surface right up to the edges. This guarantees full and casserole crunch.
Phase Three: Achieving Golden Perfection During the Bake
Set the oven to 375°F (190°C). Slide the dish in and bake for about 20 minutes.
What are we looking for?
- The cheese sauce should be visibly bubbling vigorously around the edges of the dish.
- The Panko crust must be deeply golden brown.
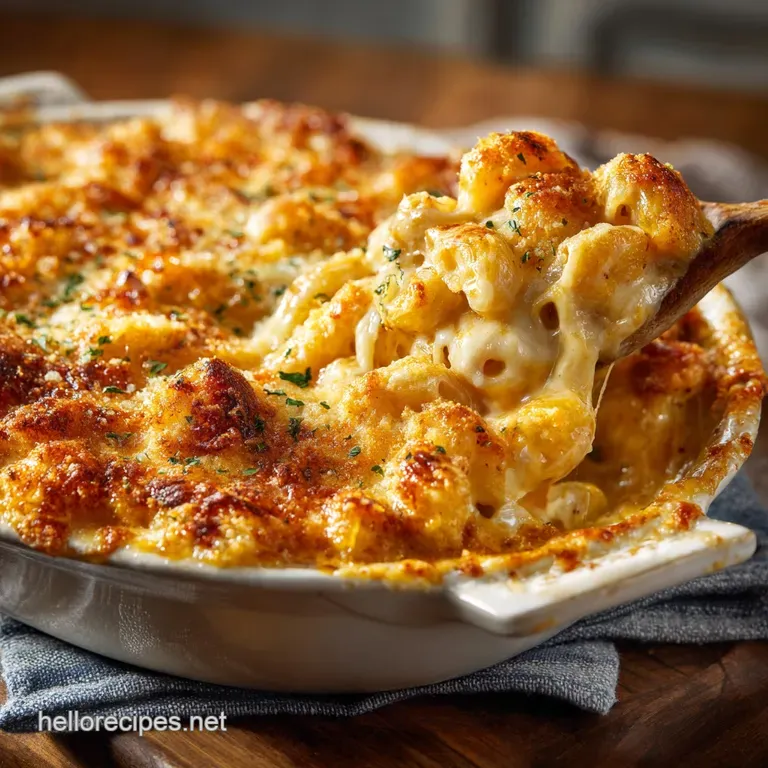
As soon as those things happen, pull it out! Don't let it go too long, or the sauce will start to dry up. Crucially, let the Baked Mac and Cheese rest for 5 to 10 minutes before serving.
That resting period allows the sauce to redistribute and set up, ensuring that when you scoop it out, it’s not watery.
Optimization and Serving Secrets for Your Signature Baked Mac and Cheese Dish
Troubleshooting Common Mac & Cheese Mistakes (Grainy Sauce or Dry Finish)
I’ve made every mistake in the book. Here are the fixes:
Crucial Warning: If your sauce turns grainy, it means the cheese was added while the liquid was too hot, causing the proteins to separate. Remove the pan from the heat before adding the cheese, and if necessary, let the sauce cool slightly first.
Using an Easy Mac & Cheese Recipe often means following this single rule perfectly. This recipe also proves you don't need eggs to achieve perfect richness, making it a wonderful Mac and Cheese Recipe No Eggs .
| Problem | Likely Cause | Solution |
|---|---|---|
| Dry Casserole | Pasta was cooked too long before baking. | Undercook the pasta significantly ( 2 minutes under directions). |
| Oily Separation | Used too much pre and shredded cheese, or sauce simmered too long after cheese was added. | Grate cheese fresh and incorporate off the heat. |
Make and Ahead Magic: Storing and Reheating This Casserole
This Baked Mac and Cheese is fantastic for making ahead. Assemble the entire casserole (up through Phase Two, step 10), but do not add the Panko topping . Cover the dish tightly with foil and refrigerate for up to 24 hours.
When ready to bake, preheat the oven as usual, but let the dish sit on the counter for 30 minutes while the oven warms up. Add the Panko topping right before it goes into the oven.
You may need to add 5 to 10 minutes to the total baking time since it’s starting cold. Leftovers reheat surprisingly well in the microwave, although the crust won't be as crisp.
Next and Level Pairings: What to Serve Alongside This Rich Dish
Because this casserole is so dense and satisfying, you need something acidic and fresh to cut through that richness. Think balance.
- A tangy, vinegary coleslaw (it’s a signature Southern pairing, great for a Baked Mac and Cheese Southern Style vibe).
- A simple side salad tossed with a sharp vinaigrette (lemon and red wine vinegar are your friends here).
- A classic protein partner: Pulled pork or barbecue brisket.
Creative Add and Ins: Flavor Variations and Protein Boosts
Once you master the base sauce, the world is your oyster.
- Evaporated Milk Swap: For an even richer, slightly tangy sauce, substitute 1 cup (240ml) of the whole milk with evaporated milk. It just adds that extra layer of silkiness. (Hello, Baked Mac and Cheese with Evaporated Milk perfection!)
- Protein Boost: Stir in shredded rotisserie chicken, crumbled crispy bacon, or diced smoked ham when you combine the sauce and the pasta.
- Spice Kick: Add a teaspoon of hot sauce (like Cholula or Frank’s) to the béchamel along with the mustard. If you like heat, mix in finely diced pickled jalapeños before baking.
- Garlic Butter Crust: Replace the smoked paprika in the Panko topping with 1 teaspoon of garlic powder.

Recipe FAQs
Help! My cheese sauce went all grainy and separated. What went wrong?
This common mishap is usually down to overheating the cheese! Remember the golden rule: remove the béchamel from the heat immediately before adding the grated cheese, as high temperatures cause the dairy proteins to seize up, resulting in a grainy, rubbish texture.
I’m prepping for a Sunday roast. Can I assemble this ahead of time and just bake it later?
Absolutely, you can! Prepare the entire dish right up until the topping stage, cover it tightly, and chill for up to 24 hours; just ensure you let it sit out for 30 minutes before baking, or add an extra 5 10 minutes to the bake time if going straight from the fridge.
I haven't got Gruyère to hand. What's the best cheese to substitute for that beautiful melt?
Not to worry! A good quality Monterey Jack or Fontina will provide a similar stretch and melt, but if you want to keep the flavour punch high, look for another nutty, semi hard cheese like Emmental or even a little extra Mature Cheddar.
My finished Baked Mac and Cheese ended up a bit dry and stodgy. How can I guarantee a creamy result?
The key to a lush, creamy texture is undercooking the macaroni significantly it must be very al dente! The pasta soaks up a surprising amount of liquid during baking, so if the mixture looks slightly runnier than you think you need before baking, you've probably nailed it.
What's the best way to store and reheat any leftovers, since this recipe makes loads?
Store covered leftovers in the fridge for up to three days; for reheating, add a generous splash of milk or single cream to your serving portion before popping it in the microwave or oven (covered with foil) to restore that original, glorious creamy consistency.
Classic Baked Mac And Cheese Casserole

Ingredients:
Instructions:
Nutrition Facts:
| Calories | 1495 kcal |
|---|---|
| Protein | 56.4 g |
| Fat | 64.7 g |
| Carbs | 148.4 g |
