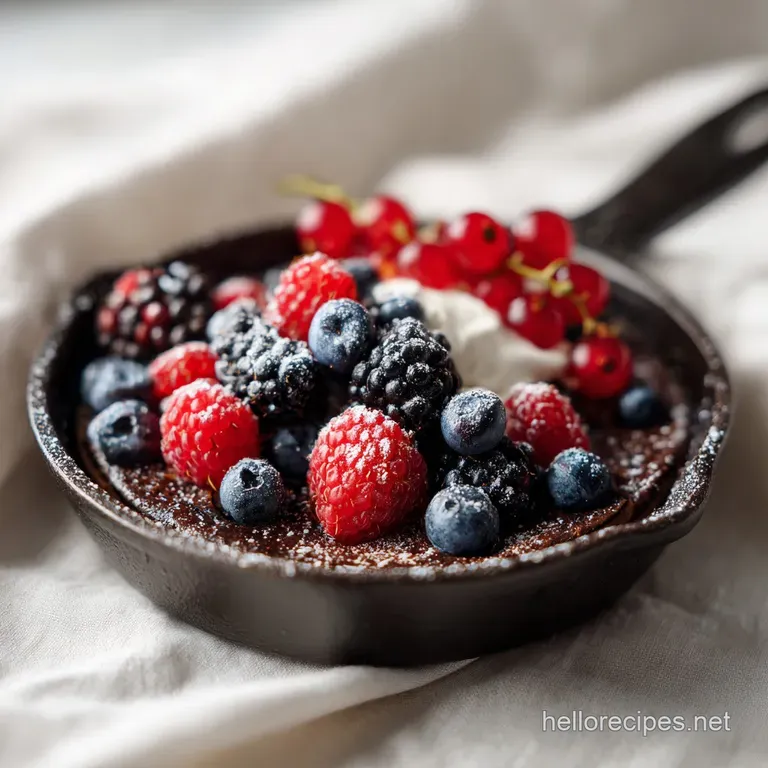
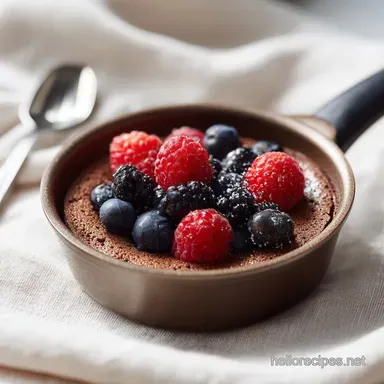
Dessert in 1 Pan with Chocolate and Berries
- Time: Active 20 mins, Passive 15 mins, Total 35 mins
- Flavor/Texture Hook: Silky dark chocolate ganache meets a shattering cookie crust with tart, bursting berries.
- Perfect for: Impressing guests at a dinner party or a fast weekend treat that feels high end.
- Dessert in 1 Pan with Chocolate and Berries
- The Science of Why This Ganache Works
- Understanding the Component Analysis of Your Ingredients
- Essential Elements for Your Chocolate Berry Tray
- Selecting the Gastronomy Tools You Truly Need
- Step-by-Step Guide to Your Chocolate Masterpiece
- Solving Common Issues for a Silky Finish
- Innovative Variations for Every Palate and Season
- Preserving Freshness and Reducing Kitchen Food Waste
- Modern Plating Techniques for the Final Reveal
- Recipe FAQs
- 📝 Recipe Card
Dessert in 1 Pan with Chocolate and Berries
The smell of warm, toasted chocolate cookies always takes me back to my first apartment, where my kitchen was the size of a closet and my only real tool was a single battered tart pan.
I remember the exact moment the petrichor of a summer rainstorm drifted through the window, mixing with the heady, earthy aroma of melting dark chocolate on my stove. It was a simple Tuesday, but that scent sharp, sweet, and intensely cocoa rich turned a boring evening into something special.
This recipe delivers an easy and delicious dessert in 1 pan with chocolate and berries. We've all been there: you want a show stopping finish for a meal, but you don't want to spend four hours washing every bowl in the house.
I made a lot of mistakes in those early days, like over boiling the cream or using cheap chocolate that turned oily, but those failures led me to this foolproof method. It's essentially a study in gastronomy simplified for the home cook who values both flavor and sanity.
You're going to love how the "shatter" of the dark crust contrasts with the velvety ganache. By using a single pan, we keep the heat distribution consistent and the cleanup non existent. We’re going for a mosaic look here, where the berries aren't just a garnish but a structural part of the experience.
It’s innovative, sustainable for a busy lifestyle, and honestly, just plain fun to put together. Let's crack on and get into the "how" behind the magic.
The Science of Why This Ganache Works
Understanding the technology of a perfect emulsion is what separates a grainy chocolate mess from a professional grade tart. When we combine heavy cream with high percentage cacao, we are creating a stable suspension of fat and water.
- Emulsion Stability: The 36% fat content in the heavy cream acts as a bridge, surrounding the cocoa butter particles to prevent them from separating into an oily layer.
- Crystallization Control: Adding a touch of espresso powder doesn't just add flavor; it contains compounds that can subtly influence how the chocolate crystals reform as they cool.
- Hygroscopic Balance: The sea salt in the crust does more than season; it draws out the aromatic volatiles in the chocolate, making the cocoa taste "darker" than it actually is.
Achieving the Perfect Emulsion
The secret to that glossy, mirror like finish is avoiding the introduction of too much air. When you stir your warm cream into the chopped chocolate, use a small, circular motion starting from the center. If you whisk too vigorously, you'll create bubbles that ruin the silky texture.
We want a dense, luxurious mouthfeel that coats the palate without being heavy.
Engineering a Shattering Crust
To get that satisfying snap, we rely on the high sugar content of the sandwich cookies. As the butter and crushed cookies bake for 15 minutes, the sugar undergoes a light caramelization, creating a rigid structure.
It's like building a foundation of edible glass that holds up the dense weight of the ganache without getting soggy from the berry juices.
| Prep Aspect | Fast Method | Classic Tart | Resulting Texture |
|---|---|---|---|
| Crust Base | Crushed cookies | Chilled pastry dough | Cookies are crispier and faster |
| Filling Tech | Hot cream pour | Tempering egg yolks | Ganache is silkier and lighter |
| Setting Time | 2 hours | 4-6 hours | Fast method is weekend ready |
The fast method is my go to because it skips the finicky step of blind baking a traditional pastry with pie weights. By leaning into the cookie base technology, you get a more consistent crunch every single time.
Understanding the Component Analysis of Your Ingredients
Before we start, let's look at why these specific elements matter. Choosing the right chocolate is a matter of sustainable gastronomy look for 60-70% cacao that is ethically sourced. The higher the quality, the more complex the berry notes will be.
| Ingredient | Science Role | Pro Secret |
|---|---|---|
| Dark Chocolate (450g) | Primary structural fat | Use 60-70% for the best "snap" when chilled |
| Heavy Cream (350ml) | Emulsifying liquid | Ensure it's 36% fat for a stable, velvety set |
| Espresso Powder (0.5 tsp) | Flavor enhancer | It amplifies the earthy notes of the cocoa |
| Fresh Raspberries (150g) | Acidic contrast | Pat them bone dry to prevent juice bleeding |
Essential Elements for Your Chocolate Berry Tray
When you're shopping, don't just grab any chocolate. The 60-70% range is the sweet spot; any darker and it becomes too brittle, any lighter and it won't set firmly enough for clean slices.
- 300g chocolate sandwich cookies: Finely crushed. Why this? The filling acts as a built in binder for the melted butter.
- Substitute: 300g graham crackers plus 2 tbsp cocoa powder.
- 115g unsalted butter: Melted. Why this? It provides the fat needed to solidify the crumb base.
- Substitute: 115g refined coconut oil for a subtle tropical note.
- 0.5 tsp sea salt: Fine grain.
- Substitute: Kosher salt (use 1 tsp).
- 450g dark chocolate (60-70% cacao): Finely chopped. Why this? Smaller pieces melt evenly without scorching the cream.
- Substitute: high-quality dark chocolate chips (bittersweet).
- 350ml heavy cream (36% fat): Fresh.
- Substitute: Full fat coconut milk (canned) for a dairy-free version.
- 1 tsp vanilla bean paste: For those beautiful black specks.
- Substitute: 1 tsp pure vanilla extract.
- 0.5 tsp espresso powder: The chocolate's best friend.
- Substitute: 1 tsp very strong brewed coffee.
- 150g fresh raspberries: Tart and bright.
- 100g fresh blueberries: Sweet and firm.
- 100g fresh blackberries: Deep and complex.
- Fresh mint leaves: For that final pop of green.
Selecting the Gastronomy Tools You Truly Need

You don't need a pantry full of gadgets, but a few specific items make this much easier. I prefer a 9 inch tart pan with a removable bottom, but a standard springform pan or even a 9x9 baking dish works perfectly if you want to serve it as bars.
- Food Processor: Necessary for getting the cookies into a fine, sand like texture. If you don't have one, a heavy rolling pin and a freezer bag work too.
- Heavy Bottomed Saucepan: Crucial for heating the cream. Thin pans have hot spots that can scald the dairy, which ruins the aroma.
- Heat Proof Glass Bowl: For the chocolate. Glass retains heat gently, helping the melting process along without aggressive temperature spikes.
step-by-step Guide to Your Chocolate Masterpiece
Right then, let's get into the assembly. The key here is patience during the setting phase. If you try to cut this too early, you'll have a delicious chocolate puddle instead of a clean slice.
Constructing the Foundation
- Preheat your oven to 350°F (180°C). Note: A properly calibrated oven ensures the crust sets without burning.
- Pulse the 300g chocolate sandwich cookies in a food processor until they look like fine soil.
- Stir in the 115g melted butter and 0.5 tsp sea salt until the mixture feels like wet sand.
- Press the mixture into your 9 inch pan, moving from the center up to the edges. Press firmly until the base is compacted and even.
- Bake the crust for 15 minutes. Check for a deep, toasty cocoa aroma. Note: This heat sets the sugar, preventing a crumbly mess later.
- Let the crust cool completely on a wire rack before adding the filling.
Melting the Silk Filling
- Place the 450g chopped dark chocolate in a glass bowl with the 0.5 tsp espresso powder and 1 tsp vanilla bean paste.
- Heat the 350ml heavy cream in your saucepan over medium heat until small bubbles form around the edges. Do not let it reach a rolling boil.
- Pour the hot cream over the chocolate and let it sit undisturbed for 5 minutes. Note: This allows the heat to penetrate the cocoa solids evenly.
- Whisk gently in small circles from the center outward until the mixture is glossy and uniform.
Creating the Berry Mosaic
- Pour the ganache into the cooled crust, smoothing it out with a spatula.
- Arrange the 150g raspberries, 100g blueberries, and 100g blackberries on top. I like to start with the larger berries and fill the gaps with the smaller ones for that "Multiple Desserts One Tray" aesthetic.
- Chill in the refrigerator for at least 2 hours (preferably 4) until the center is firm to a light touch.
- Garnish with fresh mint and a tiny sprinkle of sea salt before serving.
Solving Common Issues for a Silky Finish
Even with a simple recipe, things can go sideways. I remember my third attempt at this I was in a rush and didn't dry my berries. The juice bled into the chocolate, and while it tasted fine, it looked like a watercolor painting gone wrong.
Fixing a Grainy Ganache
If your filling looks curdled or broken, it’s usually because the cream was too hot or the chocolate wasn't chopped fine enough. To fix a broken emulsion, you can whisk in a tablespoon of room temperature cream very slowly. This helps re establish the bond between the fats and liquids.
Preventing a Crumbly Base
A base that falls apart usually lacks compression. When you're pressing the crumbs into the pan, use the bottom of a flat measuring cup to really pack it in. The tighter the pack, the cleaner the "shatter" when you bite into it.
| Problem | Root Cause | Solution |
|---|---|---|
| Ganache won't set | Too much liquid or low-fat cream | Use 36% fat cream and exact 450g chocolate |
| Oily surface | Cream was boiling/too hot | Heat cream only until simmering (165°F) |
| Soggy crust | Fruit was wet or ganache was too warm | Pat berries dry; let ganache cool 5 mins before pouring |
Similar to the technique used in The Moist Chocolate recipe, maintaining the right temperature for your dairy is the most important factor for success.
Common Mistakes Checklist:
- ✓ Pat the berries completely dry with a paper towel (prevents bleeding).
- ✓ Chop the chocolate into shards no larger than a pea for even melting.
- ✓ Allow the crust to cool fully; a warm crust will absorb the ganache and turn mushy.
- ✓ Use a sharp, hot knife for slicing (run it under hot water, then dry it).
Innovative Variations for Every Palate and Season
If you're feeling adventurous, this recipe is a fantastic canvas. For a winter version, I sometimes swap the berries for pomegranate arils and a drizzle of salted caramel. If you're looking for something lighter, similar to a Strawberry Layer Cake recipe, you can fold a bit of whipped mascarpone into the ganache once it has cooled slightly.
Mastering White Chocolate Variations
White chocolate is much more temperamental because it lacks cocoa solids. If you swap the dark chocolate for white, you must reduce the heavy cream to 200ml. White chocolate has a higher fat to solid ratio and needs less liquid to stay firm. It pairs beautifully with just raspberries and a bit of lemon zest.
Adapting for dairy-free Diets
For my vegan friends, I use a high-quality 70% dark chocolate (which is often naturally dairy-free) and swap the heavy cream for full fat canned coconut milk. The science remains the same, but you'll get a lovely, subtle tropical aroma that complements the blackberries perfectly.
Decision Shortcut
- If you want a deeper flavor, add a pinch of smoked paprika to the crust.
- If you want a cleaner cut, freeze the tart for 20 minutes before slicing.
- If you want a sweeter finish, use milk chocolate but reduce the sugar in the crust.
Preserving Freshness and Reducing Kitchen Food Waste
Sustainable cooking means making sure nothing goes to waste. If you have leftover cookie crumbs, don't toss them! They are incredible sprinkled over morning yogurt or used as a base for a quick Safe Brown Butter recipe for a midnight snack.
- Fridge: Store the tart in an airtight container for up to 4 days. The berries will begin to soften after day 2, but the chocolate remains perfect.
- Freezer: You can freeze the tart (without the berries) for up to 2 months. Thaw it in the fridge overnight and add fresh berries just before serving.
- Zero Waste Tip: If your berries are slightly overripe, macerate them with a teaspoon of sugar and a splash of balsamic vinegar. They won't look as pretty on top, but they'll taste like a concentrated explosion of summer.
Modern Plating Techniques for the Final Reveal
When it comes to the final reveal, think like a modern chef. Don't just plunk the berries on top; think about color and height. I like to leave some raspberries whole and tear others in half to reveal their hollow interiors.
A final dusting of cocoa powder or a few flakes of Maldon sea salt can add that "gastronomy" touch that makes people think you've been in the kitchen all day. This recipe is your secret weapon it's fast, it's elegant, and it's proof that you don't need a million pans to create something truly memorable.
Trust me, once you smell that ganache hitting the cool berries, you'll be making this on repeat. Enjoy every velvety bite!

Recipe FAQs
Can I use frozen berries instead of fresh ones?
No, stick with fresh. Frozen berries release excessive moisture during thawing and baking, which can thin the ganache layer and cause a soggy crust.
How to ensure the chocolate ganache sets firmly enough to slice cleanly?
Use a ratio of 1.5 parts chocolate to 1 part heavy cream by weight. Ensure your cream is heated just until simmering and pour it over finely chopped chocolate.
Is it true that the crust must be fully cooled before adding the warm ganache?
Yes, the crust must be completely cooled. Pouring warm filling onto a warm base transfers heat, preventing the chocolate fats from setting properly, leading to a soft, oily layer.
What is the secret to getting that shiny, mirror like finish on the chocolate?
Whisk gently, starting slowly from the center. Vigorous stirring incorporates air bubbles, which scatter light and dull the surface; slow incorporation achieves a stable emulsion.
How to quickly chill the dessert if I need it ready faster than 2 hours?
Place the pan in the freezer for 20 minutes, then move it to the refrigerator. This accelerates the initial set of the crust and chocolate fats without freezing the mixture solid.
Can I substitute the cookie crust with a standard shortbread base?
Yes, you can substitute, but adjust the baking time. If using shortbread, you should blind bake it for 10 minutes before cooling, as it lacks the stabilizing sugars found in sandwich cookies.
What can I use instead of heavy cream for a dairy-free version?
Use full fat canned coconut milk, ensuring you use only the solid cream layer. If you master the stable emulsion technique here, the same principles apply when using coconut fat to achieve that velvety texture.
Chocolate Berry Pan Dessert
Ingredients:
Instructions:
Nutrition Facts:
| Calories | 382 kcal |
|---|---|
| Protein | 3.7g |
| Fat | 27.4g |
| Carbs | 31.8g |
| Fiber | 2.2g |
| Sugar | 20.1g |
| Sodium | 94mg |
