Colorful Funfetti Cake Pops: a Celebration of Flavor and Fun!
Let’s look into Into the Colorful World of Funfetti Cake Pops!
Ever had one of those days where you just need a little pop of happiness? i mean, we all have those moments, right? picture this: it's a sunny saturday afternoon, you’re lounging around with your buddies, and someone pulls out a box of funfetti cake pops .
Suddenly, it feels like a birthday party, and you’re surrounded by laughter and joy! trust me when i say, these best 7 funfetti cake pops with cake pop holder will do just that they’re all about celebration, color, and pure fun!
The Magic Behind Funfetti Cake Pops
So, where did these little bites of joy come from? funfetti cakes burst onto the party scene in the ‘80s, thanks to a certain cake mix brand that just knew how to bring the rainbow!
Fast forward to today, and these delightful birthday cake pops are all the rage for parties, baby showers, or even just a casual get-together.
I mean, who wouldn’t want to enjoy these colorful cake pops with their friends?
Making them is super simple! you’ll need about an hour to whip them up, plus a little chill time for those cake pops to turn firm.
You don’t need to be a pro baker seriously, even if the only thing you’ve baked is a frozen pizza, you can rock this recipe! and can i just mention? they’re budget friendly too! with about $10 worth of ingredients, you can yield 20 fun-sized treats.
Why You’ll Love Funfetti Cake Pops
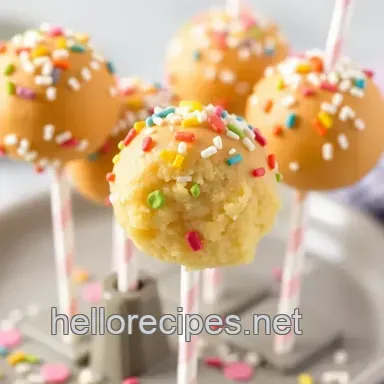
Not only are these cake pops visually appealing , but they pack a punch when it comes to flavor and nutrition too! the combination of moist vanilla cake and fun rainbow sprinkles makes them a fun dessert that’s perfect for special occasions or just sharing good times with your pals.
Oh, and let’s talk health! these treats are made primarily from a moist vanilla cake that you can whip up in a snap.
Plus, you can tweak the basic recipe to be healthier or cater to dietary needs. think gluten-free cake pops or using coconut oil instead of butter.
With all this flexibility, you can still enjoy sweet moments without the guilt, which we know can be hard for those of us with a sweet tooth.
These colorful cake pops are also awesome for kids’ baking recipes . Imagine the smiles as the little ones mix the batter and sprinkle the icing definitely a fun day in the kitchen! And let’s be real: they make for great party treats !
Perfect for Any Celebration
Whether it’s a kid's birthday bash or just a friday night movie marathon with friends, these cake pops fit right in.
Besides, wouldn’t it be fun to put together a colorful platter and watch everyone’s eyes light up?
Easy dessert recipes like this mean you can spend less time fretting in the kitchen and more time enjoying great conversations and laughs.
You can let your creativity shine through with cake pop decorating ideas like topping them with chocolate, colorful sprinkles, or even edible glitter for that extra wow factor.
Ready to get into the nitty gritty? Let’s gather our ingredients and prepare to make some delightful treats that will steal the spotlight at any gathering! From the simple cake pop making process to the delicious crunch of chocolate dipped cake pops , I just know you’re going to have a blast with these!
Let’s roll up those sleeves and grab the baking essentials because here comes the list of ingredients you need!
Essential Ingredients Guide
Cooking is like a dance, and having the right ingredients is your choreography. you don’t wanna be stepping on toes when you whip up your next treat, right? so let’s break down what you really need to know about your foundational components for baking, especially when you’re going for something as fun as best 7 funfetti cake pops with cake pop holder .
Trust me, this guide will level up your dessert game!
Premium Core Components
First off, let’s talk about measurements . in baking, precision is key. for those measuring cups and spoons out there, 1 cup of flour weighs about 120g or 4.
25 ounces . and while you're at it, remember that 1 tablespoon equals 15ml , and keep a scale handy for those more serious baking days.
Now, not all ingredients are created equal, and this is where quality matters. when you’re buying flour, look for that fresh scent and a fine texture.
Your baking powder should be active, and when you pour it, it should fizz a bit it’s like a spark of life! also, always check the expiry date on your ingredients to avoid unexpected disasters.
Storing your supplies in a cool, dry place can make a world of difference think airtight containers to keep things fresh.
Signature Seasoning Blend
Ah, the heartbeat of flavor seasoning! if you're on the hunt for that zesty kick , essential spice combinations are a must.
A pinch of cinnamon or nutmeg can take your cake to the next level. and don’t forget about your herbs fresh basil or rosemary can transform your savory dishes.
Looking to jazz things up? explore regional variations this might just become your secret weapon. ever tried a southern style spice blend? it's a complete game changer!
Smart Substitutions
Alright, let’s say you’re in a pinch. no eggs? no problem. you can use 1/4 cup of applesauce or 1 mashed banana for each egg in those easy cake pops.
Got a gluten sensitive friend? opt for some gluten-free flour instead. your flavor can still shine through, even if you’re switching things up.
And as a pro tip, pick seasonal ingredients when you can they taste better and often cost less.
Kitchen Equipment Essentials
Now, onto the tools of the trade. trust me when i say, having the right gear makes cooking a breeze! you’ll want a solid electric mixer for smooth batters, and if you’re serious about making those colorful cake pops , a cake pop holder is non-negotiable.
It keeps your pops upright while they chill because no one wants a lopsided cake pop, am i right? if your kitchen is tight on space, a good mixing bowl and a whisk can do wonders.
You’ll be amazed at how many creative cake pop designs you can whip up just by organizing your tools!
When it comes to storage, think smart. an organized spice rack helps keep your essentials on hand. now, here’s an idea label your jars.
It might seem silly, but when you’re deep in the kitchen, trust me, you’ll thank your past self!
Closing Thoughts
So there you have it! a rundown of your essential ingredients and tools to make those funfetti cake pops easier than ever.
Whether you’re prepping for a birthday bash or crafting those whimsical colorful cake pops , knowing what to stock will make all the difference.
Baking isn’t just about following recipes; it’s about finding joy in the process, learning what works, and having fun with it especially when you’re tackling that tasty cake pop making process .
Now, let’s dive into those step-by-step instructions for your lovely cake pops! Are you ready? Because it’s baking time, and I promise you’re gonna create some fabulous treats!
Mastering the Art of Professional Cooking
Cooking like a pro isn’t just about fancy techniques; it’s about nailing down the fundamentals. whether you're whipping up funfetti cake pops for a kid's birthday party or preparing an elaborate dinner, it helps to have a good foundation.
So, let’s dig into the essential preparation steps to get the best results, every time.
Essential Preparation Steps
Mise en place is your best friend. it’s just a fancy way of saying, “get your stuff together.” chop your veggies, measure your flour, and have all your ingredients on deck.
When you work in an organized way, cooking feels like a breeze!
Time management is key. set timers for everything, even if it’s just for tasks like waiting for the butter to soften.
You’ll save time and avoid burning your cookies (trust me, learned the hard way).
An organized kitchen is a happy kitchen. always clean as you go. there's nothing worse than starting to decorate your colorful cake pops with a messy counter.
Plus, it makes you look like you know what you’re doing!
Let’s not forget about safety considerations. Remember to wash your hands often and keep raw ingredients separate. It’s not just good practice; it’s crucial, especially if you want to avoid foodborne illnesses.
Step-by-step Process
Now let’s break it down into a simple,” follow the-numbers” guide.
Preheat your oven to 350° F ( 175° C) if you’re baking. This step is crucial for cooking treats like moist vanilla cake to perfection.
Gather your ingredients. Having everything ready will keep the flow, especially when you're ready to dip those easy cake pops into chocolate.
Control your temperature. check your chocolate temp while melting it should be around 110° f ( 43° c) when dipping your cake pops.
Too hot, and it’ll seize; too cold, and it won’t coat evenly.
Timing is everything! when baking a cake or chilling cake pops, follow the clock. for these festive desserts , let them chill for at least 30 minutes , so they hold their shape when you dip them in melted chocolate.
Visual cues matter. Your cake pops should be firm enough to stick to the lollipop sticks without falling apart. If they’re too soft, chill them a bit longer.
Expert Techniques
Want to elevate your game? Here are some pro tips.
Quality matters. Use good chocolate for dipping something like chocolate dipped cake pops tastes ten times better than store-bought.
Critical steps? Don’t skip the crumbling! It’s essential for achieving that perfect consistency in your cake pops.
Keep an eye on them. When you pull your cake pops from the fridge, make sure they look good they should be firm but not frozen!
Troubleshooting? If your chocolate hardens too quickly, just pop it back in the microwave for a few seconds, stirring until smooth.
Success Strategies
Learning to cook well is all about practice but avoiding major missteps can fast track your success.
Common mistakes? Don’t try to rush the cooling process; let your cake cool completely before crumbling it. Trust me, gooey messes make for bad cake pops.
For quality assurance , taste your cake mix before baking. This will ensure it's sweet enough and gives you a chance to adjust ingredients like sugar or extracts for flavor.
Want perfect results? Have fun experimenting with cake pop variations . From crumbled cookies to flavored melts, the sky’s the limit!
Lastly, think about make-ahead options. You can easily prepare the cake base a day in advance and just roll and dip the next day.
So, whether you’re whipping up the best 7 funfetti cake pops with cake pop holder for a birthday bash or just indulging your sweet tooth, these strategies will have you cooking like a pro.
Happy baking!
Before we dive into additional information about cake pop decorating ideas and storage solutions, remember: practice makes perfect, and don’t be afraid to make it your own! whether you're making gluten-free cake pops or experimenting with creative cake pop designs , it’s all about enjoying the journey.
When it Comes to Funfetti Cake Pops, Let's Get Creative!
So, you’ve decided to dive into the world of colorful cake pops , right? awesome choice! these lil’ bites of joy are just fab for birthday parties, festive gatherings, or even just a random tuesday when you need some sugar in your life.
I'm talking about the best 7 funfetti cake pops with cake pop holder trust me, you'll want to bookmark this one.
Pro Tips & Secrets
Now, before you grab that mixing bowl, let’s chat about some pro tips. first off, when you make these easy cake pops , make sure to keep your baking area organized.
Nothing's more stressful than hunting for ingredients when you’re in the middle of the cake pop making process .
Here’s a sneaky trick: chill your cake balls in the fridge for about 30 minutes before dipping. this helps them hold their shape and keeps them from falling apart.
Another tip? try using high-quality chocolate melting chips. great chocolate makes a big difference in taste. oh, and don’t forget about those sprinkles! they not only add color but an extra bit of fun.
Perfect Presentation
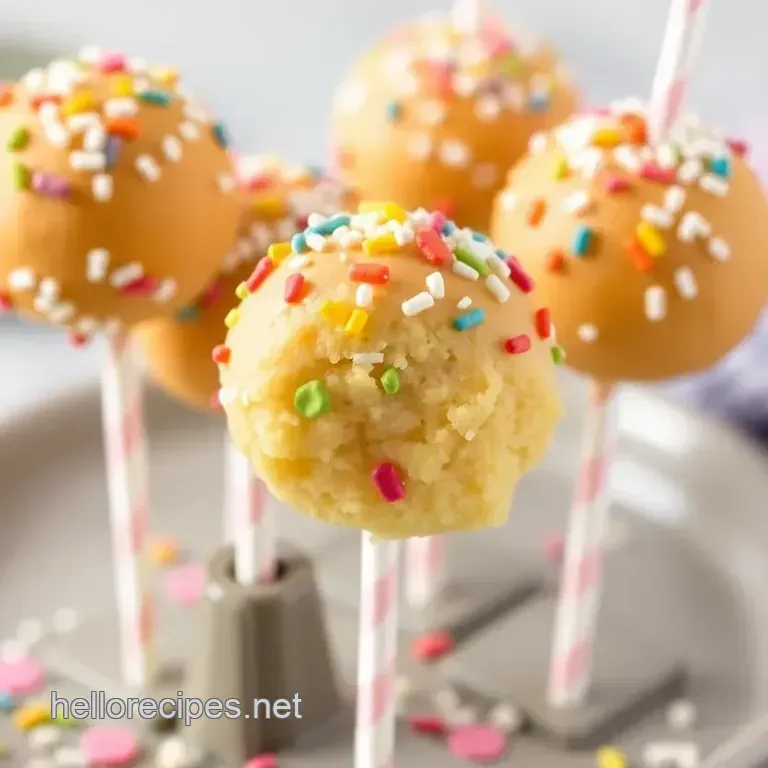
You know how they say you eat with your eyes first? well, presentation is everything. once you’ve dipped your funfetti cake pops , it’s time to get all artsy.
You can use a cake pop holder or even a block of styrofoam get it ready to showcase your colorful party snacks !
For toppings, think about different colored sprinkles or drizzle some contrasting chocolate over the top. how about colorful cake pop decorating ideas that scream “party!”? pair those vibrant treats with a colorful platter or a fun backdrop.
Trust me; your instagram followers will thank you later!
Storage & make-ahead
Let’s talk about storage because, let’s be real, life's busy. once you’ve devoured a few, pop those leftover cake pops in an airtight container.
They’ll keep well in the fridge for about a week , so you can enjoy them later perfect for those late night snack cravings.
If you’re making these ahead of a birthday party or a gathering, you can totally prep these homemade cake pops a day in advance.
Creative Variations
Feeling like experimenting? there are endless variations you can try with these pops! you can easily switch out the vanilla cake for a chocolate cake mix or even go wild with a red velvet funfetti .
Want to make it healthier? go gluten-free and swap in a gluten-free cake mix. and if you want to really impress your friends, why not add some flavored extracts like almond or coconut to your mix?
Complete Nutrition Guide
Now, i get it sometimes we want to know what we’re putting into our bodies, especially when it comes to sweet treats .
Each cake pop is roughly 130 calories packed with fun and flavor. and hey, these treats can bring smiles, which is a win in my book!
Wrapping It Up
So, ready to create your own masterpiece with the best funfetti cake pops ? whether it’s for a birthday bash or just a day to brighten someone's spirits, these colorful bites will definitely be a hit.
Remember, cooking, especially with kids, should be about fun, laughter, and a sprinkle (or two) of chaos! so gather those ingredients and let’s get baking!
You’ll have not just a delicious dessert but also create joyful memories in the kitchen. Happy baking, my friends!
Frequently Asked Questions
What makes the Best 7 Funfetti Cake Pops with Cake Pop Holder different from regular cake pops?
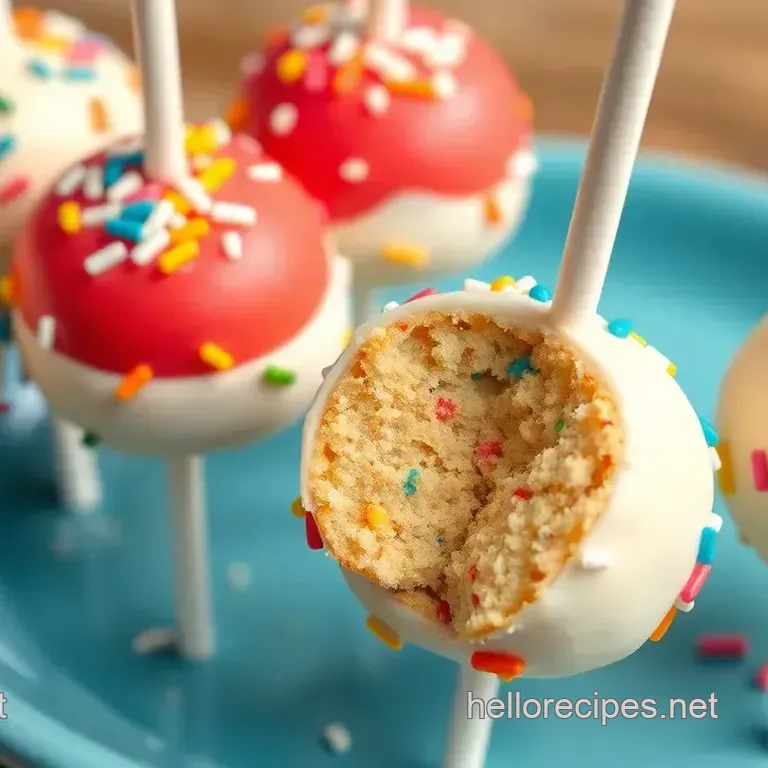
The Best 7 Funfetti Cake Pops are special due to their vibrant rainbow sprinkles mixed into the cake, adding both flavor and a whimsical look. Plus, using a cake pop holder ensures that they set perfectly without any mess, making the process even easier and more enjoyable!
Can I make Funfetti Cake Pops in advance and how should I store them?
Yes, you can make Funfetti Cake Pops a day or two in advance. Store them in an airtight container in the refrigerator to keep them fresh. If you prefer, you can freeze them for longer storage; just be sure to wrap each in plastic wrap and then place them in a freezer safe container.
What kind of cake pop holder should I use for the Best 7 Funfetti Cake Pops?
You can use a specially designed cake pop holder or even a Styrofoam block, which both serve to keep the cake pops upright while they set. Choose one that has evenly spaced holes to securely hold each cake pop to prevent them from falling over or touching.
Are there any variations I can try for the Best 7 Funfetti Cake Pops with Cake Pop Holder?
Absolutely! You can experiment with different cake bases, such as chocolate or red velvet, and even switch out the sprinkles for themed colors. Additionally, try adding flavored extracts like almond or lemon to enhance the cake's flavor or incorporate different types of coatings like colored candy melts for a fun twist.
What are some tips for making perfect Funfetti Cake Pops?
To ensure your cake pops hold their shape, chill the cake balls before dipping. Use high-quality melting chocolate for better flavor and smoother coating. Additionally, sprinkle extra toppings immediately after dipping so they adhere well before the chocolate sets.
How can I make these cake pops healthier or dietary friendly?
You can make your Funfetti Cake Pops healthier by using whole wheat flour or a gluten-free mix as a substitute. Opting for reduced sugar chocolate or dark chocolate coatings can help lower sugar content. For a dairy-free version, substitute butter with coconut oil and use non-dairy milk.
Best 7 Funfetti Cake Pops With Cake Pop Holder