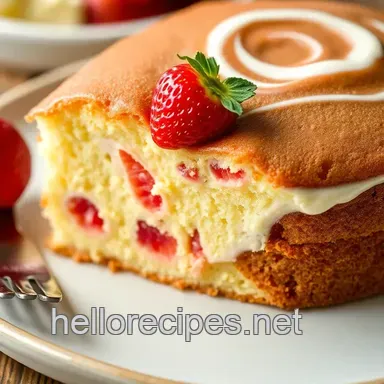
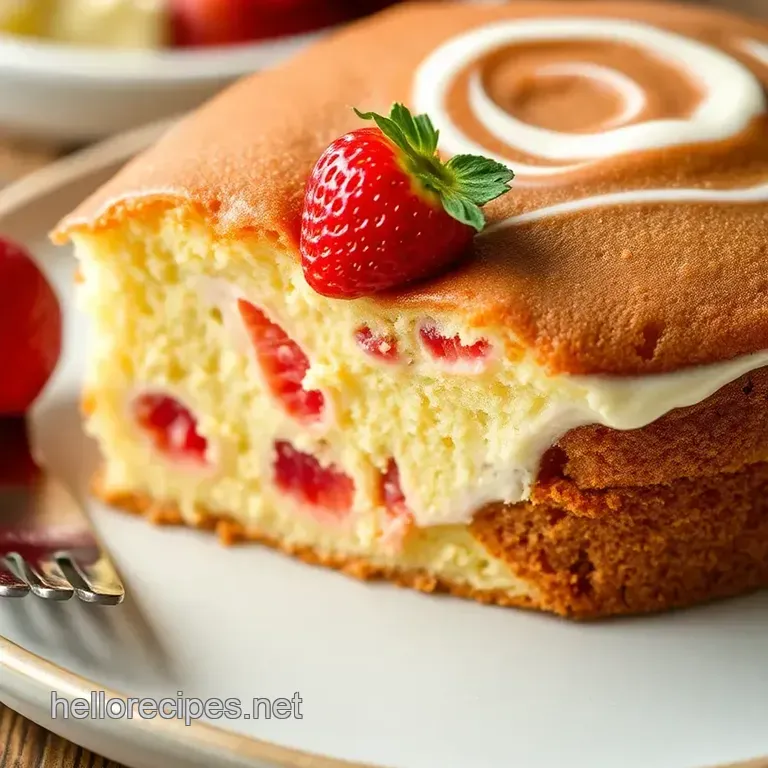
Strawberry Earthquake Cake with Creamy Swirl

A Sweet Twist on a Classic: Strawberry Earthquake Cake
Oh my gosh, you guys, let’s talk about something magical: bake strawberry earthquake cake with creamy swirl. picture this: it’s a sweltering summer day, and you’re at a barbecue, surrounded by laughter, sunlight, and the smell of grilled burgers.
Suddenly, someone cuts into this vibrant, jaw-dropping cake that looks like it just emerged from a fairytale. i'm telling you, all conversation stops, and jaws drop.
It’s the kind of dessert that can turn a mundane gathering into a fantastic party. honestly, it feels like this cake was made for those special moments.
The Story Behind the Deliciousness
So, where did this beauty come from? the earthquake cake is a classic in its own right, famous for that cracked , irresistible look.
This twist incorporates fresh strawberries to kick things up a notch. it’s like taking a breezy summer day and baking it into the heart of a cake so refreshing! this recipe isn’t just a trend; it’s a nod to the deliciousness our grandmothers used to whip up, blending nostalgia with a modern fruity flair.
Now, let's get to the nitty gritty this cake takes about 1 hour and 10 minutes from start to finish. the good news? it's not rocket science! even beginners will feel like pros.
You just need a smidgen of patience to nail that creamy swirl. and guess what? you’ll get about 10-12 servings , so it’s perfect for a crowd without breaking the bank!
Why You’ll Love This Cake
Okay, let’s get real for a sec. nutrition isn’t always the star of the dessert show, but this cake has some perks! with fresh strawberries and some cream cheese, you're adding fiber and vitamins without sacrificing flavor.
It’s not every day you can say, “yeah, i’m eating dessert, but it’s got fruits in it!” you can proudly serve this at summer gatherings, family bbqs, or even just to make your saturday night feel a little extra.
The unique selling point ? that creamy swirl ! it’s a delightful surprise with every bite. plus, it beats traditional layer cakes if you’re aiming for something visually jaw-dropping without the effort of perfect layers.
You don’t need to be a master baker; just follow along with the step-by-step baking guide , and you’re golden.
Sweet Serving Suggestions
When it comes to serving, think outside the box. a scoop of vanilla ice cream on the side? yes, please.
Or how about a dollop of fresh whipped cream on top for that gourmet vibe? trust me, this cake doesn’t just look fab; it’s also the star of the dessert table.
If you really want to go the extra mile, garnish with some more fresh strawberries or even a mint leaf for that little wow factor.
Alright, now that you’re just itching to bake, let’s have a quick rundown of what you’ll need. grab your mixing bowls and let’s whip up that creamy swirl cake .
You won’t regret it, and your friends will be begging for the recipe. here’s a sneak peek of the ingredients coming your way!
Whether you're planning to impress friends at your next gathering or just want to indulge in a delightful dessert, this strawberry earthquake cake with creamy swirl is your go-to! it’s a recipe that truly captures summer in every bite, leaving you with sweet memories to cherish.
Happy baking!
Essential Ingredients Guide
Let’s dive into the world of baking, shall we? whether you’re a seasoned pro or just starting out, understanding your essential ingredients can make a huge difference.
Today, we’re talking about what you'll need to bake strawberry earthquake cake with creamy swirl and keep that flavor popping!
Premium Core Components
First off, let’s get to the nitty gritty measurements . every recipe comes with its measurements in both us and metric, which is super handy if you're trying to convert recipes or just impress your friends.
The basics like 2 cups (240 g) of all-purpose flour and 1 cup (200 g) of granulated sugar are essentials.
So, how do you know if your ingredients are top-notch? Look for quality indicators like fresh smell and vibrant colors. For example, fresh strawberries should be bright red, not dull!
Storage tips? oh boy, these can save you! keep your flour in a cool, dry place to avoid those pesky bugs.
And store your cream cheese in the fridge, of course! it usually lasts about 2-4 weeks if unopened and maybe a week once opened.
And hey, freshness is key! Choose strawberries that are firm and ripe. Nobody wants mushy strawberries in their cake, right?
Signature Seasoning Blend
Now, let’s spice things up! the essentials to mix your flavors include a variety of herbs and spices. you know that moment when you realize you forgot to add vanilla extract? yeah, don't be that person! it’s a big flavor enhancer.
Our strawberry earthquake cake needs 1 teaspoon of vanilla for that warm, sweet touch.
Have you tried experimenting with herbs ? While you might not think about adding basil to a dessert, it’s a game changer with strawberries!
Feel free to explore regional variations too. Want to add some cinnamon for a warmer vibe? Go for it! Or how about chocolate swirls instead of cream cheese? Those earthquake cake variations are endless!
Smart Substitutions
Life happens, and sometimes you just don’t have an ingredient. so, what do you do? here’s where common alternatives come in handy.
If you run out of buttermilk, just mix 1 cup of regular milk with 1 tablespoon of vinegar or lemon juice .
Bam! instant buttermilk!
If you're vegan or have a dairy intolerance, try using plant based cream cheese in your cream cheese swirl dessert . It’ll still taste dreamy!
Feeling a seasonal vibe? use those fresh strawberries in summer to make the best strawberry filled dessert. and if strawberries are out of season, frozen ones work too - just keep in mind they can be a bit mushy.
Kitchen Equipment Essentials
Alright, let’s talk tools! Here’s what you absolutely need:
- A 9x13 inch baking pan is a must. That's where the magic happens!
- Mixing bowls and a whisk or electric mixer for the batter.
- A rubber spatula will help scrape every last bit out trust me, don’t waste that batter!
Not too keen on big kitchen gadgets? No worries! You can always use a good old-fashioned hand mixer if it’s what you’ve got.
Storage? Keep your tools organized! Use a drawer or a container for small items. It’ll make you feel like a pro!
Now that you’re equipped with the essentials, let’s transition into the fun part actually baking! we’ve got our ingredients introduced, so grab your tools and let’s dive into the step-by-step guide on how to create this scrumptious strawberry earthquake cake with creamy swirl !
Whether you're throwing a summer gathering or just want to treat yourself, you’re in for a real treat.
Happy baking, friends!
Mastering the Art of Professional Cooking
Hey there, food lovers! if you're here, it means you're ready to step up your cooking game, and i’m all in for that journey with you.
Let’s dive into the professional cooking method , shall we? whether you're dreaming of whipping up a fancy restaurant level dish or just want to impress at your next potluck, these tips will help you nail it in the kitchen.
And we’re gonna have a lil' fun while at it!
Getting Ready to Cook: Essential Preparation Steps
First things first, let’s talk about mise en place . this fancy french term just means “everything in its place.” before you cook, get all your ingredients prepped and ready.
Chop those veggies, measure your spices, and have your tools nearby. you’ll feel like a pro, trust me!
Next, time management is key. you can’t be rummaging through your pantry mid-recipe! try to plan your cooking steps ahead.
For example, if you’re making a cake like that delightful strawberry earthquake cake with creamy swirl start with the batter while your oven preheats.
It’s all about efficiency, my friend!
And hey, let’s not forget organization strategies ! keep a trash bowl nearby so you don’t have to run to the garbage each time.
It’s a small trick, but it saves big time. also, remember your safety considerations : keep your kitchen tidy to avoid accidents, and always use sharp knives blunt ones are more dangerous!
Step-by-step Magic: Cooking Instructions
Now, let’s get down to the nitty gritty the step-by-step process .
Preheat your oven to 350° F ( 175° C) . Seriously, do this first! You want your oven hot and ready.
While it’s heating, make that batter. Mix your dry ingredients like flour and sugar, and then whisk in the wet stuff. Pour half the batter into the pan.
Temperature control is crucial. If your oven’s too hot or cold, your cake won’t turn out right. Aim for perfect 350° F ( 175° C).
Watch the timing precision , too! Bake your cake for 40- 45 minutes . This might feel like a long wait, but check for doneness with a toothpick if it comes out clean, you’re golden!
When it's baked, look for those visual cues for doneness . The cake should have a lovely golden brown top. An earthquake cake should have that “cracked” appearance, which is part of its charm!
Becoming an Expert: Techniques That Shine
Let’s talk expert techniques . achieving that creamy swirl in your cake? it's all about gentle mixing. overmixing can ruin the texture.
Your batter should be smooth and just combined don’t go crazy with it!
Also, keep an eye out for quality checkpoints . Taste as you go! If your filling feels too sweet, adjust. No one wants a dessert that’s too sugary or bland, right?
And if something goes wrong? troubleshooting tips are your best friend. was your cake too dry? maybe it needed more moisture.
And if it’s too dense? let’s just say, less mixing next time!
Key to Success: Strategies for a Flawless Outcome
Lastly, let’s wrap it up with some success strategies . First, avoid common mistakes like forgetting the baking powder, yikes!
For quality assurance, always taste test. that’s how you know you’re on the right path to deliciousness. if you want perfect results every time, follow the recipe closely.
Include make-ahead options, too. you can prep the strawberry filling earlier, so assembly is a breeze.
And if i can drop a hint, always serve your cake warm or at room temp. and think about some whipped cream topping ideas .
Oh, it takes a simple dessert to next level deliciousness.
Now, armed with these techniques, you can easily whip up a fabulous dessert —like the easy, fruity Strawberry Earthquake Cake or experiment with creative variations.
Once you've mastered these cooking methods, you’ll feel like a superstar in your kitchen. ready to explore more? well, let’s transition smoothly into some additional information that will help you elevate your baking and cooking skills even further.
Bake Strawberry Earthquake Cake with Creamy Swirl Extra Insights for the Home Baker
Oh my gosh, let me tell you, baking this strawberry earthquake cake with creamy swirl is like taking a joyride in dessert land! not only does it taste amazing, but it also looks like a million bucks on your table.
But hey, we’re not just here for the recipe. let's dive into some additional insights that will make your cake game top-notch!
Pro Tips & Secrets
Let’s kick things off with some of my favorite tips and tricks . first off , make sure your cream cheese is softened before you try to mix it.
You want that creamy swirl to be smooth as silk, like a mini cheesecake party in your batter.
Feeling rushed? i get it! a time saving technique i swear by is prepping all your ingredients beforehand. line up those ingredient bowls on the counter; it speeds up the whole process and keeps your sanity intact.
Want to elevate those flavors? a little splash of vanilla extract in the strawberry filling goes a long way. it’s like giving your dessert a high five! lastly, to nail down the presentation , always sprinkle a touch of powdered sugar on top just before serving.
It’ll make your cake look fancy without too much effort.
Perfect Presentation
Alright, so you've made this beauty, and now it’s time to show it off ! for plating, cut neat squares and stagger them when you lay them on the plate.
Layering is key; it’s like presenting cake art!
Garnish ideas? oh, i love a bit of freshness. toss on some fresh mint leaves or extra sliced strawberries, and it’s an instagrammable moment.
You know, add some color combinations with berries and whipped cream for a visual feast that invites folks to dig in.
Trust me, they won’t be able to resist!
Storage & make-ahead
Now, if you're thinking of making this yummy cake ahead of time great idea! just keep it wrapped in plastic wrap or in a sealed container.
It lasts about three days at room temperature, and still manages to taste just as good.
For longer storage, pop it in the fridge it’ll last about a week. Reheating instructions ? Just warm slices in the microwave for 10-15 seconds . You want it cozy, not lava hot.
Creative Variations
Feeling adventurous? try out some flavor adaptations ! citrus zest can add a delightful zing think lemon or orange for a summer twist.
If you’re looking for some dietary modifications , swap the cream cheese with a dairy-free option and use plant based milk.
You could even give it a seasonal twist ; how about peaches or raspberries instead of strawberries? and if you want to explore regional variations , think about infusing a bit of southern charm by mixing in pecans .
Yep, the options are endless!
Complete Nutrition Guide
Now let's chat about that nutrient factor. this strawberry earthquake cake is packed with flavor. for those mindful of health, each slice has about 350 calories .
Not too shabby for such a rich treat!
Although everything in moderation, you get some great health benefits from the fresh strawberries, like vitamin c and fiber. if you're counting those carbs, it has about 50 grams .
As for portion guidance, a serving size of 10-12 pieces is ideal, making it perfect for gatherings or just indulging on a rainy day.
In the end, whether you’re throwing together this dessert for a soirée or just treating yourself, remember that baking is about the fun of it all! so grab those fresh strawberries and get ready to bake strawberry earthquake cake with creamy swirl .
It'll be a hit no matter where it lands.
So, what are you waiting for? Dust off that apron, and let’s whip up something that’ll make your taste buds dance! Happy baking!
Frequently Asked Questions
What is an Earthquake Cake and how does this Bake Strawberry Earthquake Cake with Creamy Swirl differ?
An Earthquake Cake is a unique dessert characterized by its “cracked” appearance, created during baking. This Bake Strawberry Earthquake Cake with Creamy Swirl incorporates fresh strawberries and a rich creamy swirl for added flavor and visual appeal, elevating the traditional version with fruity freshness.
Can I use frozen strawberries for this Bake Strawberry Earthquake Cake with Creamy Swirl?
Yes, you can use frozen strawberries, but keep in mind that they may yield more moisture and affect the texture of the filling. If using frozen strawberries, be sure to thaw and drain them well to minimize excess liquid.
How should I store leftovers of the Bake Strawberry Earthquake Cake with Creamy Swirl?
Store any leftover cake in an airtight container at room temperature for up to three days. For longer storage, refrigerate, where it can last for about a week. When ready to serve, gently rewarm slices in the microwave for a few seconds if desired.
What can I substitute for buttermilk in this cake recipe?
If you don’t have buttermilk, you can make a quick substitute by mixing 1 cup of milk with 1 tablespoon of vinegar or lemon juice. Allow it to sit for about 5 minutes before using it in your recipe.
Are there any variations I can try with this recipe?
Absolutely! You can swap strawberries for other berries like raspberries or blueberries for different flavors. Adding chocolate chips or a bit of lemon zest to the batter can also enhance your cake. Feel free to experiment based on your preferences!
What is the nutritional information for the Bake Strawberry Earthquake Cake with Creamy Swirl?
The estimated nutritional information per slice includes 350 calories, 5 g of protein, and 15 g of fat. Keep in mind that these values may vary based on specific ingredients and portion size, so consider adjusting according to your dietary needs.
Bake Strawberry Earthquake Cake With Creamy Swir