Vanilla Birthday Cake: Moist and Velvety
- Time: Active 30 minutes, Passive 35 minutes, Total 65 minutes
- Flavor/Texture Hook: Silky, cloud like frosting over a dense but tender vanilla bean crumb.
- Perfect for: Milestone birthdays, elegant tea parties, or any vibrant celebration.
- Create the Ultimate Birthday Cake Idea with Vanilla Frosting
- Essential Recipe Specs and Success Checkpoints
- What You Need for Success
- Crucial Baking Equipment for Cakes
- Deep Dive into Ingredient Science
- Step-by-Step Instructions for Perfection
- Fixing Common Birthday Cake Problems
- Smart Dietary Adaptations
- Freezing and Reheating Guide
- What to Serve This With
- Myths About Vanilla Baking
- Storage and Zero Waste Tips
- Recipe FAQs
- 📝 Recipe Card
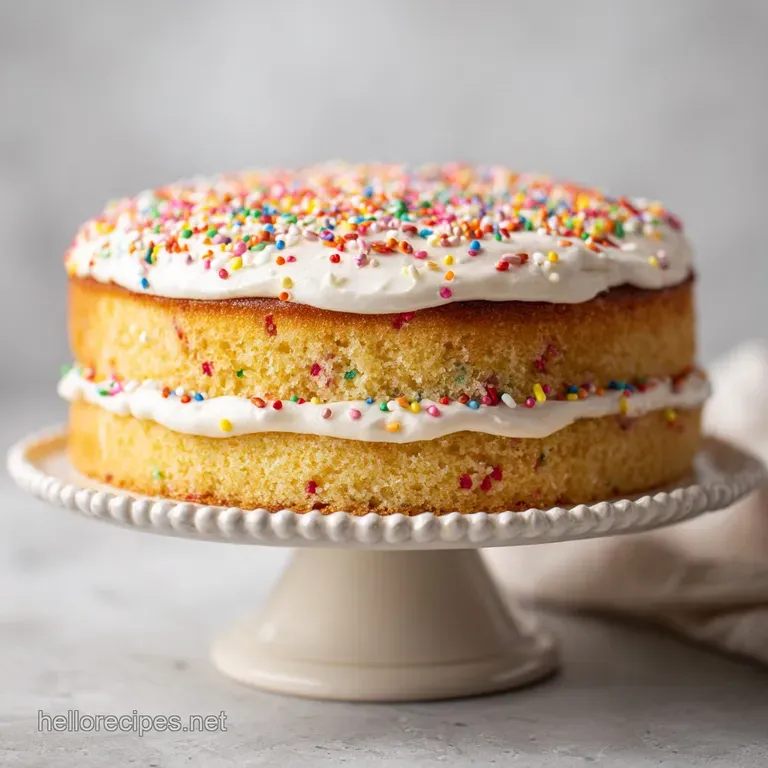
Create the Ultimate Birthday Cake Idea with Vanilla Frosting
The scent of real vanilla bean paste hitting room temperature milk is something that never gets old in my kitchen. It's a sweet, floral, and deep aroma that fills every corner, signaling that something special is about to happen.
Whenever I pull these golden rounds out of the oven, the kitchen transforms into a small town bakery, and honestly, the hardest part is waiting for the layers to cool before I can start smearing on that thick, velvety frosting.
Here's that perfect Birthday Cake Idea with Vanilla Frosting you've been searching for. I’ve made my fair share of dry, crumbly cakes that felt more like cornbread, but this specific method changed everything for me.
We’re moving away from the standard "cream butter and sugar" routine and trying something that ensures your cake stays moist for days. It is a fusion of classic technique and modern kitchen logic that works every single time.
This isn't just another box mix substitute; it is a vibrant, scratch made masterpiece that feels like a warm hug. Whether you are celebrating a big milestone or just want a "just because" treat, this cake delivers a professional texture without needing a culinary degree.
We are going to build flavors in layers, starting with the fat coated flour and ending with a whipped buttercream that feels lighter than air.
Essential Recipe Specs and Success Checkpoints
Before we get our hands into the flour, let's talk about the specific numbers that make this recipe a success. Baking is as much about precision as it is about passion, so I always keep a few hard numbers in mind.
I remember once trying to "eye" the measurements for a similar cake and ended up with a sunken mess that looked like a crater. We aren't doing that today.
| Feature | Requirement | Visual or Sensory Cue |
|---|---|---|
| Oven Temp | 175°C (350°F) | Even heat prevents the "domed" top from cracking early. |
| Bake Time | 30-35 minutes | Skewer comes out with 2-3 moist crumbs, not wet batter. |
| Butter State | 18-20°C | Soft enough to leave an indent but not greasy or melting. |
- 1. The Sand Phase
- When mixing butter into the dry ingredients, stop exactly when it looks like damp beach sand (no large chunks).
- 2. The Internal Temp
- If you have a probe thermometer, the center of the cake should reach 98°C for the perfect set.
- 3. The Frosting Whip
- Beat the butter for at least 5 full minutes before adding sugar to achieve that "cloud" texture.
What You Need for Success
Choosing the right components is the first layer of building flavor. I always opt for cake flour here because its lower protein content keeps the crumb from getting "bready." If you use all purpose, you’ll lose that delicate melt in-your mouth feel. Also, don't skimp on the vanilla bean paste.
The little black specks don't just look fancy; they provide a multicultural depth of flavor that extract alone can't match.
- 375g cake flour: This is the foundation for a tender, fine grained crumb.
- 400g granulated sugar: Adds sweetness and helps retain moisture.
- 12g baking powder: The primary lift for our layers.
- 3g fine sea salt: Balances the sugar and enhances the vanilla.
- 225g unsalted butter (room temp): For the cake batter emulsion.
- 4 large eggs: Provides structure and richness.
- 120g full fat sour cream: The "secret" for moisture and a slight tang.
- 240ml whole milk: Adds hydration and fat.
- 30ml vegetable oil: Keeps the cake moist even when refrigerated.
- 15ml pure vanilla bean paste: The star flavor component.
- 450g unsalted butter (frosting): Softened for a silky base.
- 750g powdered sugar: Sifted to ensure zero grit in your buttercream.
- 60ml heavy cream: To thin the frosting to a spreadable consistency.
- 10ml vanilla extract: For that classic frosting aroma.
- 1g salt: Just a pinch to cut through the heavy sugar.
| Method | Prep Time | Resulting Texture | Best For |
|---|---|---|---|
| Classic Creaming | 15 mins | Airy, large crumbs, can be dry | Short term eating |
| Reverse Creaming | 10 mins | Tight, velvety, stays moist | Layer cakes and weddings |
| One Bowl Melted | 5 mins | Dense, muffin like | Quick snacking cakes |
Crucial Baking Equipment for Cakes
You don't need a professional kitchen, but a few specific tools will make your life much easier. I used to try frosting cakes with a butter knife, and let me tell you, it looked like a toddler did it. Investing in a simple offset spatula was a game changer for my decorating confidence.
- Stand Mixer: Such as a KitchenAid, is vital for the 5 minute frosting whip.
- Two 8 inch round cake pans: Standard size for perfect layer proportions.
- Parchment Paper: Essential for ensuring the cake actually leaves the pan.
- Offset Spatula: For that smooth, professional frosting finish.
- Kitchen Scale: To measure the 375g of flour accurately (cups are too unreliable!).
Chef’s Note: Always grease your pans with butter and then line the bottom with parchment. This double layer of protection is the only way to guarantee your cake doesn't stick.
Deep Dive into Ingredient Science
Understanding why we use these specific items helps you become a better baker. It isn't just about following a list; it's about knowing how the fats and proteins interact to create that vibrant texture we are after.
| Component | Science Role | Pro Secret |
|---|---|---|
| Sour Cream | Acidic Tenderizer | Breaks down gluten strands for a "soft shatter" bite. |
| Vegetable Oil | Liquid Fat | Unlike butter, oil stays liquid at room temp, keeping cake moist. |
| Cake Flour | Low Protein | Minimizes gluten formation so the cake stays light and fluffy. |
| Vanilla Paste | Essential Oil Carrier | The seeds provide a concentrated burst of flavor in every bite. |
But what about the "cloggy" texture some vanilla cakes get? That usually comes from over mixing once the liquid hits the flour. By using the reverse creaming method, where we coat the flour in butter first, we create a waterproof barrier. This prevents the liquid from activating the gluten too early. If you've ever enjoyed a silky smooth buttercream frosting, you know how important texture is to the overall experience.
step-by-step Instructions for Perfection
1. The Dry Aeration Phase
Preheat your oven to 175°C (350°F). In your stand mixer bowl, whisk together the 375g cake flour, 400g sugar, 12g baking powder, and 3g salt. Note: Mixing on low for 30 seconds ensures all the leavening agents are evenly distributed before we add fats.
2. The Reverse Creaming Process
Add the 225g of softened butter to the dry ingredients one tablespoon at a time. Keep the mixer on a low speed. Continue mixing until the butter is fully incorporated and the mixture looks like fine, damp sand. Note: This coats the flour particles in fat, which is the secret to a tender crumb.
3. The Liquid Base Preparation
In a separate jug or bowl, whisk together the 4 eggs, 120g sour cream, 240ml milk, 30ml vegetable oil, and 15ml vanilla bean paste. Ensure this is completely smooth before moving to the next step.
4. The First Emulsion
With the mixer on low, slowly pour about half of your liquid mixture into the "sandy" dry ingredients. Increase the speed to medium and beat for exactly 1 minute. Watch as the batter becomes pale and voluminous as air is incorporated into the structure.
5. Final Batter Integration
Reduce the speed to low again and add the remaining liquid. Mix only until just smooth and combined. Scrape the sides of the bowl with a spatula to ensure no flour pockets remain at the bottom.
6. The Precision Bake
Divide the batter evenly between your two prepared 8 inch pans. Use a scale if you want them perfectly level. Bake for 30-35 minutes until the tops spring back when lightly touched. A skewer inserted into the center should come out clean or with a few moist crumbs.
7. The Cooling Cycle
Let the cakes sit in their pans for 10 minutes before flipping them onto a wire rack. They must be completely cold to the touch before you even think about frosting them. Note: Frosting a warm cake will result in a melted, greasy mess.
8. Whipping the Vanilla Frosting
Beat the 450g of softened butter for 5 minutes until it turns almost white and very fluffy. Gradually add the 750g of sifted powdered sugar. Add the 60ml heavy cream, 10ml vanilla, and a pinch of salt.
Whip on high for another 3-5 minutes until it looks like a thick, glossy cloud.
9. Assembly and Decorating
Place one layer on your stand, spread a generous amount of frosting over the top, then place the second layer on top. Apply a thin "crumb coat" of frosting over the whole cake, chill for 15 minutes, then finish with the remaining buttercream using your offset spatula.
Fixing Common Birthday Cake Problems
Even the best cooks run into trouble sometimes. The key is knowing how to spot the issue before it ruins your celebration. If your cake looks a bit wonky or the frosting isn't behaving, don't panic! Most issues are easily fixed with a few vibrant adjustments.
The "Domed" or Cracked Top
If your cake has a high peak in the middle that cracks, your oven was likely too hot. This causes the outside to set before the inside has finished rising, forcing the middle to burst through the crust.
Simply use a serrated knife to level the top before frosting and maybe check your oven calibration with a separate thermometer next time.
The Gritty Buttercream
Nothing is worse than a frosting that feels like sand on your teeth. This usually happens when the powdered sugar wasn't sifted or wasn't whipped long enough with the liquid. If this happens, try adding another tablespoon of heavy cream and whipping on high for 2 extra minutes.
The extra moisture and mechanical action should help dissolve the remaining sugar crystals.
| Problem | Root Cause | Solution |
|---|---|---|
| Dense, heavy cake | Expired baking powder | Check dates and use fresh leavening agents. |
| Frosting is sliding | Cake was still warm | Chill the cake in the fridge for 30 mins before re applying. |
| Crumbly texture | Over baked | Reduce bake time by 5 mins in the next batch. |
Common Mistakes Checklist:
- ✓ Ensure eggs and dairy are at room temperature (prevents batter curdling).
- ✓ Sift the powdered sugar through a fine mesh strainer (prevents lumps).
- ✓ Do not over mix after the final liquid addition (prevents toughness).
- ✓ Use a kitchen scale for flour (measuring by volume is often inaccurate).
- ✓ Let the butter for the frosting get truly soft, but not "melty."
Smart Dietary Adaptations
If you're cooking for a multicultural crowd or guests with specific needs, this recipe is surprisingly flexible. While the classic version is hard to beat, I've had great success making a few plant based swaps that maintain that vibrant flavor profile.
For a plant based version, you can replace the eggs with a high-quality commercial egg replacer (like Just Egg) or 1/4 cup of unsweetened applesauce per egg. Use a vegan "butter" stick that is designed for baking avoid the tubs of soft spread, as they contain too much water and will make your cake greasy.
Full fat coconut milk (the canned kind) works beautifully as a substitute for both the milk and the sour cream if you add a teaspoon of lemon juice to it first.
If you need a gluten-free option, a 1:1 gluten-free baking flour (like King Arthur or Cup4Cup) works well. Just keep in mind that gluten-free flours often need about 10% more liquid and a 10 minute rest in the pan before baking to help the starches hydrate.
The resulting texture will be slightly more "sandy" but still delicious when paired with that heavy vanilla frosting.
Freezing and Reheating Guide
This is a fantastic make-ahead cake. In fact, I often find that the flavors of the vanilla bean paste deepen after 24 hours. If you are prepping for a big party, you can bake the layers up to two days in advance.
Just wrap them tightly in plastic wrap once they are cool and store them at room temperature.
Freezing the Layers: You can freeze the unfrosted layers for up to 3 months. Wrap each layer in a double coating of plastic wrap and then a layer of aluminum foil. When you're ready to use them, thaw them in the fridge overnight.
Pro tip: frosting a slightly chilled cake is actually easier because it creates fewer crumbs!
Storing the Finished Cake: Once frosted, the butter in the icing acts as a sealant, keeping the moisture locked inside the cake. You can keep the finished cake under a dome at room temperature for up to 2 days, or in the fridge for 5 days.
If you refrigerate it, make sure to take it out 2 hours before serving; cold buttercream is hard and loses its cloud like charm.
What to Serve This With
While this Birthday Cake Idea with Vanilla Frosting is a star on its own, I love pairing it with contrasting flavors. Since the cake is quite sweet and rich, a tart berry compote or fresh strawberries on the side adds a vibrant pop of acidity.
For a truly decadent experience, a scoop of honey lavender ice cream brings a floral, multicultural fusion to the plate.
| Servings | Flour / Sugar Adjustments | Pan Size | Total Cook Time |
|---|---|---|---|
| 6 People | Halve all ingredients | One 6 inch pan | 25-30 mins |
| 14 People | Use original recipe | Two 8 inch pans | 30-35 mins |
| 28 People | Double all ingredients | Two 9x13 pans | 40-45 mins |
If you are looking for another showstopper for your dessert table, you might want to try my Strawberry Layer Cake which uses a similar mascarpone cream that is absolutely divine. It provides a nice fruit forward contrast if you are serving multiple cakes at a larger gathering.
Myths About Vanilla Baking
There's a weird misconception that "vanilla" means "plain" or "boring." In reality, high-quality vanilla is one of the most complex flavors in the world, containing over 250 organic components. When you use real bean paste, you aren't just making a "white cake" you're making a spice cake.
Another myth is that you must cream butter and sugar until "white" to get a light cake. While that works for some recipes, the reverse creaming method we used today proves that you can get a velvety, tight crumb by focusing on coating the flour instead of just aerating the fat.
This method is much more forgiving and results in a cake that doesn't dry out the second you slice it.
Finally, don't believe the idea that all fats are equal. I’ve seen people try to swap the butter for all oil to save time. While oil adds moisture, it doesn't provide the structural integrity or the rich, multicultural flavor that butter brings.
The 30ml of oil in this recipe is just enough to assist with moisture, while the 225g of butter does the heavy lifting for the flavor and "shatter" of the crumb.
Storage and Zero Waste Tips
If you find yourself with leftover cake (rare, I know!), don't let it go to waste. Stale vanilla cake is the absolute best base for cake pops or a classic British trifle. Simply crumble the leftovers, mix with a little extra frosting, roll into balls, and dip in melted chocolate.
It is a vibrant way to extend the life of your bake.
For zero waste in the kitchen, save your vanilla bean paste jar! Even when it looks empty, there is usually a lot of flavor stuck to the sides. Pour a bit of warm milk into the jar, shake it up, and use that "vanilla milk" for your morning coffee or a small batch of oatmeal.
Also, any leftover buttercream can be frozen for up to 3 months and used to top a quick batch of muffins later on.
I hope you enjoy making this cake as much as I do. There is something truly special about the process of turning simple ingredients like flour and butter into a centerpiece for a celebration.
Take your time with the frosting whip, watch for those moist crumbs on the skewer, and most importantly, enjoy every vibrant, vanilla filled bite!

Recipe FAQs
What cake flavors go well with vanilla buttercream?
Pair vanilla buttercream with citrus, chocolate, or fruit based sponge cakes. Its neutral, sweet profile acts as a perfect canvas for bolder flavors like fresh strawberry or rich cocoa.
What is the 1234 rule for cake?
This traditional ratio refers to 1 cup butter, 2 cups sugar, 3 cups flour, and 4 eggs. While it provides a solid foundation for many pound cakes, our specific recipe uses a reverse creaming method for a more tender, refined crumb.
Which cake is trending now for birthday?
Minimalist bento cakes are currently the biggest trend for celebrations. If you want to try this smaller format, you can easily adapt the mixing techniques used in our adorable bento cakes recipe.
What is the 4 day cake rule?
Aim to consume or store your cake properly within 4 days for peak freshness. After this window, the moisture content begins to change, which is why we recommend using leftovers for trifles or cake pops if you haven't finished it by then.
How to achieve the perfect cloud like frosting texture?
Beat the softened butter for several minutes until it turns pale and fluffy before adding the sugar. Whipping the final mixture on high speed for 3-5 minutes after adding the heavy cream and vanilla extract is the secret to creating that signature light, airy consistency.
Is it true that I should mix the batter as much as possible to ensure smoothness?
No, this is a common misconception. You should only mix until the batter is just smooth, as overworking the flour once the liquid is added can lead to a tough, dense cake rather than a tender one.
How to ensure the butter incorporates correctly during the reverse creaming method?
Add the room temperature butter one tablespoon at a time to the dry ingredients while the mixer runs on low. Continue this process until the mixture reaches a texture resembling fine, damp sand, which indicates that the flour particles are properly coated with fat.
Vanilla Birthday Cake
Ingredients:
Instructions:
Nutrition Facts:
| Calories | 841 kcal |
|---|---|
| Protein | 4.8 g |
| Fat | 46.1 g |
| Carbs | 104.0 g |
| Fiber | 0.8 g |
| Sugar | 83.4 g |
| Sodium | 193 mg |
