The Cloud Bakers Secret Soft Fluffy Homemade Roti Chapati
- Unveiling the Magic of True Homemade Roti: Beyond the Store-Bought Blandness
- Why This Simple Indian Flatbread Deserves a Spot on Your Weekly Menu
- Assembling Your Dough Kit: The Minimalist Ingredients for Flawless Homemade Roti
- Precision Measurement: Ensuring the Ideal Flour-to-Water Ratio
- The Master Method: From Flour Dust to Perfectly Poofed Roti
- Troubleshooting Common Pitfalls: Why Didn't My Roti Puff Up?
- Exploring Variations: From Roti Dough to Savory Paratha Hybrids
- Recipe FAQs
- 📝 Recipe Card
Unveiling the Magic of True Homemade Roti: Beyond the store-bought Blandness
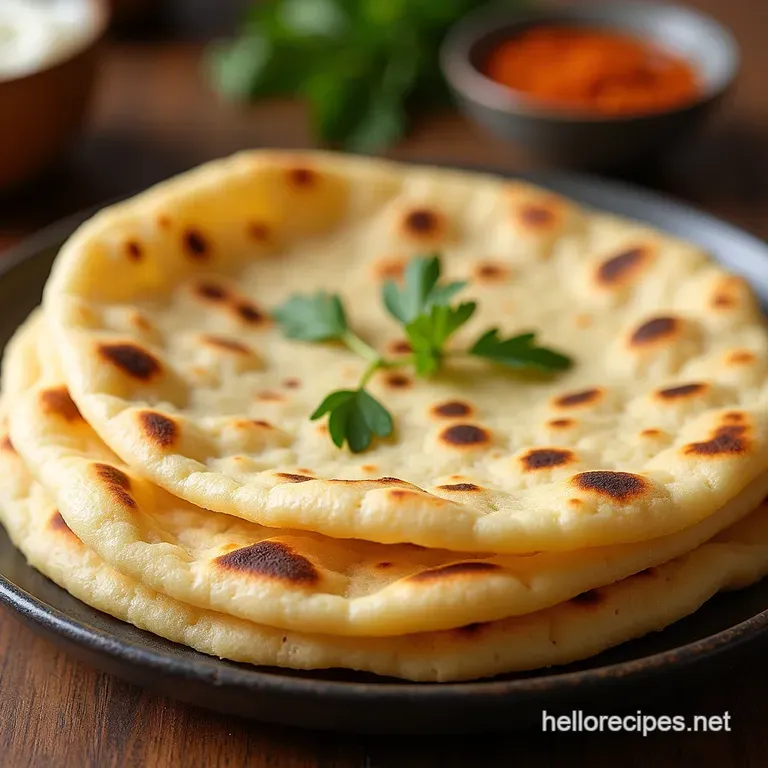
There is a distinct, soul satisfying aroma that fills a kitchen when true Roti is being prepared a warm, wheaty fragrance promising comfort and simplicity. Forget those stiff, store-bought compromises; achieving the perfect Homemade Roti is not a culinary mountain to climb, but rather a gentle, satisfying practice.
This foundational Indian flatbread, often called Chapati , is the unsung hero of countless meals, acting as the perfect utensil and accompaniment to the richest curries and heartiest lentil dishes.
Made from nothing more than whole wheat flour and water, the success of this bread lies entirely in the technique, promising a result that is light, wonderfully pliable, and capable of achieving that coveted, glorious puff.
This comprehensive guide demystifies the process, ensuring your Roti Recipe Easy step-by-step journey results in soft, perfect rounds every single time.
Why This Simple Indian Flatbread Deserves a Spot on Your Weekly Menu
The beauty of Roti resides in its purity and versatility. Because it relies solely on whole wheat flour, it offers substantial fiber and nutrition without the heaviness often associated with leavened breads.
Integrating this bread into your routine is surprisingly easy; with a total time commitment of just about an hour (including resting time for the dough), you can produce a batch of 10 to 12 freshly cooked flatbreads.
This Chapati Recipe Easy methodology ensures you spend minimal active time in the kitchen while maximizing flavor and authenticity. It’s a true staple, perfect for scooping up spicy goodness or simply brushed with ghee as a snack.
Defining the Perfect Roti Texture: Softness is Non-Negotiable
When we talk about perfect Roti, we are universally aiming for a texture that is both soft and slightly chewy never brittle or tough. The ideal texture must allow the bread to fold without cracking.
This pliability is directly linked to two factors: the quality of the flour used and the resting period for the dough. A well rested dough allows the gluten structures to relax, which means when you roll it thin, the dough resists snapping back, leading to an evenly cooked, supple final product.
The Tawa Technique: Essential Equipment for Authentic Results
The key cooking vessel for achieving a proper Roti is the Tawa —a heavy, flat, cast iron or non-stick griddle. The Tawa is responsible for the initial "setting" of the dough, creating the surface tension needed for the final inflation.
It must be heated consistently over medium high heat. While you can technically cook Roti on any large skillet, using a dedicated Tawa ensures even heat distribution, which is crucial for preventing localized burning or undercooking.
Roti vs. Chapati vs. Phulka: Clearing Up the Flatbread Jargon
While often used interchangeably, subtle differences exist. Roti Bread Recipe Easy generally refers to any unleavened flatbread made from whole wheat. Chapati is the specific term, particularly in North India, for a Roti cooked primarily on the Tawa (often resulting in a flatter bread, though still soft).
Phulka , however, is specifically the Roti that has been intentionally puffed up, usually achieved by exposing it to a direct open flame, resulting in a lighter, airier texture. Our goal here is to master the Phulka technique to ensure you achieve the Puffed Roti Recipe standard.
Assembling Your Dough Kit: The Minimalist Ingredients for Flawless Homemade Roti
One of the most appealing aspects of this Homemade Roti Recipe is its elemental nature. You need very few items to create something truly spectacular. The core ingredients are simply two: whole wheat flour and water, with a touch of salt for flavor enhancement.
For an extra layer of richness and supreme softness, you can optionally introduce one teaspoon of ghee or neutral oil into the dough mixture.
Related Recipes Worth Trying
- The Best Homemade Peach Cobbler Recipe with Flaky Biscuit Topping — Forget soggy bases This easy peach cobbler recipe features sunripened fruit under a light buttery biscuit crown The perfect summer peach dessert is here
- The Best Homemade Buttercream Frosting Recipe for Silky Smooth Results — Ditch the grainy texture This easy buttercream frosting recipe delivers the best silky smooth finish for all your cakes and cupcakes Get the technique right
- The Ultimate BLT Sandwich Crispy Bacon Homemade Garlic Mayo — Forget soggy bread This Perfect BLT Sandwich recipe elevates the classic with shatteringly crisp bacon and a tangy homemade garlic mayo Get the best...
Precision Measurement: Ensuring the Ideal Flour-to-Water Ratio
The ratio between your flour and water dictates the dough’s consistency, which is paramount. For a reliable batch yielding about 10 to 12 Rotis, you will begin with 2 cups (240 grams) of whole wheat flour. Into this, you will gradually incorporate about ½ cup (120 ml) of water.
Remember, this is a starting point; you are aiming for a dough that is firm yet yielding.
Selecting the Right Flour: Why Atta Makes All the Difference
The flour selection is perhaps the most important component of this Best Roti Recipe . You must use Atta flour, which is finely milled whole wheat flour traditionally used in South Asia.
Atta is finely ground, which allows it to achieve a smoother texture than standard whole wheat flour you might find in a typical Western grocery store. If you cannot source true Atta, look for the finest, softest whole wheat flour available, as this will provide the necessary structure for elasticity.
Water Temperature Secrets: The Key to Pliable Dough
The temperature of your water plays a subtle but important role in hydration. Avoid ice-cold water, as it can inhibit the gluten formation necessary for elasticity. Instead, use lukewarm or warm water.
This slight warmth helps the flour absorb the moisture evenly and quickly, leading to a more workable dough right from the start.
Essential Tools Beyond the Rolling Pin (Belan)
While a rolling pin ( Belan ) and a flat surface ( Chakla ) are necessary for flattening, two other tools become essential for the cooking process. First, a heavy bottomed Tawa . Second, a pair of sturdy tongs for maneuvering the Roti during the crucial puffing stage.
If you plan on achieving the authentic open flame puff, you will also need safe access to a medium high gas burner.
The Master Method: From Flour Dust to Perfectly Poofed Roti
Creating the dough is the foundation, but executing the steps properly transforms simple ingredients into transcendent flatbreads. Following this sequence is the essence of a successful Roti Recipe Easy step-by-step .
Kneading Fundamentals: Developing Gluten Without Overworking
Combine the flour and salt in a large bowl. Slowly add the warm water while mixing with your fingers until a shaggy mass forms. Turn this onto a clean surface and begin kneading. This step requires commitment: knead with moderate pressure for a solid 8 to 10 minutes. The goal is elasticity.
The dough should feel smooth, uniform, and spring back softly when you poke it. If it feels sticky, add a tiny sprinkle of dry flour; if it feels crumbly, moisten your hands slightly and continue working it.
Resting the Dough: Giving Your Atta Time to Relax
This step cannot be overstated for a Soft Roti Recipe . Once the dough is smooth, form it into a ball. Lightly grease the bowl you used, place the dough back inside, cover it with a damp cloth or plastic wrap, and allow it to rest at room temperature for a minimum of 30 minutes, though an hour is even better.
This rest allows the gluten strands to relax, making the dough pliable and ensuring your Rotis roll out thinly without tearing or shrinking.
Rolling Techniques: Thinness Equals Fluffiness
After resting, divide the dough into equal portions, usually about the size of a golf ball (yielding 10-12 pieces). Keep the unused portions covered to prevent drying. Dust one portion lightly with dry flour, press it into a small disc, and begin rolling using your Belan .
Roll outwards evenly, aiming for a consistent diameter of 6 to 7 inches. The key here is evenness; thick spots will remain doughy when cooked.
The Direct Flame Finish: How to Get Instant Inflation
Heat your Tawa over medium high heat until it’s hot enough that a drop of water evaporates instantly. Place the rolled Roti onto the dry, hot Tawa . Cook for about 30 seconds until small bubbles surface. Flip it.
Cook the second side for 45 60 seconds until light brown specks appear. Now, for the magic: using tongs, transfer the partially cooked Roti directly over an open gas flame. It should balloon almost instantly due to the steam trapped inside.
Give it 5 10 seconds per side until lightly browned, and immediately transfer it to a stack wrapped in a clean cloth to maintain that beautiful steam induced softness.
Troubleshooting Common Pitfalls: Why Didn't My Roti Puff Up?
If your Roti remained flat, there are usually three culprits. First off,, the Tawa was not hot enough, leading to a dry, inelastic surface before the internal steam could build pressure. Next,, your dough may have been too dry or lacked sufficient kneading, resulting in weak gluten development.
Finally, the rolling technique might have created uneven thicknesses, allowing steam to escape too easily through the thinner sections. Practice on getting that consistent 6-7 inch circle, and ensure your Tawa is smoking hot before the first placement.
Exploring Variations: From Roti Dough to Savory Paratha Hybrids
While the basic Roti is perfection in simplicity, the Roti Bread Recipe Easy base lends itself wonderfully to creative additions. You can easily transform your dough mix before kneading by incorporating finely chopped herbs like coriander or cilantro, or by adding spices like cumin seeds or ajwain (carom seeds) directly into the dry flour for a savory lift.
Addressing Hardness: Simple Fixes for Stiff Roti Dough
If you find your dough becomes stiff during the kneading or resting process, it’s likely too dry. Resist the urge to add large splashes of water. Instead, wet your hands slightly and continue kneading, or add just a teaspoon of water at a time until the dough softens.
A stiff dough will always result in harder, less pliable finished Rotis.
Inclusion Ideas: Adding Spices or Vegetables to Your Basic Roti Base
For flavor variety, consider adding finely chopped spinach (ensure it’s squeezed completely dry) or a teaspoon of finely grated cooked potato into the dough mix. These inclusions slightly alter the texture, making the Roti slightly denser, moving it toward a hybrid Paratha style, but they add tremendous nutritional value and taste.
Making Kuttu (Buckwheat) Variations: A Gluten Conscious Alternative
For those seeking a gluten-free option, especially during fasting periods, you can experiment with substituting half of the Atta with Kuttu (buckwheat) flour.
Be aware that buckwheat lacks gluten, so this dough will require far less kneading and will not puff in the same manner, resulting in a flatter, slightly more crumbly bread, but it remains a delicious alternative.
Reviving Day-Old Roti: The Best Way to Reheat for Softness
If your Rotis have cooled and stiffened, do not despair. The secret to reviving them lies in reintroducing moisture. Stack 3-4 stiff rotis, wrap them securely in a damp paper towel, and microwave them for 15 20 seconds. The trapped steam will soften them immediately.
Alternatively, place them back on a hot Tawa for 10 seconds per side, pressing gently with a cloth, before serving.

Recipe FAQs
Why won't my Homemade Roti puff up? It just stays flat!
Ah, the classic roadblock! The puffing relies on steam, which means two things must be right: the dough must be soft and elastic from resting, and the tawa (griddle) needs to be piping hot.
If the heat is too low, the moisture escapes before the pressure builds inside, resulting in a flat disc instead of a delightful balloon.
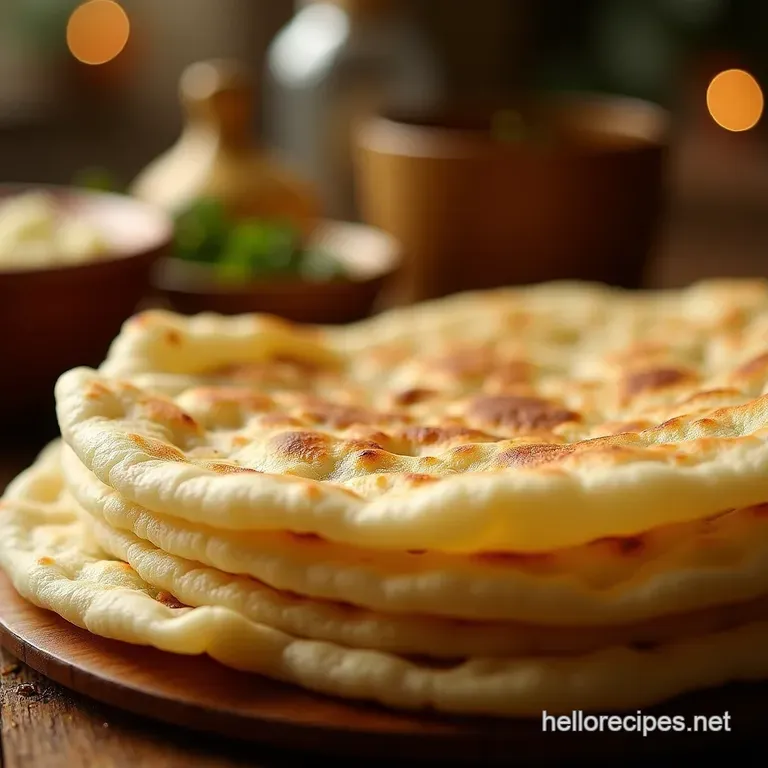
What’s the secret to making truly soft Homemade Roti that doesn't turn stiff the next day?
The real trick to enduring softness is trapping the steam immediately after cooking. As soon as the roti comes off the heat, wrap it snugly in a clean, dry kitchen towel or place it in a casserole dish with a lid.
This trapped heat and moisture keep them pliable think of it like keeping your chips crisp by sealing the bag!
Can I make the dough ahead of time, or does it have to be freshly prepared?
You absolutely can prepare the dough ahead, which is handy for busy weeknights. Let the dough rest for at least 30 minutes, then you can pop it into an airtight container in the fridge for up to 24 hours.
Just remember to let it warm up slightly and knead it for a minute before rolling; cold dough is a nightmare to roll thin!
I don't have Atta flour; can I use standard All-Purpose Flour (Maida) for my Roti?
You can, but it won't be traditional Roti; it will behave more like a very thin Chapati or even a basic unleavened bread. Atta flour is finely milled whole wheat, which gives Roti its distinct nutty flavour and wholesome texture.
If you use Maida, your rotis will likely be paler and slightly softer, but they won't have that classic hearty bite.
How should I store any leftover Roti, and how do I reheat them properly?
For leftovers, keep them stacked and tightly wrapped in a bag or container at room temperature for up to 2 days. To reheat and bring back that 'fresh off the tawa' feel, place them directly onto a hot, dry skillet for about 15 seconds per side, or even briefly over an open gas flame if you’re feeling adventurous!
Soft Homemade Roti Recipe

Ingredients:
Instructions:
Nutrition Facts:
| Calories | 147 kcal |
|---|---|
| Protein | 1.6 g |
| Fat | 10.3 g |
| Carbs | 8.5 g |
| Fiber | 1.2 g |
| Sodium | 63 mg |
