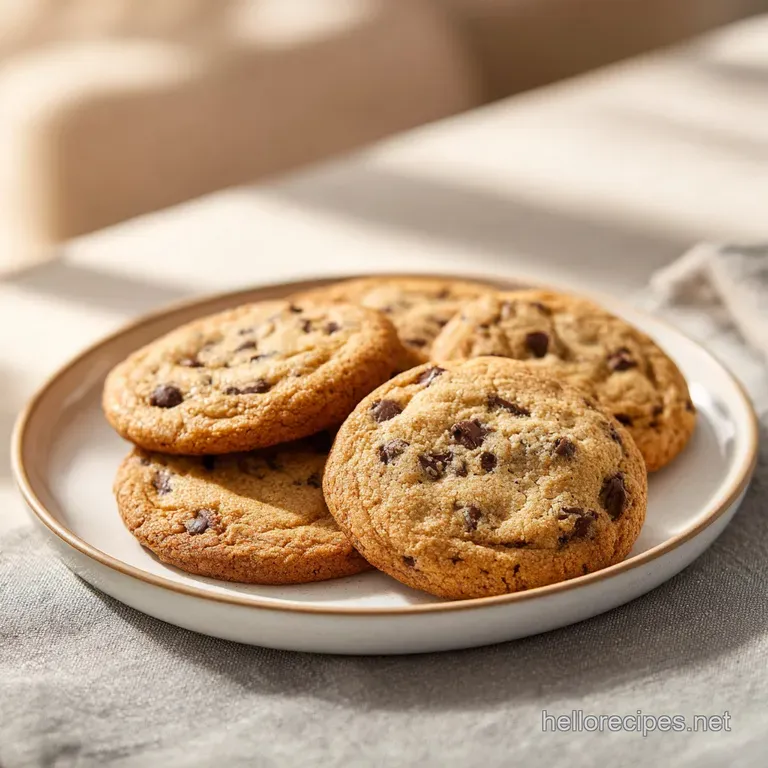
Santa's Favorite Chocolate Chip Cookies
- Time: Active 50 minutes, Passive 10 minutes, Total 60 minutes
- Flavor/Texture Hook: Buttery, chewy centers with a colorful candy shell shatter
- Perfect for: Holiday gift tins, festive dessert boards, or a midnight snack for Santa
- Bake the Best Santas Favorite Chocolate Chip Cookies
- The Secret Ingredient for Unmatched Cookie Texture
- Essential Timing and Yield for Holiday Success
- Selecting Premium Elements for the Best Dough
- Tools Required for Professional Holiday Baking
- Step by Step Method for Festive Treats
- Solving Common Baking Hurdles with Ease
- Creative Ways to Customize Your Holiday Batch
- Keeping Your Cookies Fresh for Santa
- Elegant Presentation for Your Holiday Dessert Plate
- Recipe FAQs
- 📝 Recipe Card
Bake the Best Santas Favorite Chocolate Chip Cookies
The kitchen is quiet, lit only by the soft glow of the oven and the twinkling lights on the tree, but the air is thick with the scent of toasted sugar and vanilla. There is something deeply rhythmic about the "clack clack" of red and green candies hitting the glass bowl, a sound that signals the official start of the holiday season in my home.
I remember the first time I pulled a tray of these out; the way the semi sweet chocolate pooled in molten dips against the vibrant festive colors was enough to make me skip the cooling rack entirely.
We often get caught up in the hustle of the holidays, but this recipe is my invitation to slow down and embrace the tactile joy of baking. It isn't just about the sugar; it's about the way the cold butter transforms into a pale, fluffy cloud under the mixer's paddle, and how the dough feels heavy and promising in your hands.
This particular version of santas favorite chocolate chip cookies has been a staple in my kitchen because it hits that specific multicultural sweet spot a fusion of the classic American chewy cookie with the exuberant, vibrant colors of a global celebration.
You’re looking for a cookie that doesn't just taste good but feels like a hug in a hand held format. We’re going for a specific contrast here: a soft, almost fudgy interior and a slightly crisp edge that yields with a satisfying snap.
Whether you’re leave these out on a chipped ceramic plate for a midnight visitor or stacking them into vibrant tins for neighbors, the result is the same: pure, unadulterated comfort that reminds us why we fell in love with baking in the first place.
The Secret Ingredient for Unmatched Cookie Texture
What actually makes these cookies stand out is the interaction between moisture and structure. Most people think a cookie is just a vessel for chocolate, but the dough is the real hero here. We use a higher ratio of dark brown sugar to granulated sugar because the molasses in the brown sugar adds acidity.
That acidity reacts with the baking soda to create a lift that is tender rather than cakey. It’s a subtle shift that results in a velvety crumb that melts the moment it hits your tongue.
Moisture Lock: Cornstarch acts as a tiny sponge, holding onto liquid during the bake to ensure the center remains chewy rather than drying out into a cracker.
Fat Solidification: Chilling the dough for exactly 30 minutes allows the butter to firm up, which means it takes longer to melt in the oven, preventing the dreaded "pancake spread."
Cold Emulsification: Using a room temperature egg ensures it blends seamlessly into the creamed butter, creating a stable air pocket network for a lighter bite.
| Dough Thickness | Oven Temperature | Rest Time | Visual Finished Cue |
|---|---|---|---|
| 1.5 inches (Scoup) | 350°F (175°C) | 5 minutes | Edges set, center slightly soft |
| 1 inch (Flattened) | 350°F (175°C) | 3 minutes | Golden brown throughout |
| 2 inches (Jumbo) | 350°F (175°C) | 8 minutes | Deep golden rim, puffy middle |
Adding cornstarch might seem like a small detail, but it is the bridge between a "good" cookie and a "how did you make this?" cookie. It softens the proteins in the all purpose flour, mimicking the lower protein environment of cake flour while keeping the heartiness of a standard chip cookies base.
Essential Timing and Yield for Holiday Success
When we talk about component analysis, we have to look at the pillars of the dough. Each ingredient has a specific role that goes beyond just flavor; they are the architectural blueprints of your bake.
If you've ever wondered why some cookies stay soft for days while others turn into hockey pucks by morning, the answer lies in the hydration and the type of sugars used.
| Component | Role in Recipe | Pro Secret |
|---|---|---|
| Dark Brown Sugar | Provides deep caramel notes and essential moisture | Pack it tight into the cup to ensure the correct molasses ratio |
| Cornstarch | Interferes with gluten development for a tender bite | Sift it with the flour to avoid tiny white clumps in the finished bake |
| Unsalted Butter | Controls the spread and provides a rich, fatty mouthfeel | Use butter at 65°F it should dent with pressure but not be greasy |
| Sea Salt | Cuts through the intense sweetness of the candies | Use flaky sea salt to create tiny "flavor pops" on the palate |
If you're craving that rich, nutty profile without the oven time, check out this Safe Brown Butter cookie dough that captures similar festive vibes. It’s a great way to experience the flavor map of a holiday bake without the traditional steps.
The salt is particularly important in this recipe. Because we are using both semi sweet chocolate and candy coated chocolates, the sugar levels are high. Sea salt acts as a vibrant counterpoint, sharpening the cocoa notes and making the butter taste even creamier.
Without it, the flavor profile would be flat; with it, every bite is a multicultural explosion of sweet and savory.
Selecting Premium Elements for the Best Dough
Gathering your ingredients is the first step in the ritual. I always suggest using the best quality vanilla you can find pure extract over imitation makes a world of difference in the floral aroma that wafts out of the oven.
For the chocolate, semi sweet chips provide a stable melt that doesn't overwhelm the colorful candies.
- 2 ¼ cups (280g) All purpose flour: The backbone of the structure.
- 1 tsp Baking soda: Our primary leavener for that classic lift.
- 1 ½ tsp Cornstarch: Why this? Keeps the cookies soft and prevents them from becoming too crispy or hard.
- ½ tsp Sea salt: Enhances the chocolate and balances the sugar.
- ¾ cup (170g) Unsalted butter: Why this? Provides the fat needed for flavor and a tender, melt in-the mouth texture.
- ¾ cup (150g) Dark brown sugar: Adds moisture and a deep caramel undertone.
- ½ cup (100g) Granulated white sugar: Gives the edges that slight, addictive crunch.
- 1 large Egg: The binder that holds our festive world together.
- 2 tsp Pure vanilla extract: Adds depth and a nostalgic aroma.
- 1 cup (180g) Semi sweet chocolate chips: The classic heart of the cookie.
- ½ cup (90g) Red and green chocolate coated candies: The festive "shatter" and color pop.
| Original Ingredient | Substitute | Why It Works |
|---|---|---|
| Dark Brown Sugar | Light Brown Sugar + 1 tsp Molasses | Replicates the moisture and acidity of dark sugar. |
| Unsalted Butter | Vegan Butter Sticks (high fat) | Maintains the fat to flour ratio for a dairy-free version. |
| Semi sweet Chips | Dark Chocolate Chunks | Adds a sophisticated, bitter contrast to the sweet candies. |
For those who want to pivot from cookies to a grander centerpiece, this German Chocolate Cake offers that same deep cocoa satisfaction. It's a fantastic alternative if you have a crowd that prefers a fork and plate dessert over a hand held snack.
Tools Required for Professional Holiday Baking
You don't need a professional kitchen to make these, but a few specific tools will make the process much smoother. A stand mixer such as a KitchenAid is my preferred method because it allows for a high speed "cream" of the butter and sugar, which is vital for aeration.
If you're working by hand, be prepared for a bit of a workout!
A medium cookie scoop is another non negotiable for me. It ensures that every single one of your santas favorite chocolate chip cookies is the exact same size. This isn't just about aesthetics; uniform size means they all bake at the same rate.
There is nothing worse than having half a tray burnt while the other half is raw.
Finally, parchment paper or a silicone mat is your best friend. It prevents the sugars in the candies from sticking to the metal sheet and burning. Plus, it makes cleanup a breeze, leaving you more time to enjoy the "vibrant" atmosphere of your festive home rather than scrubbing pans at the sink.
step-by-step Method for Festive Treats
- Whisk together 2 ¼ cups all purpose flour, 1 tsp baking soda, 1 ½ tsp cornstarch, and ½ tsp sea salt in a medium bowl. Note: This ensures the leavening agents are evenly distributed so you don't get any "salty pockets."
- Cream ¾ cup softened butter, ¾ cup dark brown sugar, and ½ cup white sugar in your mixer for 3 minutes until the mixture is pale, light, and looks like wet sand.
- Add 1 large egg and 2 tsp vanilla extract to the creamed mixture. Beat on medium until the dough looks silky and fully combined.
- Lower the mixer speed and gradually pour in the dry ingredients. Stop the moment the last streak of white flour disappears.
- Fold in 1 cup semi sweet chocolate chips and ½ cup festive candies by hand with a spatula. until the colors are evenly swirled through the dough.
- Cover and chill the dough in the fridge for 30 minutes. Note: This is the most important step for preventing flat, oily cookies.
- Preheat your oven to 350°F (175°C) and line your sheets with parchment.
- Scoop 2 tablespoon sized balls and place them 2 inches apart. until the tray is filled but not crowded.
- Bake for 9-10 minutes. until the edges are just barely golden but the tops still look soft.
- Cool on the pan for 5 minutes until the structure sets enough to move to a rack.
Cornstarch for Tender Texture
Adding this starch is a trick I learned from high end bakeries. It physically gets in the way of gluten strands forming, which means the dough stays soft even after it cools.
Chilling for Thick Results
When you chill the dough, you're not just letting flavors mingle; you're hydrating the flour. This makes the dough easier to handle and ensures a much thicker, taller cookie that won't spread into a puddle.
Sugar Ratios and Longevity
The dark brown sugar is high in moisture. By using more of it than white sugar, we create a humectant effect, which means the cookies pull moisture from the air to stay soft for days.
Solving Common Baking Hurdles with Ease
Baking is a conversation between you and your ingredients. Sometimes, things go a bit sideways maybe the oven runs hot, or the butter was a bit too melted. Understanding the "why" behind these issues helps you fix them on the fly without losing a single batch of these festive treats.
Fixing Spread Out Cookies
If your cookies look like they’re trying to escape the pan, it’s usually a temperature issue. The butter likely melted before the flour structure had a chance to set. This often happens if the dough isn't chilled long enough or if the baking sheets were still warm from a previous batch.
| Problem | Root Cause | Solution |
|---|---|---|
| Flat/Greasy Cookies | Butter was too warm or dough wasn't chilled | Chill the dough for an extra 15 minutes and use cool pans. |
| Dry/Crumbly Texture | Too much flour or overbaked | Measure flour by weight (280g) and pull cookies out when "underdone." |
| Hardened Candies | Overtapped or baked too high | Keep the temperature at exactly 350°F and don't over mix the candies. |
One mistake I once made was trying to bake these on a dark, non stick pan without adjusting the time. Dark pans absorb more heat, which can lead to burnt bottoms. Always stick to light colored aluminum pans if you can, or reduce the temperature by 25°F if using dark metal.
Common Mistakes Checklist
- ✓ Always use room temperature eggs to prevent the butter from curdling.
- ✓ Don't skip the 3 minute creaming time; aeration is key to the texture.
- ✓ Avoid over mixing once the flour is added, or the cookies will be tough.
- ✓ Check your oven temperature with an external thermometer for accuracy.
- ✓ Never place raw dough onto a hot baking sheet from a previous round.
Creative Ways to Customize Your Holiday Batch
If you’re feeling adventurous, this recipe is a fantastic canvas for fusion flavors. You can easily swap the semi sweet chips for white chocolate to create a "White Christmas" aesthetic that looks stunning against the red and green candies.
The base dough is sturdy enough to handle various mix ins without losing its signature chew.
- To get a Salted Caramel vibe: Use half white chocolate chips and top each cookie with a pinch of Maldon salt before baking.
- To get a Nutty Crunch: Replace half the chocolate chips with chopped toasted pecans or walnuts for a multicultural twist on the classic.
- To get a Spicy Kick: Add ½ tsp of ground cinnamon and a pinch of cayenne to the dry ingredients for a "Mexican Hot Chocolate" festive cookie.
| Fresh Version | Shortcut Version | Flavor Impact |
|---|---|---|
| Hand creamed Butter | Melted Butter (Melt & Mix) | Fresh is much fluffier; shortcut is denser/greasier. |
| Pure Vanilla Bean | Vanilla Essence | Fresh has complex floral notes; shortcut is one note. |
| Chilled Dough | Room Temp Dough | Fresh is thick and soft; shortcut is thin and crispy. |
Baking these as a double batch is always a smart move. You can freeze the individual dough balls and bake them off one-by-one whenever you need a "vibrant" pick me-up. Just add 1-2 minutes to the baking time if you're going straight from the freezer to the oven.
Keeping Your Cookies Fresh for Santa
Storage is where many holiday bakers lose the battle. To keep your santas favorite chocolate chip cookies soft, you want to store them in an airtight container as soon as they are completely cool. A little trick I use is to tuck a single slice of plain white bread into the container.
The cookies will actually pull the moisture out of the bread, staying soft while the bread turns into a crouton.
In the fridge, these will stay fresh for up to 5 days, though I doubt they'll last that long! For long term storage, they freeze beautifully. I like to wrap them in pairs in plastic wrap and then place them in a heavy duty freezer bag. They’ll stay perfect for up to 3 months.
When you're ready to eat, just let them sit at room temperature for 20 minutes or give them a 10 second zap in the microwave for that "just baked" molten chocolate experience.
Don't let the scraps go to waste! If you have broken cookies or crumbs at the bottom of the tin, save them. They make an incredible topping for vanilla bean ice cream or can be folded into a festive cheesecake crust for a multicultural dessert fusion.
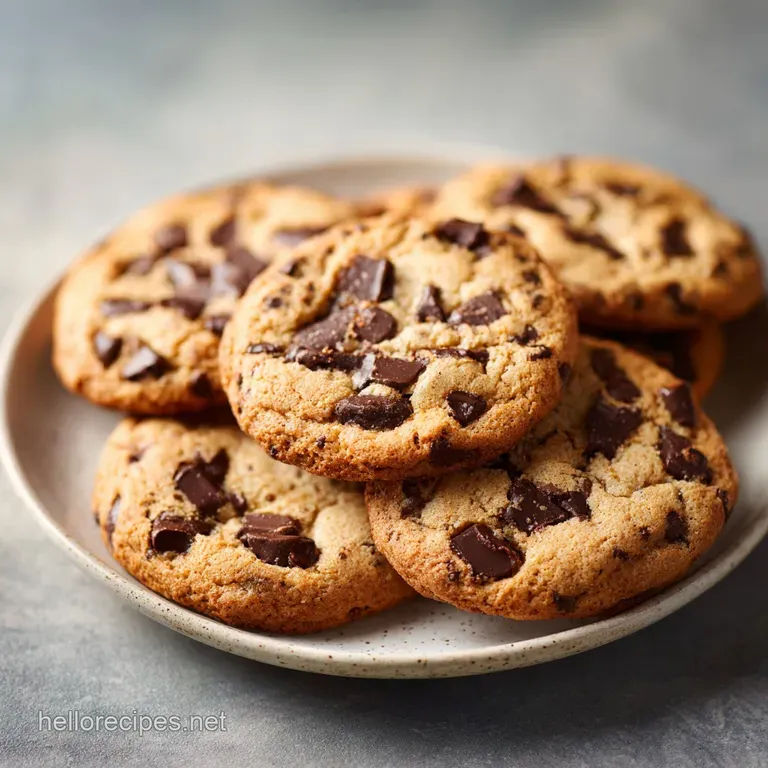
Elegant Presentation for Your Holiday Dessert Plate
When it comes to serving these, lean into the festive contrast. I love placing them on a dark wooden board or a vibrant ceramic platter to make the red and green candies really pop. If you're hosting a party, try stacking them in a "cookie tower" tied with a simple piece of kitchen twine for a rustic, homey feel.
Pairing is also key. While a cold glass of milk is the traditional choice, these cookies are sophisticated enough to stand up to a rich espresso or a spicy chai latte. The bitterness of the coffee or the warmth of the tea spices creates a beautiful balance with the sweet, buttery dough.
- Sugar is more than a sweetener: It's actually a liquid in baking terms once it melts. It controls the spread and the browning.
- Salt doesn't make things salty: It functions as a flavor enhancer that makes the cocoa and butter profiles more distinct and vibrant.
- Resting isn't optional: The carry over cooking that happens on the hot pan for 5 minutes is what finishes the center of the cookie without drying out the edges.
Creating these cookies is a small act of holiday magic. It’s about more than the 192 calories per serving; it’s about the "shatter" of the candy, the velvety crumb, and the shared joy of a treat made with intention.
Trust the process, don't rush the chill, and you'll have a plate that truly earns its title as Santa's favorite.

Recipe FAQs
How to achieve a thick, bakery style cookie texture?
Chill your dough for at least 30 minutes before baking. This prevents the butter from melting too quickly in the oven, which keeps the cookies from spreading thin and ensures a thick, chewy center.
Why must I cream the butter and sugars for a full three minutes?
Aeration is the secret to a fluffy cookie structure. Creaming the butter and sugars until the mixture turns pale and light incorporates air bubbles that expand during baking; if you mastered this creaming technique, you can apply it to achieve the perfect crumb in any classic drop cookie.
How to ensure the cookies do not overbake?
Remove them from the oven while the centers still look slightly underbaked. They will finish setting on the hot baking sheet during the mandatory five minute cooling period, maintaining a soft, tender interior.
Is it necessary to use a stand mixer for this recipe?
Yes, it is highly recommended. A stand mixer fitted with the paddle attachment is the most efficient way to achieve the required emulsification of the egg and butter, which is difficult to replicate by hand.
How to keep the cookies fresh for a few days?
Store them in an airtight container at room temperature. Placing a slice of bread in the container can also help retain moisture and keep them soft for longer.
Can I bake these cookies at a higher temperature to save time?
No, stick to the 350°F (175°C) setting. Baking at a higher temperature will cause the edges to burn before the center of the cookie has a chance to set properly.
How to prevent salty pockets in the dough?
Whisk the sea salt thoroughly with the flour, baking soda, and cornstarch before adding to the wet ingredients. This ensures the leavening and seasoning are perfectly distributed throughout the entire batch of dough.
Santa S Chocolate Chip Cookies

Ingredients:
Instructions:
Nutrition Facts:
| Calories | 192 kcal |
|---|---|
| Protein | 2.1g |
| Fat | 9g |
| Carbs | 26.5g |
| Fiber | 0.7g |
| Sugar | 16.4g |
| Sodium | 107mg |
