Perfectly Fluffy Rice in Your Instant Pot
The Magic of Cooking Rice in Your Instant Pot
Oh my gosh, remember that one time when i totally forgot to make rice for dinner? the whole meal felt incomplete! that's when i discovered how to cook rice in an instant pot , and my cooking game changed forever.
Seriously, if you’ve ever found yourself rushing around the kitchen, juggling pots, while the clock ticks down, this instant pot method is about to be your new best friend.
Let’s kick off this rice adventure with a little backstory. rice has been a staple food for thousands of years, popping up in cultures across asia, africa, and even here in the good ol’ u.
S. of a. whether it’s fluffy basmati fluffing up a spicy curry or hearty brown rice hanging out on your dinner plate, it’s been a filling sidekick for ages.
Nowadays, everyone’s whipping up instant pot rice recipes , and for good reason! in about 20 minutes, you can have perfectly cooked rice just like that.
Plus, it’s super forgiving for those of us who still get a little flustered by boiling water.
Recipe Overview: Fluffy Rice Unlocked
Now, let’s talk about why this recipe rocks. first off, it’s easy like “i just stumbled out of bed and i can still handle it” easy.
You can snag all your ingredients for under $5, and depending on the type of rice, you’ll get about four servings.
Fancy dinner for the fam? check. quick weeknight meal? double check.
You’ll need roughly five minutes to prep , and in only 10 minutes of cook time , voila! your rice is ready, fluffy and hot.
And honestly, what could be more rewarding than serving up a side that feels like a big deal but took hardly any effort?
Key Benefits of Instant Pot Rice
Now, let’s get into the good stuff the benefits! first up, let’s talk health benefits . rice is low in fat and a great source of energy perfect fuel for those busy days.
With instant pot rice , you get to pick your poison: white, brown, or even mix in some quinoa for a wholesome twist.
And here’s a unique selling point: rice can be as versatile as your inner culinary artist allows. it’s perfect for any occasion, too.
Serving up a home cooked meal for family game night? you can throw together a stir fry alongside your perfect rice. hosting a dinner party? use it as part of a sophisticated side for your fancy main dish.
What makes this method shine is how darn simple it is compared to other pressure cooker meals or even regular stovetop rice! no more boiling over or burnt bottoms; the instant pot does the heavy lifting for you.
Time to Gather Ingredients!
Okay, now that we’ve set the scene and built the tension about how fabulous this recipe is, let’s get to what you’ll need! Ready? Gather up:
- 1 cup long grain white rice (like Basmati or Jasmine)
- 1 cup water or broth (chicken/vegetable)
- 1 tablespoon unsalted butter or olive oil (optional)
- ½ teaspoon salt (adjust to taste)
You guys, this is all super straightforward. and if you’re like me and love to experiment in the kitchen, feel free to swap in chicken broth or toss in some spices maybe stir in some garlic or onion for flavor.
So, let’s put on our aprons and dive into the steps to create this fluffy masterpiece. trust me; you won’t regret mastering the art of instant pot rice .
Cooking is all about finding those little victories, and serving up perfect rice can definitely be one of those!
Your Essential Ingredients Guide for Perfectly Fluffy Rice
So you wanna learn how to cook rice in an instant pot ? buckle up, because once you get the hang of it, you’ll be making the fluffiest rice like a pro! cooking rice doesn't need to be a battle trust me, i’ve been there, and let’s just say there were some kitchen disasters along the way.
Let’s break it down into easy bites think of it as your roadmap for rice success.
Premium Core Components
First things first: let’s talk about the essential ingredients . You’ll need:
- 1 cup (200g) long grain white rice (Basmati or Jasmine really rocks)
- 1 cup (240ml) water or broth (chicken or veggie)
- 1 tablespoon (15g) unsalted butter or olive oil (optional but why not?)
- ½ teaspoon (3g) salt (adjust to your taste; don’t be shy)
Quality indicators? Look for rice that’s uniform and shiny, not broken or dull. Store it in a cool, dry place, and it’ll last for ages like your favorite pair of jeans that you just can’t throw away!
Signature Seasoning Blend
Let’s get those flavors popping! Use aromatics and seasonings that complement your rice:
- Garlic or onion: Adds a savory depth.
- Bay leaves or hunk of ginger: Will elevate your game without too much effort.
- Toss in herbs like cilantro or parsley just before serving for that fresh zing!
Tip: If you want a little variety, consider mixing seasonings. One day, add cumin for a Mexican twist; another day, toss in saffron for a touch of elegance.
Smart Substitutions
Sometimes things go sideways. No broth? No problem! Water works just fine. Need a gluten-free option? Use quinoa. Other dietary restrictions? Rinse and repeat the possibilities are endless.
Emergency replacements? if you find yourself low on rice, try couscous or even farro! trust me; they both cook up nicely.
Also, feel free to experiment with seasonal ingredients. in summer, fresh basil might be just what you need!
Kitchen Equipment Essentials
Now, the equipment. You only need a few tools to turn into a kitchen superstar:
- Instant Pot (or any electric pressure cooker) : This is your knight in shiny armor.
- Measuring cups: Accurate measurements are the secret sauce to your success.
- Fine mesh strainer: Essential for rinsing rice, and you’ll need it trust me!
Don’t worry if you don’t have all the fancy gadgets. A regular pot will do, but hey, the Instant Pot is where the magic happens!
Let’s Talk Technique!
Food is all about technique! here’s how i always roll when cooking rice. rinse your rice well like, really well. you want to get rid of that excess starch.
Combine your ingredients in the instant pot, seal it up, and let the pressure do the work.
Remember: for white rice , set the timer for 4 minutes . for brown rice , you’re looking at 22 minutes .
When done, allow it to rest for about 10 minutes before releasing the pressure. fluff, and serve! talk about easy pressure cooker meals!
Serving Suggestions
Pair your fluffy rice with various dishes think curries, stir fries, or even salads! you can throw anything in there, and it’ll come out tasting divine.
Sometimes, i just make a giant bowl of rice and add leftovers from the fridge to it. instant meal, right? it’s a no-fuss dinner that always hits the spot!
And there you have it the complete guide to making rice your new best friend. it’s time to dive into those instant pot rice recipes and explore all the instant pot ideas you can cook up! don’t worry, i’ll be right there with you, figuring it all out every step of the way.
Now on to the fun part getting our hands ready to whip up some perfectly fluffy rice in your instant pot! happy cooking!
Unlocking the Secrets of Professional Cooking: Perfectly Fluffy Rice in Your Instant Pot
Cooking rice might seem pretty basic, right? but let me tell you, there’s an art to it , especially when you want it to come out perfectly fluffy each and every time.
Today, i’m sharing my go-to method for cooking rice in an instant pot. whether you're whipping up some basmati for a spicy curry or hearty brown rice for your meal prep, this technique will change the game for you!
Essential Preparation Steps
First things first - the mise en place . it’s a fancy french term, but it just means "everything in its place.
” gather your ingredients and equipment: 1 cup of long grain white rice, 1 cup of water or broth, a tablespoon of butter (optional), and some salt.
This step keeps you organized and less stressed while cooking.
Ah, and let's talk time management. set a timer for about 20 minutes total this includes prep, cooking, and pressure release time.
You’ll be surprised how quickly it comes together. it’s like getting that extra half hour of sleep because you prepped your breakfast ahead!
And safety? Always make sure your Instant Pot is closed properly. You don’t want a steam explosion! Trust me, I’ve had my share of kitchen fails.
Step-by-step Process
Now, let’s get into the nitty gritty of how to cook rice in your Instant Pot.
- Rinse the Rice : Start by rinsing the rice under cold water in a fine mesh strainer until the water runs clear. This gets rid of excess starch and prevents stickiness.
- Combine Ingredients : Toss the rinsed rice in the Instant Pot along with your 1 cup of water or broth , optional butter, and ½ teaspoon of salt .
- Seal the Pot : Secure the lid and set the steam valve to "sealed."
- Set Cooking Time : Select "Manual" or "Pressure Cook." For white rice , set it to 4 minutes . If you’re using brown rice , go for 22 minutes .
- Pressure Release : Once your timer goes off, let it sit for about 10 minutes to naturally release pressure. After that, do a quick release for any remaining steam.
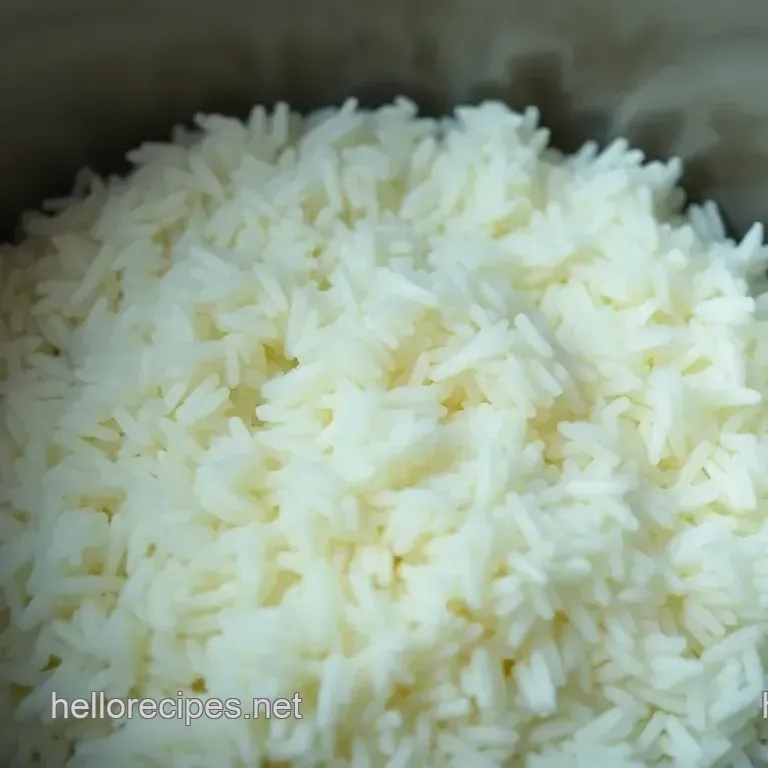
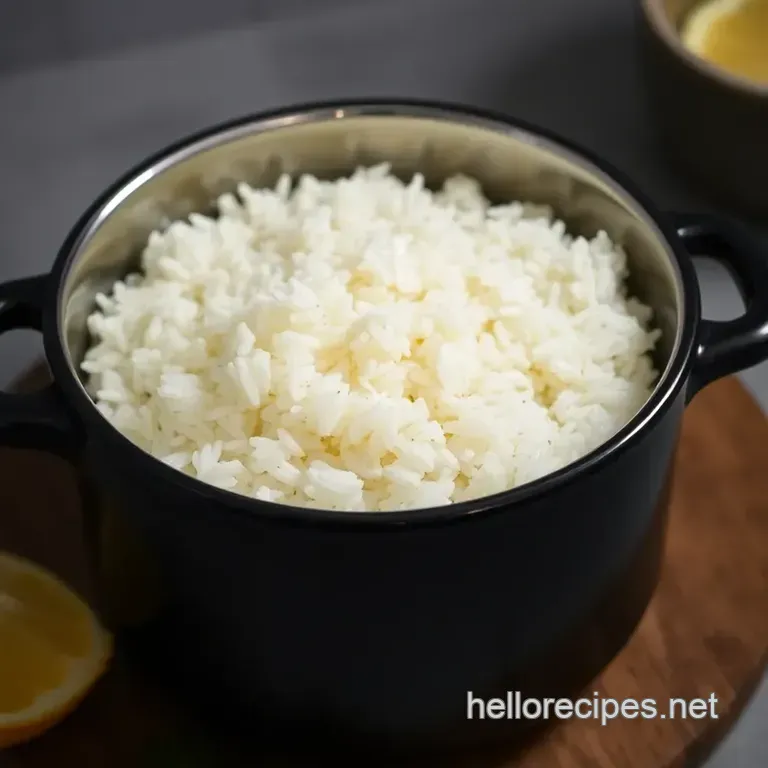
- Fluff the Rice : Open the lid and gently fluff the rice with a fork. Voilà!
- Serve : You can serve your rice immediately or keep it warm until you're ready to eat.
Expert Techniques
Alright, now onto some nifty tips from my own cooking experiences. one critical step is to let the pot rest after you’ve cooked it.
Don’t rush this little trick lets the rice finish steaming. if you cook brown rice, make sure to adjust the liquid a bit.
It's always a good idea to experiment; maybe try using chicken broth instead of water next time oh wow, flavor explosion!
A common rookie mistake? Opening the lid too early. Patience is key!
Success Strategies
Look, we’ve all been there soggy rice, undercooked rice, or sticky rice. to avoid these disasters, focus on measuring your liquid correctly; the standard rule is a 1:1 ratio for white rice! and, if you're feeling ambitious, batch cooking is a dream.
You can whip up a double batch and throw half in the fridge for later this week. talk about easy prep for quick dinners!
Wrap-Up and What's Next
So, there you have it! a super easy guide on how to cook rice in your instant pot that guarantees fluffy, delicious results every time.
If that's not a win-win, i don't know what is! oh, and don’t forget that these techniques are flexible. you can turn your instant pot rice into an amazing side for curries, stir fries, or even salads.
As we move on, stick around for some additional information! We’ll dive deeper into variations on rice recipes and how to make the best out of your Instant Pot for magical weeknight meals!
Unlocking Fluffy Rice: Tips, Tricks, and More
Ah, rice the comforting staple that can turn any meal into a feast! when it comes to how to cook rice in an insta pot , i've got to say, it's a game changer.
I mean, if you can master this simple dish, you can elevate your everyday dinners from “meh” to “wow!” so let’s dive in!
Pro Tips & Secrets
First up, let’s talk pro tips —you know, the little nuggets of wisdom that can totally transform your rice making game.
Rinsing is key : always rinse your rice! seriously, it’s like washing off the bad vibes. rinse under cold water until it runs clear.
This helps remove excess starch, giving you that fluffy texture we all crave.
Flavor boost : here’s a trick i learned from my chef buddy: instead of water, use broth! chicken or veggie broth will infuse your rice with so much flavor, you’ll be tempted to eat it on its own.
Butter, Baby : A tablespoon of butter or olive oil makes everything better. It adds richness and keeps the rice from clumping.
Relax the Pressure : Let your Instant Pot release pressure naturally for about 10 minutes after cooking. Trust me, it’s worth the wait.
Perfect Presentation
Next, let’s talk presentation . Don’t be that person who serves rice like it's a boring sidekick. Step up your game!
Plating Techniques : Use a ring mold for that fancy restaurant style look. Just scoop the rice in, press down gently, and lift it away.
Garnish Like a Pro : Fresh herbs are your best friends. A sprinkle of parsley or cilantro makes your rice pop with color.
Color Combinations : Mix in some colorful veggies or even nuts for a stunning visual and textural contrast.
Visual Appeal : Remember, we eat with our eyes first! A beautiful plate can make even plain old white rice recipes feel special.
Storage & make-ahead
Now let’s chat about storage and make-ahead tips. Life gets busy, right?
Storage Guidelines : Let your cooked rice cool before storing it in an airtight container. This keeps it fresh longer.
Preservation Methods : You can store cooked rice in the fridge for about 4-6 days. It’s a perfect base for many Instapot meals .
Reheating Instructions : When you’re ready to use it, add a splash of water and steam it in the microwave or back in the Instant Pot on low for a few minutes.
Freshness Duration : If it starts to smell funky, you know it's time to toss it. Better safe than sorry!
Creative Variations
Time to spice things up with some creative variations ! If you’re feeling adventurous, give these a shot:
Flavor Adaptations : Want to kick it up a notch? Throw in some spices like cumin or coriander while the rice cooks.
Dietary Modifications : Need a gluten-free option? No problem! Quinoa can be swapped in easily. Just use a 1:1 water-to-quinoa ratio and adjust cooking times accordingly.
Seasonal Twists : Toss in seasonal veggies or dried fruits for a delightful seasonal dish.
Regional Variations : How about trying a coconut rice recipe? Use coconut milk instead of water for a tropical flair.
Complete Nutrition Guide
Finally, let’s not forget about the nutrition side.
Nutritional Breakdown : Each serving of this rice is about 160 calories, making it a guilt free addition to any meal.
Health Benefits : Rice is a fantastic source of energy and provides plenty of carbs that your body needs.
Dietary Considerations : If you’re watching your carbs, try brown rice instead. It’s a bit nuttier and packed with fiber!
Portion Guidance : A good rule of thumb is about a 1/4 cup of uncooked rice per person. That’ll give you around 4 servings!
So there you have it! whether you're whipping up a simple bowl of fluffy rice for dinner or fancying things up with some ninja foodi recipes , remember that cooking can be fun and creative.
Get in there, experiment, and most importantly enjoy it! cheers to mastering that perfectly fluffy rice today! 🍚
Frequently Asked Questions
How to cook rice in Insta Pot without it getting sticky?
To avoid sticky rice when learning how to cook rice in Insta Pot, rinsing the rice thoroughly under cold water is essential. This removes excess starch which can lead to clumping. Also, make sure to use the right ratio of water to rice; for most long grain varieties, a 1:1 ratio works perfectly.
Can I cook brown rice and white rice at the same time in the Instant Pot?
It's not recommended to cook brown rice and white rice at the same time in the Instant Pot, as they have different cooking times. Brown rice typically requires about 22 minutes under pressure, whereas white rice only takes about 4 minutes.
If you're looking to mix, it’s best to cook them separately or adjust the times accordingly.
What’s the best way to store leftover cooked rice?
Leftover cooked rice can be stored in an airtight container in the fridge for up to 4-5 days. Just make sure it’s cooled to room temperature before sealing up, to prevent moisture build-up. You can also portion it out and freeze it for up to a month, which is a great time saver for future meals!
Can I use broth instead of water when cooking rice in an Instant Pot?
Absolutely! Using broth instead of water can infuse your rice with extra flavor. Just remember to adjust the salt in your recipe accordingly, especially if you're using a salted broth. This is an easy way to elevate a simple rice dish, making it a standout at the dinner table.
Should I let the rice sit after cooking, or can I fluff it right away?
It’s best to let the rice sit in the Instant Pot for about 10 minutes after cooking before fluffing it. This allows the grains to finish cooking in their own steam and prevents them from being overly mushy. After that, grab a fork and fluff gently to keep the grains separated!
What are some creative ways to use cooked rice?
Once you've mastered how to cook rice in Insta Pot, get creative! Use the cooked rice in stir fries, as a base for salads, or even in rice bowls topped with proteins and veggies. You can also make delicious rice pudding for dessert or cold rice salads for a light lunch.
Perfectly Fluffy Rice In Your Instant Pot

