Crinkle Cookies: Classic Fudgy Chocolate Recipe
- The Magic of the Crinkle: Why These Crinkle Cookies Define the Holidays
- Achieving the Signature "Earthquake" Effect: The Science of Cracking
- Essential Components for Deep Chocolate Flavor and Texture
- Mixing and Baking: Detailed Method for Perfect Results
- Troubleshooting Your Chocolate Crinkle Batch
- Keeping Your Crinkles Fresh: Storage, Freezing, and Pairing
- Storage, Freezing, and Reheating
- Recipe FAQs
- 📝 Recipe Card
The Magic of the Crinkle: Why These Crinkle Cookies Define the Holidays
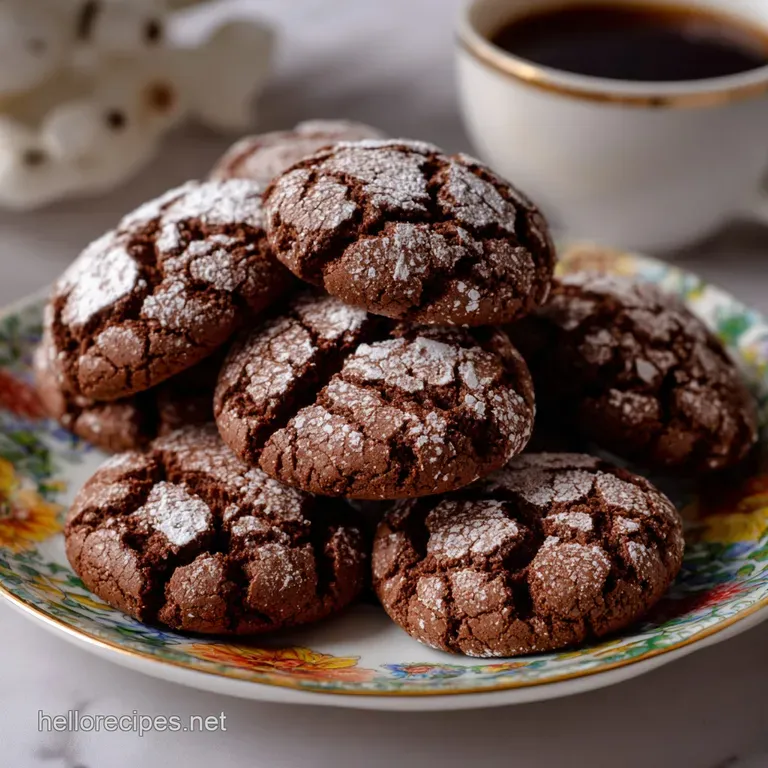
Tell me honestly, is there any cookie that screams "classic winter perfection" louder than the Crinkle Cookie? You bite through that crisp, snowy coating and hit a deeply fudgy, almost brownie like center.
The aroma of rich dark chocolate filling your kitchen is the instant signal that the holiday baking season has officially begun. These aren't just pretty desserts; they are an experience, a little moment of kitchen alchemy that transforms simple ingredients into stunningly beautiful Crinkle Cookies .
I know, I know. You've tried a dozen recipes, and sometimes the powdered sugar melts away, leaving you with just a slightly lumpy chocolate blob. Total disaster! But trust me, this specific method for making my famous fudgy Crinkle Cookies is a lifesaver because it relies on two non-negotiable, foolproof tricks that guarantee that dramatic, crackled finish every single time.
They look fancy, but they are secretly incredibly easy and cheap to pull off.
We’re skipping the melted butter method here and using oil, which is the unsung hero of fudgy texture in baking. It keeps the dough tender and moist for days, unlike butter based cookies that can dry out fast.
So grab your mixer, put on some terrible holiday music (it’s required, I don't make the rules), and let’s crack on with making the absolute best Crinkle Cookies you'll ever bake.
Achieving the Signature "Earthquake" Effect: The Science of Cracking
This isn't magic, it’s geometry! When you bake, the dough expands rapidly. If the exterior is coated in something inelastic (like a thick layer of sugar), that exterior cannot keep up with the spreading interior, and boom: it cracks wide open.
The science of baking perfect Crinkle Cookies is surprisingly simple once you know the core principles.
The History Behind the Classic Crinkle Cookie Name
These beauties have been around for ages, though they gained massive popularity in the mid-20th century, especially around Christmas. They originated from the concept of rolling cookie dough in confectioners' sugar before baking.
But the "crinkle" or "earthquake" name comes directly from that visual effect dark earth cracking open to reveal fresh snow. The look of these Crinkle Cookies is simply unforgettable.
What Makes This Recipe So Fudgy?
It all comes down to the fat source. Most cookie recipes use creamed butter, which incorporates air and results in a lighter, cake like crumb. We are using vegetable oil here instead.
Oil is 100% fat (unlike butter, which is 80% fat and 20% water), and since oil is liquid at room temperature, it keeps the final baked product incredibly moist and dense, ensuring a deliciously fudgy texture in these perfect Crinkle Cookies .
A Quick Look at the Medium Difficulty Level
While the steps are easy to follow, I rate this recipe as medium difficulty purely because of the required patience. You cannot rush the chilling time. Attempting to bake warm dough results in flat, sad, absorbed Crinkle Cookies .
Patience is truly your most important ingredient when making these classic treats.
The Importance of High Fat Content for Fudginess
As mentioned, the oil is crucial. High fat content, combined with a relatively low amount of flour and no leavening agent beyond baking powder, keeps the structure tight and chewy. This structural density prevents the cookie from puffing up too much, ensuring that satisfying bite.
This is the secret to getting a truly authentic fudgy texture in our Crinkle Cookies .
The Role of Powdered Sugar Density
The powdered sugar coating must be thick. When the cookie starts to bake and spread, the heavy sugar coating resists the movement, forcing the cookie to crack rather than just gently stretch. Think of it like a hard shell on a soft chocolate core.
If you skimp on the final roll, your Crinkle Cookies will turn out patchy and slightly disappointing.
Why Room Temperature Eggs are Key to Emulsion
Using room temperature eggs helps the wet ingredients (oil, sugar, eggs) emulsify beautifully. When you add cold eggs to oil, the mixture can seize up or look broken. Using warmer eggs ensures the batter stays smooth and shiny, which leads to a more consistent crumb structure and overall better Crinkle Cookies .
Essential Components for Deep Chocolate Flavor and Texture
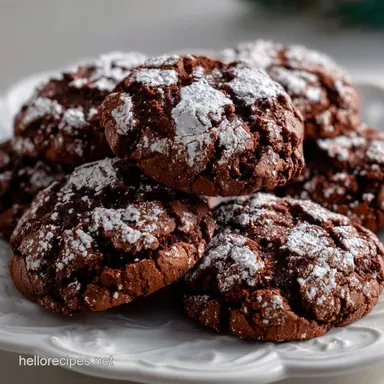
We are aiming for a deep, rich, almost black appearance to maximize the contrast against the white coating. This depth of color and flavor is achieved not just by the amount of cocoa, but the type of cocoa you use.
| Ingredient | Role in Crinkle Cookies | Smart Substitution |
|---|---|---|
| All-Purpose Flour | Structure | Use a 1:1 gluten-free blend containing xanthan gum. |
| Dutch Cocoa Powder | Deep color, less acidic flavor | Natural cocoa powder (results in a slightly lighter, tangier flavor). |
| Vegetable Oil | Fudgy texture, high moisture | Melted unsalted butter (will be slightly less fudgy, more cake like). |
| Baking Powder | Rise and crackle | You can use baking soda but only if using acidic natural cocoa powder. |
| Granulated Sugar (Coating) | Moisture barrier | Skip entirely, but your powdered sugar will absorb faster. |
Mixing and Baking: Detailed Method for Perfect Results

Let’s talk tools. While you can mix this dough by hand, it gets incredibly thick and sticky once the cocoa is added. If you have a stand mixer, use it. If not, be prepared for a solid arm workout, because this is dense dough, perfect for dense, chewy Crinkle Cookies .
Cocoa Powder Selection: Dutch Process vs. Natural
If you want those truly spectacular, dark-as-night Crinkle Cookies , always reach for Dutch process cocoa. It has been alkalized, neutralizing acidity, which results in a smoother, deeper chocolate flavor and a richer color.
Natural cocoa powder is great, but it’s lighter in color and provides a slightly tangy edge when baked. Either works, but the Dutch variety offers a better visual pop.
Smart Substitutions for Dairy and Eggs
Since this recipe relies on oil, it’s already naturally dairy-free! If you needed an egg substitution, you could try flax eggs (1 tablespoon ground flaxseed mixed with 3 tablespoons water, set aside for 5 minutes). However, because the eggs are key to the fudginess and structure, I recommend using a quality store-bought egg replacer if you must swap them out. If you’re playing with gluten-free flour, this recipe for gluten-free Chocolate Chip Cookies: Proper Thick Chewy Brown Butter Recipe uses similar techniques and might offer more insights into handling gluten-free dough.
Preparing the Double Sugar Coating Station
This is the secret weapon for these Crinkle Cookies . You need two separate bowls ready. Bowl one gets the granulated sugar. Bowl two gets the confectioners' (powdered) sugar.
The granulated sugar acts like a tiny shield, creating a slight barrier that prevents the powdered sugar from immediately dissolving into the moist dough. It keeps that snow white coating on the exterior where it belongs until the cookie bakes.
Phase 1: Creating the Dense Chocolate Base
Start by whisking the sugar and oil together until they are well combined. Add those room temperature eggs one at a time, ensuring everything looks homogenous and shiny before adding the next. When you incorporate the dry ingredients, mix only until the flour streaks disappear. Stop the mixer right there.
Overmixing is the death of tender, fudgy Crinkle Cookies . The dough will be very sticky, almost like a thick, heavy mud. That’s exactly right.
The Crucial Step: Chilling Time Requirements
Four hours minimum, friend. Seriously. Overnight is even better. I once tried to shortcut this and threw the dough in the freezer for 45 minutes, only to end up with flat, puffy cookies where the powdered sugar vanished entirely.
If the dough for your Crinkle Cookies isn't completely firm, it will spread immediately in the oven and ruin the signature crackle. A firm, cold dough ensures height and controlled spreading.
Rolling and Coating the Dough Balls
Scoop the dough (a 1.5 tablespoon scoop is perfect for uniformity) and roll it into a smooth ball. Now, for the technique: First, roll it lightly in the granulated sugar. Then, immediately transfer it to the powdered sugar bowl. Roll it heavily.
You want the ball to look completely white, like a mini snowball. Place the heavily coated balls onto your prepared baking sheet.
Chef's Note: Do not press the balls down before baking! You want them to retain that round height when they hit the heat. This helps force the crackle effect in your magnificent Crinkle Cookies .
Troubleshooting Your Chocolate Crinkle Batch
Even experienced bakers face issues sometimes, especially when dealing with the delicate balance needed for dramatic cracks. Here are the most common pitfalls and how to navigate them successfully.
My Powdered Sugar Melted: Preventing Crinkle Failure
This almost always happens because the dough was too warm. If you find the powdered sugar disappearing, it means the moisture on the surface of the dough dissolved it before the dough set in the oven. The fix?
Put the rolled cookie balls back in the fridge or freezer for 15 minutes before baking. Also, make sure you used the double roll technique, as that initial layer of granulated sugar is vital for protecting the powdered sugar on these classic Crinkle Cookies .
Achieving Uniform Cookie Size for Even Baking
Baking unevenly sized cookies means some will be perfectly fudgy while others are dried out. Use a standard cookie scoop (1.5 tbsp size) to ensure every cookie is the same volume. This guarantees that your baking time of 10– 12 minutes yields perfectly cooked, chewy Crinkle Cookies across the board.
If you don't have a scoop, measure out two level tablespoons of dough for each ball.
Tips for Quick Chilling When You're Short on Time
Okay, if you absolutely cannot wait four hours, here is the emergency procedure. Instead of chilling the dough in one large bowl, roll the dough into balls immediately after mixing, complete the double roll, and place them on the baking sheet.
Then, stick the entire baking sheet in the freezer for 45 minutes. The smaller size allows them to chill faster, saving your Crinkle Cookies from flat disaster.
Keeping Your Crinkles Fresh: Storage, Freezing, and Pairing
These cookies actually improve slightly after the first day, as the flavors meld and the centers become even softer and fudgier.
How to Properly Freeze Crinkle Cookie Dough
This is a brilliant recipe for making ahead! Follow the instructions right up to step 9 (the double sugar roll). Place the raw, coated Crinkle Cookies on a parchment lined baking sheet and freeze until solid (about 2 hours).
Transfer the frozen balls to a heavy duty freezer bag or airtight container. They keep beautifully for up to 3 months. When ready to bake, place them directly on a prepared sheet and bake for 12– 14 minutes (adding a couple of minutes to the standard time since they are frozen).
Best Practices for Storing Baked Cookies
Once they are fully cooled, store the finished Crinkle Cookies in an airtight container at room temperature for up to 5 days. For extra freshness, throw half a slice of sandwich bread into the container; the bread sacrifices its moisture to the cookies, keeping them soft and chewy for longer.
Just remember to replace the bread every couple of days.
Ideal Drinks and Desserts to Serve Alongside
Because these are so rich, they pair perfectly with milk, strong coffee, or a cozy, slightly tart pairing. I love serving my Crinkle Cookies alongside a platter of simple treats, maybe with some crisp Haystacks Recipe: Classic No-Bake Chocolate Oatmeal Cookies for textural contrast. If you're going all-out for a holiday tray, try using them as a base for a scoop of homemade peppermint ice cream.
Storage, Freezing, and Reheating
How to Store Leftovers
Store your baked Crinkle Cookies at room temperature in an airtight container. They stay wonderfully fudgy for up to 5 days. Do not try to store them in the fridge; that only makes them dry out and get oddly stiff.
Freezing Instructions
Freezing the dough is the superior method. See the detailed instructions above on how to freeze the raw, coated balls. If you absolutely must freeze baked Crinkle Cookies , wait until they are fully cooled, wrap them tightly in plastic, and place them in a freezer bag.
Thaw them overnight on the counter before serving.
Best Reheating Methods
A quick zap in the microwave (8 10 seconds) is perfect for bringing that fresh out-of-the-oven warmth and chewiness back to your baked Crinkle Cookies . Alternatively, place them on a sheet pan and heat them in a 300°F (150°C) oven for 5 minutes.
What to Serve With This Dish
These Crinkle Cookies are brilliant on their own, but they are spectacular when paired with something cool and creamy. They are also rugged enough to handle heavy royal icing if you feel like adding extra decorative flair. If you need a stable icing recipe for other cookies on your platter, check out my recipe for Sugar Cookie Icing: Rock Hard Royal Glaze for Cookies . You won’t be disappointed by this glorious combination. This perfect Crinkle Cookies recipe is ready for its close-up!

Recipe FAQs
Why did my cookies not get the signature white crinkle?
This is usually due to insufficient chilling or poor coating technique. The dough must be chilled for at least 4 hours so it does not melt too quickly on the baking sheet. Additionally, ensure you generously double coat the chilled balls in powdered sugar right before baking.
My powdered sugar disappeared while baking; how do I prevent this?
The moisture from the dough often absorbs the powdered sugar if the coating is too thin or applied too early. For the best result, roll the balls first in a thin layer of granulated sugar, and then immediately and heavily double coat them in powdered sugar just before placing them in the oven.
Why did my Crinkle Cookies spread too much and come out flat?
Excessive spreading is a classic sign that your butter was too soft, or the dough was not chilled for the full required time. Ensure your dough balls are firm and cold before baking, and check that you haven't over measured any liquid ingredients.
How should I store Crinkle Cookies, and how long do they last?
Store these cookies in an airtight container at room temperature. Due to their high fat and moisture content, they stay wonderfully soft for up to 5 days. If stacking them, place small sheets of parchment paper between layers to protect the delicate powdered sugar coating.
Can I freeze the cookie dough or the baked cookies?
Yes, both freeze very well. For dough, roll the balls, coat them entirely in powdered sugar, and freeze them on a baking sheet; once solid, transfer them to a freezer bag and bake from frozen, adding about 2-3 minutes to the bake time.
Can I substitute a different extract, like peppermint, for a holiday variation?
Absolutely, peppermint extract is a wonderful substitution for the vanilla extract in this recipe. Start with 1 teaspoon of peppermint, tasting the raw dough if possible, as peppermint can be quite strong. You may also add a few crushed candy canes on top immediately after they come out of the oven.
Is the chilling of the dough mandatory for this recipe?
Yes, chilling the dough is absolutely mandatory for Crinkle Cookies. The chill time ensures that the fat firms up, which prevents spreading and allows the exterior to set before the centre cooks. This contrast is what creates the dramatic, controlled cracking effect.
Fudgy Chocolate Crinkle Cookies
Ingredients:
Instructions:
Nutrition Facts:
| Calories | 1102 kcal |
|---|---|
| Protein | 12.3 g |
| Fat | 35.0 g |
| Carbs | 156.3 g |
