The Great Unbaked Edible Dough Sculpt Snack Coloured Naturally
- Why This Playdough Recipe Beats the Store-Bought Stuff
- The Sensory Joy of Squishing: Our Unique Edible Dough Concept
- What You Need: Assembling Your Edible Playdough Components
- Step-by-Step Mastery: Mixing Up Your Batch of Playdough
- The Kneading Ritual: Developing That Essential Smooth Consistency
- Extending the Fun: Creative Uses Beyond Simple Shaping
- Troubleshooting and Preservation Tips for Your Dough Masterpiece
- Recipe FAQs
- 📝 Recipe Card
Why This Playdough Recipe Beats the store-bought Stuff
There’s a unique magic that happens when you first feel that perfectly pliable, yielding material beneath your hands. store-bought compounds are convenient, certainly, but they often lack that authentic, satisfying squish factor we crave.
More importantly, commercially produced versions rely heavily on synthetic preservatives and dyes that, while safe for play, aren't exactly kitchen cabinet friendly. Our goal with this Playdough Recipe is to blend the nostalgia of tactile play with the assurance of wholesome, edible ingredients.
We are achieving that classic elasticity without relying on harsh chemicals, creating a Best Playdough Recipe that actively encourages safe, exploratory sensory engagement.
This approach turns simple crafting time into an opportunity for gentle, low-stakes culinary exploration for the youngest participants.
The Sensory Joy of Squishing: Our Unique Edible Dough Concept
The fundamental pleasure of playdough lies in its texture it needs to be firm enough to hold a shape but soft enough to mould easily. Many classic homemade variations either end up too crumbly or too sticky.
By incorporating a brief, controlled heating phase, this specific No Cook Playdough Recipe (modified slightly by heat) transforms simple pantry staples into something truly remarkable.
It mimics that professional, luxurious feel, making it an excellent candidate for detailed sculpting or repetitive stress relieving kneading.
Unlocking Screen Free Fun: An Activity That Really Sticks
In an era dominated by glowing screens, engaging children in an activity that demands focused, three dimensional creativity is paramount. This recipe yields about four cups of dough, providing ample material for siblings or an entire afternoon of focused creation.
It's an Easy Playdough Recipe that requires minimal setup and draws kids straight into the tactile realm. When the resulting creation is structurally sound enough to hold its shape (perhaps a tiny imaginary cake!), the sense of accomplishment is immediate and tangible, fostering genuine engagement far removed from digital distractions.
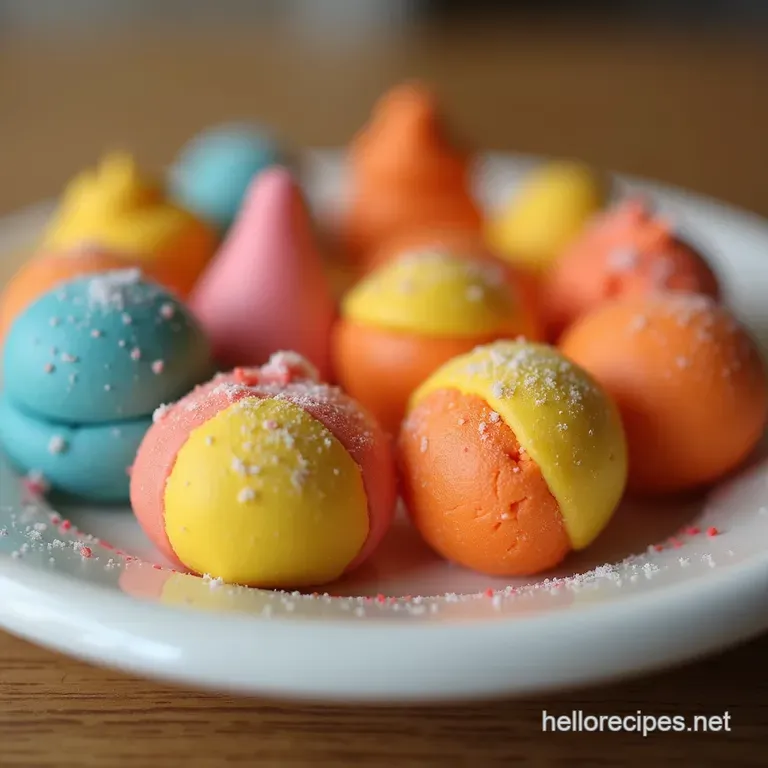
Natural Hues: Creating Vibrant Colours Without Artificial Dyes
One of the biggest departures from conventional recipes is our commitment to natural colouring. Why settle for harsh blues and neon pinks when nature provides such rich pigments? We achieve vibrant results by harnessing kitchen ingredients: think the deep rose from powdered beetroot or the sunshine yellow courtesy of a pinch of turmeric.
This makes our dough a Natural Playdough Recipe , perfect for parents concerned about food dyes or those simply looking to integrate more natural elements into playtime.
The Best Kind of Nibbles: Safe and Delicious Kitchen Crafting
Because this dough is entirely made from edible ingredients flour, salt, butter, and natural colouring it transcends mere craft material. It becomes an Edible Playdough Recipe .
For toddlers or younger children who inevitably explore the world by tasting, this eliminates the usual anxiety. It’s sweet, faintly vanilla scented, and perfectly safe for accidental sampling.
This feature elevates the experience from simple moulding to safe, satisfying kitchen crafting where small nibbles are permissible.
What You Need: Assembling Your Edible Playdough Components
To achieve the perfect consistency for this Soft Playdough Recipe , precision in measurement is our first ally. We are aiming for elasticity and longevity, which means carefully balancing the dry starches against the liquid binders.
The core of this formula requires the inclusion of cream of tartar, which is crucial for texture and preservation, often leading people to search for a "Playdough Recipe Without Cream of Tartar" but trust us, for the best result, it stays in!
The Dry Foundation: Measuring Core Ingredients Precisely
The structural integrity begins with the starch content. You will need precisely two cups (about 240g) of sifted All-Purpose Flour. Sifting prevents lumps that can mar the final smoothness of the dough.
To this foundation, we add just a half teaspoon of fine sea salt for balance, but the real secret weapon is two teaspoons of Cream of Tartar. This acidic powder reacts during heating, creating the necessary binding power that ensures a smooth, non-crumbly finish.
Liquid Binders: Achieving the Perfect Non-Sticky Texture
For moisture, we rely on 3/4 cup of room temperature water, paired with a teaspoon of neutral vegetable oil or coconut oil. The oil is vital; it coats the flour particles slightly, resulting in that wonderfully smooth, non-tacky surface we associate with the Best Playdough Recipe .
A half teaspoon of vanilla extract is added here, not just for flavour, but for a delightful, inviting aroma that enhances the sensory appeal during kneading.
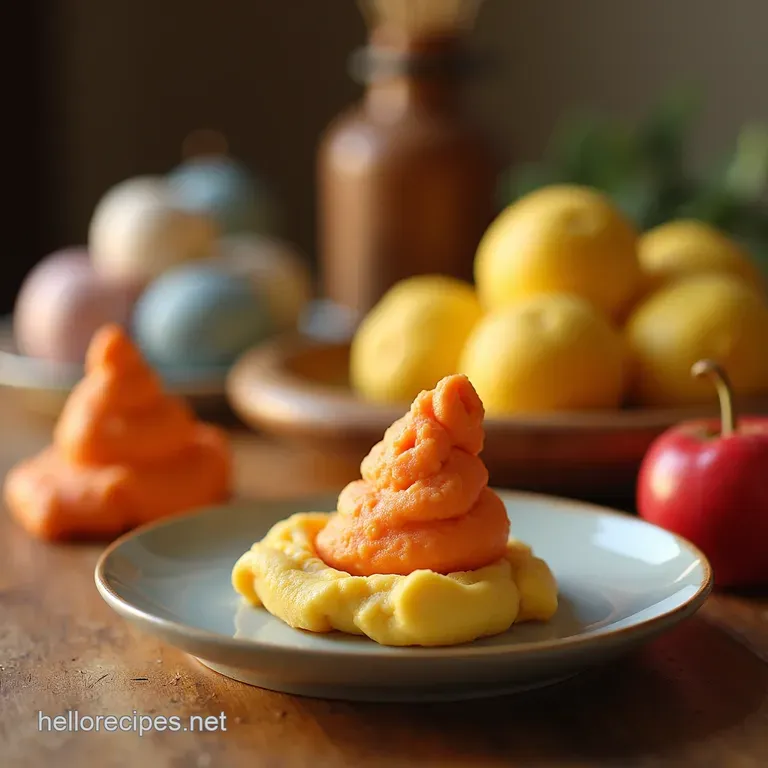
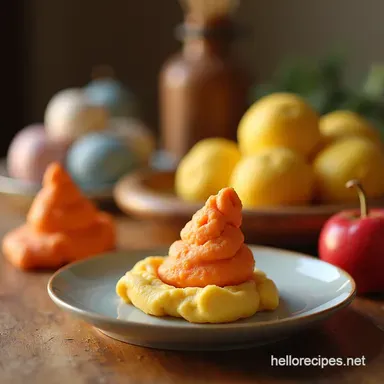
Natural Colour Concentrates: Sourcing Vibrant Vegetable Powders
To achieve our natural palette, you will want things like a half teaspoon of powdered beetroot for rich pinks, a tiny pinch of turmeric for sunshine yellow, or a quarter teaspoon of spirulina or matcha powder for various shades of green.
These powders are potent, so they are best added to small, divided portions of the dough later, rather than mixing them into the entire batch upfront.
Related Recipes Worth Trying
- Best Moist Lemon Cake Recipe Tangy Easy Drizzle — Looking for the best lemon cake recipe from scratch This is our truly moist tangy lemon drizzle cakea foolproof bake for your afternoon cuppa
- The Ultimate Moist Lemon Cake Recipe From Scratch Easy Drizzle — Forget dry bakes This truly moist lemon cake recipe delivers an incredible zesty flavour perfect for afternoon tea Get the foolproof steps now
- Easy Simple Lemon Layer Cake Recipe Moist Zesty — Bake this incredibly moist Simple Lemon Layer Cake Our foolproof recipe delivers bright tangy flavour perfect for tea time Get the Lemon Cream Cheese...
step-by-step Mastery: Mixing Up Your Batch of Playdough
While some versions of this craft are genuinely no-cook, our method incorporates gentle heat to ensure superior structure, moving it slightly away from a strict Playdough Recipe With Cornstarch style towards a more resilient, cooked dough texture.
This brief heating process activates the starch, leading to a product that lasts longer and feels significantly better under pressure.
The Kneading Ritual: Developing That Essential Smooth Consistency
The journey from wet mixture to velvety smooth toy is where the true alchemy occurs. Pay close attention during the cooking phase; rushing this step is the number one cause of texture failure.
Phase One: Combining Dry Elements for This Playdough Recipe
Begin by ensuring all your dry ingredients flour, salt, and cream of tartar are thoroughly whisked together in a medium non-stick saucepan while it is still cold and off the heat. Next, pour in the liquid components: the water, oil, and vanilla.
Stir everything with a wooden spoon until you have a cohesive, shaggy mass that looks like a very rough biscuit dough.
Tempering Heat: Gentle Cooking for Dough Structure
Now, place the saucepan over medium low heat. Add the single tablespoon of cubed butter. This is critical: you must stir continuously . As the mixture heats, the ingredients will begin to incorporate fully, and the dough will start to coagulate.
Continue stirring until the entire mass pulls cleanly away from the sides and bottom of the pan, forming one smooth, unified ball. This usually takes between five and eight minutes. This gentle cooking ensures the interior is just as cooked as the exterior.
Achieving the Playable State: Cooling and Conditioning Techniques
Immediately remove the dough ball from the heat source and transfer it to a plate or cutting board. Allow it to cool for at least 15 to 20 minutes. It must be cool enough that you can handle it comfortably without burning your hands, but retaining a slight warmth is beneficial for the final kneading stage.
Once warm to the touch, begin the process of kneading.
Extending the Fun: Creative Uses Beyond Simple Shaping
Once you have mastered the base creation, the possibilities are endless. Because this recipe is so structurally sound, it works beautifully for complex models. Children can sculpt intricate scenes, make "cookies" that are safe to decorate with real sprinkles, or even use the dough as a creative, temporary stamp pad for small objects found outdoors.
This versatility makes it a fantastic craft staple throughout the year.
Troubleshooting and Preservation Tips for Your Dough Masterpiece
Even the Easiest Playdough Recipe can sometimes encounter minor hiccups, usually due to ambient humidity or slight variations in flour absorption. Knowledge of how to correct these small issues ensures your efforts aren't wasted.
Holiday Crafting Ideas: Using Dough for Edible Decorations
For seasonal activities, consider using this dough for edible ornaments or pretend holiday baking. If you use slightly less water during the initial mix, you can create a firmer dough perfect for cutting out intricate shapes to be displayed and eventually, safely tasted!
Making It Last: Optimal Storage for Extended Play Value
The inclusion of cream of tartar is your main preservative, but good storage is key to maximizing playtime. Wrap each colour portion tightly in plastic wrap to prevent air exposure, or place them into sturdy, zip-top bags, ensuring you expel as much air as possible before sealing.
Stored properly, this edible dough can remain soft and pliable for several weeks at room temperature, or even longer if refrigerated.
Colour Customization Secrets: Adjusting Hues for Best Results
If your natural colours look a little muted after the initial kneading, don't panic. Allow the coloured dough to rest wrapped for about an hour; often, the pigments deepen as the mixture settles.
For stronger colours in the future, consider turning your vegetable source into a thick paste (by simmering and reducing juice) instead of using dry powder, which requires less volume to achieve deeper saturation.
A Quick Nutrition Snapshot: Understanding Your Edible Ingredients
While this is fundamentally a plaything, it’s reassuring to know what you’re working with. The base is primarily carbohydrate from the flour, balanced by a small amount of fat from the butter. This is not intended as a nutritional powerhouse, but rather a safe, sweet distraction.
Understanding that it is fundamentally flour and-salt based helps reinforce that it should be enjoyed in moderation, despite its edibility.

Recipe FAQs
How long will this edible Playdough Recipe last if I store it properly?
Because this dough contains no harsh preservatives, you'll want to treat it like fresh bread, really. Store each coloured portion tightly wrapped in plastic wrap or in an airtight container in the fridge for up to one week. If it starts to smell a bit off, best to bin it safety first, chaps!
My dough is too sticky/crumbly after cooling what's the fix?
Ah, the age-old dough dilemma! If it’s sticky, knead in a teaspoon of plain flour at a time until it stops clinging to your fingers like a limpet on a rock. If it’s too crumbly, try kneading in a few drops of water or a tiny drizzle of oil until it comes back together.
This usually depends on the humidity in your kitchen!
Is the cream of tartar strictly necessary for this Playdough Recipe?
It’s the secret weapon, much like having an extra strong brew on a Monday morning! The cream of tartar is crucial because its acidity reacts during the gentle cooking process to create that smooth, non-grainy, and pliable texture. Without it, your dough will likely be dry and crumbly, not fun for sculpting.
Can I use food colouring gels instead of the natural dyes mentioned?
Absolutely, feel free to use standard liquid or gel food colouring if you want brighter colours, though you might miss out on the subtle earthy tones the natural ingredients provide.
If you use liquid colouring, remember that it adds moisture, so you may need to knead in an extra teaspoon of flour to maintain the perfect consistency.
What's the best way to make sure the natural colours come out vibrant?
Natural colourants are naturally more subtle than artificial dyes, so don't be shy about adding a little more powder especially with beetroot for pinks. For the best results, ensure your dye powders (like turmeric or spirulina) are sifted really finely before adding them to the dough well, which prevents little specks of undissolved colour later on.
My little ones have sensitive skin; are there any ingredients I should avoid?
Since this dough is entirely edible, it’s generally very gentle, but standard flour can be an issue for some. If you suspect a sensitivity, you could try substituting the flour with a fine cornstarch/tapioca starch blend for a softer, almost corn dough feel, though the texture will be less elastic than the cooked flour version.
Always check for known allergies, of course!
Edible Natural Playdough Recipe
Instructions:
Nutrition Facts:
| Calories | 340kcal |
|---|---|
| Fat | 5g |
| Fiber | 2g |
