Fried Chicken Legs: the Golden Standard Crispy Recipe
- Introducing the Golden Standard: A Proper Sunday Dinner Feature
- The Science Behind the Craggy, Crispy Crust
- Essential Components for Golden Fried Chicken Legs
- Mastering the Technique: Your Detailed Cooking Guide for Fried Chicken Legs
- Troubleshooting: Avoiding Greasy or Undercooked Results
- Make Ahead and Storage Solutions
- What to Serve Alongside Your Crispy Comfort Food
- Recipe FAQs
- 📝 Recipe Card
Introducing the Golden Standard: A Proper Sunday Dinner Feature
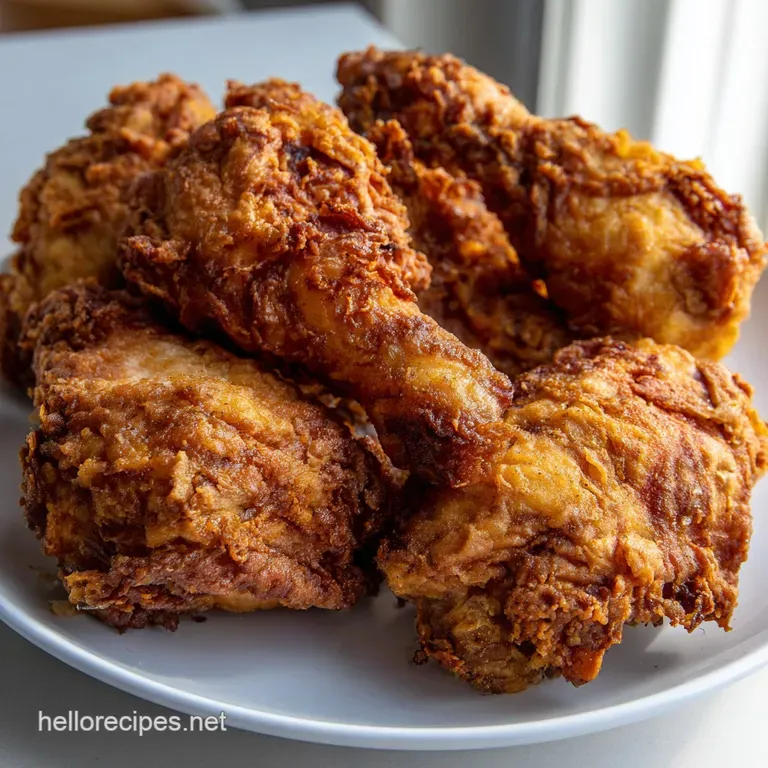
Seriously, listen to that crunch. That satisfying, unmistakable sound is why we dedicate an afternoon to perfecting deeply seasoned Fried Chicken Legs . When they emerge from the oil, dripping golden brown and whispering of smoked paprika and cayenne, the aroma takes over your entire kitchen.
That is pure, unadulterated comfort food at its finest.
We all crave that classic dish, but the store-bought versions are often sad, pale, and soaked in too much grease. This homemade Southern Fried Chicken Recipe is ridiculously simple, far cheaper than takeout, and instantly elevates a regular night to a full blown feast.
Plus, drumsticks are the most budget friendly cut available.
I’ve messed up enough batches hello, raw centers and burnt crusts! that I finally cracked the code after years of experimenting. Trust me, the secret to the Best Homemade Fried Chicken Recipe lies not just in the seasoning, but in temperature control and a mandatory rest period after dredging.
Let's make some truly crispy, juicy Fried Chicken Legs .
The Science Behind the Craggy, Crispy Crust
The difference between a "good" fried leg and an epic one is structural integrity. We aren't just dipping and frying; we are purposefully building a helmet of flavour around the tender meat.
That craggy, bumpy texture that catches the light is exactly what we are aiming for, and it requires two specific steps.
Why Buttermilk is the Secret to Ultimate Tenderness
Buttermilk is your absolute best friend here. Its mild acidity works wonders by gently breaking down the muscle fibers in the legs without toughening them up like harsher marinades can. The resulting meat is impossibly tender and succulent.
Think of it as a pre-seasoning bath that guarantees moisture, even after 15 minutes submerged in hot oil.
What Makes This Recipe the 'Golden Standard'?
Two words: cornstarch and the double dredge. Mixing cornstarch into the flour dredge limits gluten development, which is crucial for achieving that light, shatteringly crisp texture instead of a thick, bready crust.
The double dredge technique forces the seasoned flour to adhere unevenly, creating those beautiful little crags and peaks that maximize crunch.
A Quick Glance at Prep and Cook Times
Don’t rush the process! The minimum four hour rest in the buttermilk marinade is non-negotiable for tender, flavourful meat. You can do the marinating part the day before, which is perfect if you’re planning a big Sunday cook-up.
Getting the seasoning sorted for your Fried Chicken Legs is fast, but the soaking time is key to success.
Oil Temperature Control for Even Cooking
This is where most amateur cooks fail, myself included back in the day. If the oil is too hot (above 340°F), the outside burns dark immediately while the inside remains raw. If it’s too cold (below 315°F), the coating absorbs the oil and you end up with greasy, heavy results.
Keeping the oil consistently between 325 335°F (165 170°C) is vital, which is why a deep fry thermometer is essential equipment.
The Buttermilk Marinade: Boosting Moisture and Flavor
The brine we use isn’t just buttermilk; we add hot sauce and Worcestershire sauce for complexity. The mild heat from the hot sauce doesn't make the chicken spicy, I promise. It just adds a subtle, deep flavor that you can’t quite place, making these much more complex than your average, boring chicken legs.
Achieving the Ultimate Double Dredge Texture
The goal is texture, texture, texture. When you perform the second dredge, you must press the leg firmly into the flour mix with the heel of your hand. Don’t be shy! This creates uneven adherence, building up those wonderful flaky layers.
When these hit the oil, they crisp up instantly, creating the iconic, craggy crust we associate with true Southern Fried Chicken Legs.
Essential Components for Golden Fried Chicken Legs
Selecting the Right Chicken Leg Cut (Drumsticks vs. Bone-in Thighs)
We are focusing specifically on drumsticks here because their uniform shape makes them easier to fry evenly in the oil bath. They cook quickly and maintain fantastic moisture. Bone-in thighs work brilliantly too, but they are flatter and might require a slightly longer cook time to ensure the internal temperature is reached near the bone.
Flour Power: Mastering the Seasoning Blend
The seasoned dredge is responsible for 80% of your flavor profile. Don't rely solely on salt and pepper! My blend includes smoked paprika for that gorgeous deep colour, onion and garlic powder for umami depth, and a little cayenne for that subtle warmth.
This is the secret to How To Season Chicken Legs so that the crust itself is packed with flavour.
Choosing the Best Frying Oil (High Smoke Point Guide)
You need oil that can handle high heat without breaking down. For making Fried Chicken Legs in Deep Fryer applications, refined peanut oil is my first choice, followed closely by vegetable or canola oil.
Absolutely steer clear of extra virgin olive oil or butter, as their low smoke points will lead to burnt flavours and potentially dangerous smoke.
Substitutes for Buttermilk
If you suddenly realize you’re out of buttermilk, don't panic! There is a simple, effective workaround.
| Ingredient | Substitution | Notes |
|---|---|---|
| Buttermilk | Whole milk mixed with 1 Tbsp lemon juice or white vinegar per cup. Let stand for 10 minutes. | The acid is vital for the tenderness and the brining process. |
| Cornstarch | Potato Starch or rice flour. | Necessary for structural crispness; don't skip the starch component. |
Mastering the Technique: Your Detailed Cooking Guide for Fried Chicken Legs

Step 1: The Critical Buttermilk Soak (Prep Time)
Pat the chicken legs dry first. This ensures they absorb the marinade properly. Now, combine the buttermilk, spices, hot sauce, and Worcestershire in a zip-top bag. Add the legs, squeeze out the air, and seal. Refrigerate for a minimum of 4 hours or better yet, overnight.
I pull the legs out of the fridge about 30 minutes before frying so they aren't ice cold when they hit the oil; this helps them cook evenly.
Step 2: Executing the Double Dredge Method
Set up your station: Marinated Chicken -> Flour Mix -> Wire Rack. First, pull the leg from the brine, letting the excess drip off. Coat it lightly in the flour. Second, give it a quick "flash dip" back into the residual buttermilk.
Finally, immediately transfer it back to the flour and press hard . You should see a shaggy, uneven coating form. Place these beauties on a wire rack to rest for 15– 20 minutes. This rest is crucial.
Chef’s Note: The resting period allows the seasoned flour to fully hydrate and bind to the moisture from the buttermilk. If you skip this, your beautiful crust will simply wash off into the oil when frying. Don’t risk it!
Step 3: Deep Frying for Perfect Internal Temperature
Heat your oil slowly in a heavy pot or cast iron skillet until it hits 325°F (165°C). Carefully lower 2 3 pieces of chicken into the oil using tongs. You MUST monitor the temperature throughout the cooking process. If the oil starts to dip below 320°F, raise the heat slightly.
Fry for about 12– 15 minutes, turning every few minutes until they are a deep, uniform golden brown. Remove only when a thermometer registers 175°F (80°C) in the thickest part.
Step 4: Draining and Resting for Maximum Crispness
Remove the cooked Fried Chicken Legs and immediately place them on a clean wire rack set over a baking sheet. Do not put them on paper towels! Paper towels trap steam, making the underside of the crust soggy almost instantly.
As soon as they are draining, sprinkle them lightly with fine sea salt this finishes the seasoning and helps draw out any final moisture, locking in the crunch.
Troubleshooting: Avoiding Greasy or Undercooked Results
Why Temperature Gauges Are Non-Negotiable
Seriously, I can’t stress this enough. Attempting Classic Fried Chicken Instructions without a thermometer is like driving blind. If the oil is too cold, the chicken takes ages to cook, sucking up grease and tasting heavy.
If the oil is too hot, the crust will look perfect at minute five, but the chicken inside will be raw. Invest in a reliable deep fry thermometer.
The Danger Zone: Dealing with Raw Interiors
If you’ve pulled the legs from the oil and the internal temp is only around 160°F (71°C) but the crust is already dark brown, you have two options. One: very gently place them back in the oil for another minute or two, reducing the heat slightly.
Two (The Safer Option): Place the legs on a baking sheet and transfer them to a 250°F (120°C) oven for 5– 10 minutes until they reach 175°F (80°C). This allows the heat to creep into the center without torching the crust.
How to Prevent the Coating from Falling Off
This almost always traces back to skipping the rest period (Step 2). You need that 15– 20 minutes of rest after the double dredge so the wet flour glue sets. If you try to fry the legs immediately, the coating is too loosely bound and dissolves when it hits the hot oil.
Pro Tip: Rest the Legs Before Frying
I’m dedicating another entire section to this because I failed at it so many times! Don't let your eagerness ruin the process. The texture of the coating after the rest should feel slightly tacky and firm to the touch, not dusty and loose.
make-ahead and Storage Solutions
Reheating Leftover Crispy Drumsticks
Never, ever microwave your lovely Fried Chicken Legs . The microwave turns that beautiful crisp crust into a sponge. The best way to reheat is on a wire rack in a 375°F (190°C) oven or an air fryer for 8– 10 minutes until they are sizzling hot.
The dry heat reactivates the crispness.
Can You Freeze Cooked Fried Chicken Legs?
Yes! Fried Chicken Legs freeze well, provided they are properly protected. Cool them completely, then wrap each leg tightly in plastic wrap before placing them in a heavy duty freezer bag. They keep well for up to 3 months. Thaw overnight in the fridge and reheat as described above.
What to Serve Alongside Your Crispy Comfort Food
You’ve mastered the Easy Fried Chicken Legs Dinner, now what? This dish is rich, so you want sides that offer acidity and textural contrast.
A mandatory side is a creamy, tangy coleslaw to cut through the richness. We love pairing it with some fluffy homemade biscuits or a hearty scoop of mashed potatoes. For a completely different and delicious contrast, check out my recipe for Pork Fried Rice: Restaurant Quality, Non-Greasy, over High heat Recipe ; the crisp chicken and savory rice are a match made in heaven. If you happen to be avoiding gluten, you should definitely check out my guide on making gluten-free Fried Chicken: The Crispiest, Juiciest Recipe Yet next.
Go forth and enjoy the golden standard of Fried Chicken Legs !

Recipe FAQs
Why is my fried chicken crust soggy or falling off the leg?
A soggy or detached crust often results from insufficient drainage after the buttermilk soak or overcrowding the frying pot. Ensure you gently shake off excess marinade before dredging and allow the dredged chicken to rest for 10 minutes to help the flour adhere better.
Also, maintain the oil temperature between 325°F and 350°F to ensure rapid crisping.
What is the best way to tell if the chicken legs are cooked all the way through?
The only reliable method is using a meat thermometer inserted into the thickest part of the leg, avoiding contact with the bone. The chicken is safe and properly cooked when the internal temperature reaches 165°F (74°C).
If the crust is browning too quickly, lower the heat slightly and cover the pot partially for the last few minutes of cooking.
I don't have buttermilk. What can I use as a substitute for the marinade?
You can easily create a substitute by combining regular whole milk with an acid, such as white vinegar or fresh lemon juice. Use one tablespoon of acid for every one cup of milk, stir well, and let it sit for about five minutes until it thickens slightly and begins to curdle.
This acidity is vital for tenderizing the chicken meat effectively.
Can I prepare the chicken ahead of time, and how long can it soak in the buttermilk?
The chicken can be soaked in the buttermilk marinade for a minimum of 4 hours and up to a maximum of 24 hours in the refrigerator. However, the dredging step should be performed immediately before frying. If the dredged chicken sits too long, the flour coating will absorb moisture and become pasty rather than crispy.
Can I bake or air fry this recipe instead of deep frying?
While the recipe is optimized for deep frying, you can adapt it for an air fryer or oven, though the texture will be slightly drier. For oven frying, spray the fully dredged legs liberally with oil and bake at 400°F (200°C), flipping halfway, until the internal temperature reaches 165°F.
This will achieve a decent crunch without the oil volume.
My finished chicken legs taste bland. Did I miss a step?
Flavor infusion in fried chicken happens in two primary stages: the buttermilk marinade and the seasoned flour coating. Ensure you are generously seasoning both the marinade mixture and the dredging flour with adequate salt, pepper, and herbs.
Skipping the proper seasoning on the flour is the most common reason for a bland crust.
How do I safely handle and dispose of the used frying oil?
Always allow the oil to cool completely before attempting to move it. Once cool, strain the oil to remove any remaining food particles and pour it into a non-recyclable sealed container, such as an empty jug or carton. Never pour cooking oil down the sink, as it will solidify and clog household plumbing systems.
Crispy Buttermilk Fried Chicken Legs
Ingredients:
Instructions:
Nutrition Facts:
| Calories | 502 kcal |
|---|---|
| Protein | 32.0 g |
| Fat | 35.0 g |
| Carbs | 13.0 g |
