Hershey Kiss Cookies: Chewy Peanut Butter Blossoms
- Unwrapping the Classic: Why Everyone Loves These Peanut Butter Blossom Cookies
- Pantry Staples and Crucial Ingredient Notes for Perfect Dough
- Rolling, Baking, and Adding the Kiss: A Definitive Step-by-Step Guide
- The Science of Softness: Achieving That Signature Chewy Texture
- Troubleshooting Your Bake: Expert Tips for Hershey Kiss Cookies Success
- Storing and Freezing Guide: Maximizing Freshness and Shelf Life
- Elevated Pairings and Display Ideas
- Recipe FAQs: The 'Spot On' Classic Hershey Kiss Cookies
- 📝 Recipe Card
Unwrapping the Classic: Why Everyone Loves These Peanut Butter Blossom Cookies
Oh, hey! I’m so glad you asked for this one. I swear, the minute the temperature dips below 60 degrees, my brain flips a switch and demands the cozy aroma of vanilla and peanut butter.
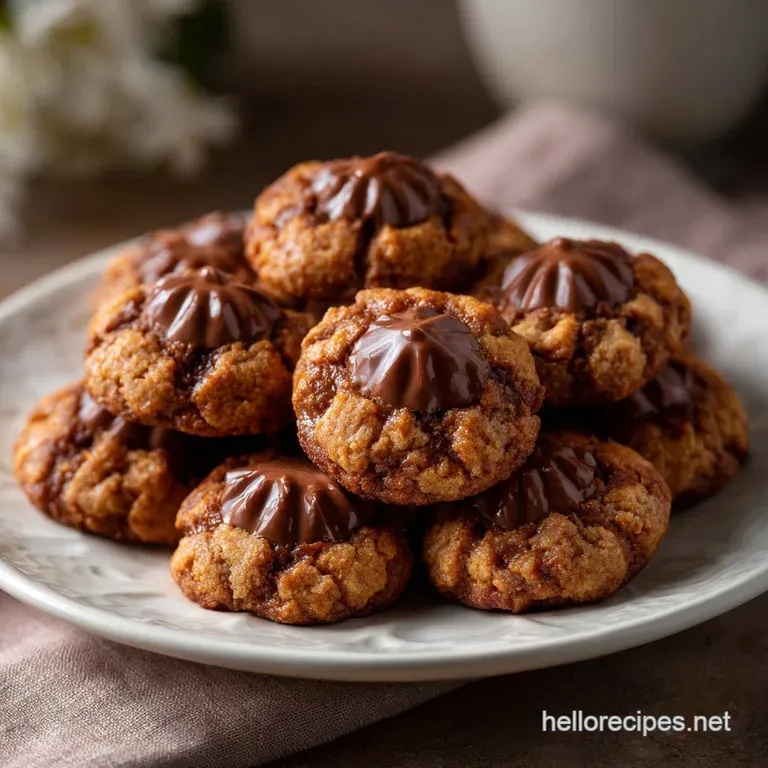
These are the Hershey Kiss Cookies —the true benchmark of holiday baking, but honestly, I make them year round. When you pull these hot, fragrant rounds from the oven, and the heat starts melting that perfect chocolate crown?
The smell alone is enough to send you straight back to childhood kitchen memories.
Look, you don't need a fancy pastry diploma to nail this. This particular Hershey Kiss Cookies recipe is a lifeline when you need maximum impact for minimal effort. They’re forgiving, they’re fast, and they cost next to nothing to make.
Plus, they travel brilliantly, which makes them perfect for cookie swaps or just dropping off a plate to a friend who needs a little pick-me-up.
We’re not just going to throw some ingredients in a bowl; we are making the best chewy, soft centered version possible. I’ve learned all the little sneaky tricks like why you need to chill the dough, and why waiting 60 seconds post bake before pressing the chocolate is the difference between perfection and pure chaos.
Let’s crack on and make some seriously phenomenal Hershey Kiss Cookies .
The Iconic Bite: Texture Contrast Explained (Soft Dough vs. Melted Chocolate)
The magic of a great cookie always boils down to texture, right? We aren't aiming for a hockey puck here. We want that beautiful chewiness from the peanut butter dough, crisp edges from the granulated sugar coating, and the final, creamy contrast provided by the melting chocolate.
This recipe achieves a perfect density because we use both brown sugar and granulated sugar, which locks in moisture while allowing for spread.
This balance means the cookie base is robust enough to hold the weight of the chocolate Kiss without collapsing, but tender enough to yield easily when you take a bite. Every good Hershey Kiss Cookies bake relies on this contrast. If you want a similar structural success but chocolate based, you should check out my tips on making Crinkle Cookies: Best Fudgy Chocolate Recipe next!
A Brief History of the Peanut Butter Kiss Cookie Tradition
Did you know these cookies have been around since the 1950s? They were originally submitted by a woman named Freda Smith to the Pillsbury Bake Off, and they were officially called "Peanut Butter Blossoms." They became a Christmas tradition almost overnight, specifically because of their simplicity and festive look.
For decades, families have relied on this simple method for reliably delicious results. The combination of salty peanut butter and sweet, rich milk chocolate is just unbeatable. It’s hard to imagine a cookie plate without these classic Hershey Kiss Cookies making an appearance, especially around the holidays.
Prep Time, Bake Time, and Yield Overview
I always try to be realistic about timing. While the active prep is about 15 minutes, you absolutely cannot skip the chill time. That 30 minutes in the fridge is where the magic happens and where we guarantee the shape.
You’ll get a solid three dozen cookies from this recipe, which sounds like a lot until you realize how fast these disappear from the cooling rack. Plan for about 9– 10 minutes per tray in the oven; patience is key to making the best Hershey Kiss Cookies .
Pantry Staples and Crucial Ingredient Notes for Perfect Dough
Listen closely, because this section separates the good cookies from the truly great ones. Baking is chemistry, and using the wrong fats or sugars will throw the whole equation off balance. We need consistency and richness to make these Hershey Kiss Cookies shine.
The Peanut Butter Choice: Creamy vs. Natural Consistency Debate
You must use processed, shelf stable creamy peanut butter. I’m talking Jif, Skippy, or a similar brand. I love natural peanut butter (the kind you stir!), but its oil separates easily and is far too inconsistent for baking.
If you use natural peanut butter, the high oil content will cause your cookies to spread disastrously thin, and the result will be oily rather than tender. Trust me on this.
Selecting Your Kiss: Optimal Chocolate Placement and Variety
The classic choice is, obviously, the standard silver wrapped Milk Chocolate Hershey’s Kiss. However, if you want to jazz up your Hershey Kiss Cookies , go wild!
I’ve successfully swapped them out for Dark Chocolate Kisses, Special Dark, or even the small, unwrapped Rolos (the caramel filling is a fantastic twist). Just ensure whatever you choose is pre-unwrapped before you start mixing.
Chef's Note: Don’t try to substitute the Kisses for chocolate chips. The structure relies on pressing a solid piece of chocolate into the warm center, allowing it to soften and set with a creamy texture, which chips simply cannot replicate.
Essential gluten-free and Dairy Swaps for Dietary Needs
Making these Hershey Kiss Cookies friendly for everyone is totally doable. If you need a good substitute, here’s my cheat sheet:
| Ingredient | Standard Ingredient | Substitution | Notes |
|---|---|---|---|
| Flour | All-Purpose Flour | 1:1 gluten-free Blend | Make sure it contains Xanthan Gum, or add 1/2 tsp per cup. |
| Butter | Unsalted Butter | dairy-free Butter Sticks | Must be the stick format, not the soft tub kind, for structure. |
| Peanut Butter | Creamy Processed PB | Creamy Almond or Sunbutter | Maintain the 'processed' smooth consistency. |
If you are going gluten-free, be mindful of the dough texture. You might need an extra tablespoon of milk or non-dairy milk if the GF blend feels too dry. I put a lot of work into perfecting my gluten-free Chocolate Chip Cookies: Proper Thick Chewy Brown Butter Recipe , and the key takeaway is always: don't overwork GF dough!
Why Room Temperature Butter and Eggs Matter for Creaming
If your butter is too cold, you can't properly cream it with the sugars. Creaming is not just mixing; it’s whipping tiny air pockets into the fat and sugar crystals. This air is what gives the finished cookie its delicate, airy lift and chewy texture.
If the butter is too hard, you end up with a dense, flat cookie. Set out your butter and egg about 30 minutes before you start making these easy Hershey Kiss Cookies .
Rolling, Baking, and Adding the Kiss: A Definitive step-by-step Guide
Creating the Foundation: Properly Creaming Butter and Sugar
Start slow. Mix the butter, both sugars, and the peanut butter on low speed until combined, then crank the mixer up to medium. You’re looking for a change in appearance here it should stop looking grainy and start looking pale and fluffy, maybe 2– 3 minutes total.
This ensures a tender base for your future Hershey Kiss Cookies . After that, beat in the egg and vanilla just until they disappear; overmixing after adding the egg develops too much gluten.
The Perfect Portion: Scooping Uniform Dough Balls (No Special Equipment Needed)
Uniformity is key to consistent baking. Use a small cookie scoop (about 1.5 tablespoons) to portion out the dough. If you don't have a scoop, measure out a tablespoon and roll it in your hands until smooth. The dough should feel soft but manageable.
Roll each ball in the small bowl of granulated sugar until it’s fully coated. That sugar roll isn’t just for looks it helps prevent excessive spreading and creates that satisfying little crunch on the outside of these classic Kiss Cookies .
Baking Watch: Identifying the 'Set' Edge for Optimal Doneness
Preheat your oven to 375°F (190°C). Bake the cookies for 8– 10 minutes. Here's the trick: they will look underdone in the center. The edges should be lightly golden and set, but the center should still look puffy and slightly soft.
They will finish cooking on the hot tray. Pull them out right at the 8 minute mark if you prefer an intensely chewy interior, or the 10 minute mark if you want slightly more structure. Do not overbake these!
The Crucial 60 Second Window: Pressing the Chocolate Kiss
The absolute moment the baking sheet comes out of the oven, start pressing those unwrapped Kisses! I mean immediately . You have about 60 90 seconds of peak softness. Gently press the chocolate into the center of the cookie. You want it to sit firmly, but you don't want to crack the cookie base.
The heat from the cookie will slightly melt the base of the Kiss, securing it perfectly. These beautiful Peanut Butter Cookies With Kisses need that swift action!
The Science of Softness: Achieving That Signature Chewy Texture

We achieve chewiness through two main strategies: the ratio of fats/sugars and the internal temperature when baking stops. Using more brown sugar than white sugar is essential, as brown sugar contains molasses, which is hydroscopic it attracts and holds moisture.
That moisture translates directly into a softer, chewier cookie that resists drying out, ensuring your Hershey Kiss Cookies stay soft for days.
The second part is the intentional underbaking. By removing the cookies when the center is still soft, we retain maximum moisture and stop the gluten structure from becoming tough.
It's a fundamental principle of great baking, and it works flawlessly for every batch of these chewy Hershey Kiss Cookies .
Troubleshooting Your Bake: Expert Tips for Hershey Kiss Cookies Success
I’ve had my share of kitchen catastrophes, trust me. I once forgot to chill the dough entirely, and ended up with peanut butter pancakes instead of cookies. Learn from my mistakes! Troubleshooting is half the battle when trying to perfect your Hershey Kiss Cookies Success .
The Role of Brown Sugar in Moisture Retention
If your cookies feel too dry or crumbly, look at your sugar ratio. Did you use the full 1/2 cup of packed brown sugar? If you accidentally swapped it for granulated, that's likely the culprit. The molasses in the brown sugar is your secret weapon against dry cookies.
Use a fork to ensure your brown sugar is packed firmly into the measuring cup for the right amount.
Preventing Spread: Chilling the Dough vs. Sugar Coating Techniques
We hit this earlier, but I need to hammer it home: chilling the dough is mandatory, not optional. If you are baking in a hot climate or your kitchen is warm, chill the dough for longer up to an hour. For extra insurance against spreading, the granulated sugar coating acts as a physical barrier.
The sugar crystallizes immediately in the heat, creating a firm shell that discourages the fat from melting too quickly. If your cookies spread thin, increase your chill time for your next batch of perfect Peanut Butter Blossom Cookies .
The Timed Press: Why Kisses Must Be Added Post Bake
Why can't we just bake the Kisses right on top? Because the high heat of the oven will destroy them. The chocolate will seize, turn dull, and become chalky, or it will simply melt into a puddle.
By adding the Kiss the moment the cookie comes out, we utilize the residual heat to achieve a soft, creamy base while keeping the top of the chocolate cool and shiny. This is the difference between an amateur bake and the stunning holiday presentation these Hershey Kiss Cookies Christmas treats deserve.
The Flattening Fix: What to Do If Your Cookies Spread Too Much
If your first tray spreads too much, immediately place the rest of your dough back in the freezer for 10 minutes. The quick freeze will solidify the fat, allowing the structure to set before the melting begins in the oven.
Also, ensure your baking soda is fresh (it should bubble vigorously when mixed with vinegar). Old leaveners mean poor lift, leading to flat cookies.
Ensuring Chocolate Stays Shiny: The Quick Cooling Technique
Once you've pressed the Kisses into your warm Hershey Kiss Cookies , don't just leave them sitting near a hot stove. Move the cooling rack to a cool, non-drafty place. Rapid cooling, but not shocking the chocolate with a blast of cold air, is essential.
This helps the cocoa butter recrystallize into a stable, shiny form rather than a dull, streaky white bloom.
Altitude Adjustments for Baking Consistency
For my friends baking at high altitude (above 3,000 feet), you may need a slight modification. Try reducing the baking soda by 1/4 teaspoon and increasing the flour by 1 2 tablespoons.
The lower air pressure causes cookies to rise faster and collapse more easily, so reducing the leavening and strengthening the structure helps these wonderful Kiss Cookies hold their shape.
Storing and Freezing Guide: Maximizing Freshness and Shelf Life
These Hershey Kiss Cookies store beautifully, making them ideal for prepping ahead of time.
- Room Temperature Storage: Once fully cooled, store them in an airtight container at room temperature for up to 5 days. Layer them between sheets of parchment paper if stacking to protect the Kisses.
- Freezing Baked Cookies: Place completely cooled cookies in a heavy duty freezer bag or container, again layered with parchment. They keep well for up to 3 months. Thaw them at room temperature.
- Freezing Dough: Roll the dough into balls, coat them in sugar, and place them on a tray until frozen solid. Transfer the frozen, sugared balls into a freezer bag. You can bake them directly from frozen; just add 2– 4 minutes to the baking time. This frozen dough trick is the ultimate secret to having fresh baked hershey kiss cookies recipe goodness anytime you want!
Elevated Pairings and Display Ideas
While these are perfect on their own, serving these simple Peanut Butter Kiss Cookies with a little extra flair is always fun.
- Icy Cold Contrast: They pair brilliantly with creamy, cold desserts. If you want a truly luxurious treat, serve them alongside a scoop of something unusual, like Lavender Ice Cream: Velvet Dream Honey Kissed Recipe . The floral notes and honey cut through the richness of the peanut butter wonderfully.
- Themed Platters: If you're using these for a holiday platter, alternate them with other classics, like my Haystacks Recipe: Classic No-Bake Chocolate Oatmeal Cookies for textural variety.
This recipe for Hershey Kiss Cookies isn't just a tradition; it’s a blueprint for cookie success. Follow these tips especially the chilling and the timing and you’ll never buy pre-made dough again. Happy baking!

Recipe FAQs: The 'Spot On' Classic Hershey Kiss Cookies
Why did my chocolate kisses crack or fall off when I pressed them into the cookies?
Cracking usually happens if the cookies are allowed to cool too much before the Kiss is pressed in, or if the oven temperature was slightly too high. For the best result, press the chocolate into the center immediately after removing the cookies from the oven, while they are still steaming hot, ensuring the base is slightly indented.
Quickly transfer the pressed cookies to a cooling rack to help the chocolate set firmly.
My peanut butter cookies are too dry and crumbly. What went wrong?
Dryness is most often caused by measuring too much flour (always spoon and level) or by over baking the dough. Ensure you remove the cookies promptly at the 8-10 minute mark, even if the center looks slightly soft, as they will continue to set up on the cooling rack.
If the dough itself seems overly crumbly before rolling, you can incorporate a single teaspoon of milk or water to improve elasticity.
Can I use natural, oil-separation style peanut butter in this recipe?
It is strongly recommended to use commercial, no-stir peanut butter (like Jif or Skippy) because its stable emulsified fat content is critical for the cookie structure. Natural peanut butter tends to separate and can make the dough too oily or too dry, leading to undesirable spreading or flatness.
If you must use natural peanut butter, ensure it is extremely well stirred and chill the finished dough for at least one hour before baking.
Does the cookie dough need to be chilled before baking?
While chilling is not strictly mandatory for this specific recipe, chilling the dough for 30 minutes is highly recommended as it helps prevent excessive spreading, especially in warmer kitchens. Chilled dough is also much easier to handle when rolling the balls and coating them in granulated sugar.
This quick chill helps the cookies retain their perfectly rounded shape.
How should I store the finished Hershey Kiss Cookies, and how long do they last?
Store the completely cooled cookies in an airtight container at room temperature for up to one week. To protect the chocolate kisses from knocking off, it is best to place parchment paper between any stacked layers of cookies.
Avoid refrigerating these cookies, as the cold air tends to dry out the peanut butter base quickly.
Can I freeze the dough or the baked cookies?
Yes, both methods work wonderfully. For freezing dough, roll the balls and sugar coat them, then freeze them solid on a tray before transferring them to a freezer bag for up to 3 months; bake directly from frozen, adding a minute or two to the bake time.
Baked cookies freeze well for up to 3 months, though the thawed kisses might sometimes show slight cosmetic discoloration (known as bloom).
Can I use different types of chocolate candies or kisses for variation?
Absolutely! While the recipe calls for the standard Milk Chocolate Kiss, substitutions are encouraged for flavor variation. Popular options include using dark chocolate kisses, peanut butter cup miniatures, or even Hershey's special holiday flavors like Candy Cane or Caramel Kisses.
Just ensure the candy is pressed in immediately after baking and is roughly the same size as the traditional Kiss.
Classic Hershey Kiss Cookies

Ingredients:
Instructions:
Nutrition Facts:
| Calories | 983 kcal |
|---|---|
| Protein | 16.5 g |
| Fat | 51.7 g |
| Carbs | 75.9 g |
