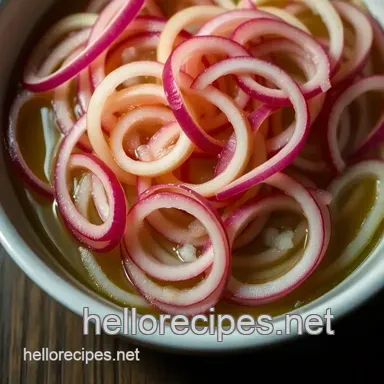
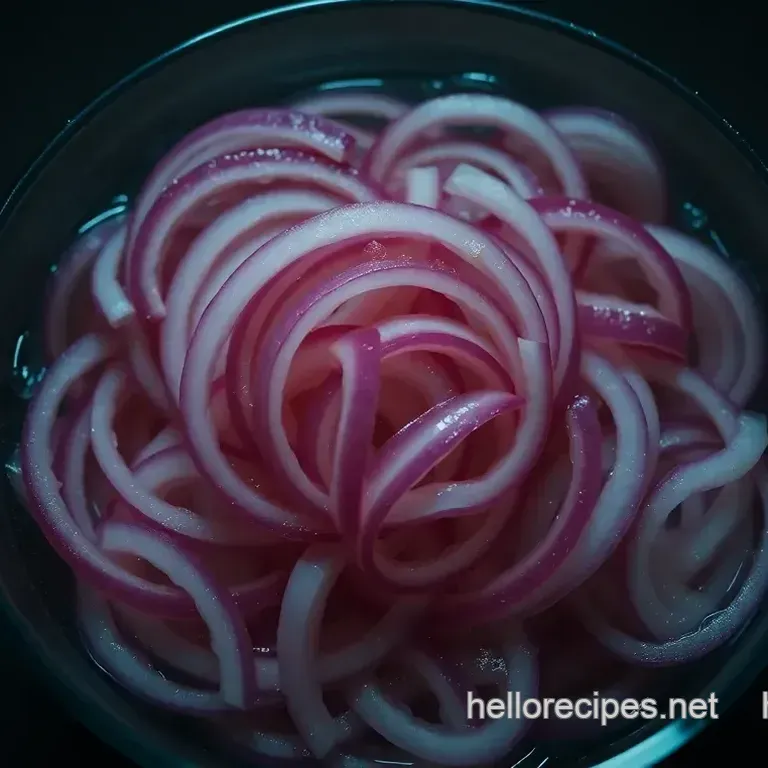
Brilliantly Pickled Onions: a Zesty Snack or Condiment
- Essential Ingredients Guide: Pickling Made Easy
- Mastering the Art of Pickling: Your Guide to Brilliantly Pickled Onions
- Pro Tips & Secrets for Pickling Perfection
- Perfect Presentation: Eye Candy for Your Plate
- Storage & Make-Ahead: Prep Like a Pro
- Creative Variations: Get Funky with Your Pickling
- Complete Nutrition Guide: Health Meets Flavor
- Frequently Asked Questions
- 📝 Recipe Card
Oh my gosh, have you ever taken a bite of a taco and thought, “this needs something ”? i had that experience at a little street food stand in san diego.
I piled on everything salsa, guacamole, you name it until i added this magical touch: pickled onions. suddenly, it became a fiesta in my mouth! that tangy crunch literally danced on my taste buds, and i hadn’t looked back since.
If you’re curious about how to make pickling onions , then stick around. you won’t believe how easy it is!
Pickle onions might just seem like an extra topping, but they’ve got a rich history, too. pickling vegetables is one of the oldest forms of food preservation.
Our ancestors knew that with some vinegar and a little patience, they could create bursts of flavor that would last through the seasons.
Fast forward to today, and people are totally loving pickled veggies again, thanks to the whole eat more plants movement! they add a pop of color and zing to everything from salads to sandwiches.
Recipe Overview
So, let’s break it down: for this recipe, you’ll need about 50 minutes total. you’ll spend about 15 minutes prepping, and then just leave the onions to chill for about 30 minutes .
No fancy techniques here if you can chop an onion, you’re golden! plus, it’s super budget friendly. you’ll whip up about 2 cups of pickled onions without breaking the bank.
Seriously, grab a few onions and your pantry staples, and let’s get going!
Key Benefits
You might be wondering, “what’s so great about pickling onions?” well, let me just tell you. first off, they’re healthy! they’re low in calories, yet they pack a flavorful punch.
You get the added benefits of added probiotics if you choose to ferment your onions longer. bonus!
These quick pickled onions are seriously versatile. you can toss them on any dish, and they instantly elevate the flavor.
I love serving them at parties. picture a charcuterie board with a mix of cheeses and meats, and then boom! you add a pop of color with those pickled beauties.
They’re perfect for birthdays, barbecues, or just a casual sunday dinner. honestly, i have friends who request them every time they come over!
And here’s a fun fact for ya: they’re actually great for those who are trying to eat healthier but still want to enjoy their favorite foods! you can put them on burgers instead of mayo, or sprinkle them onto avocado toast.
They’ve got that wow factor that makes you skip the calorie laden stuff and reach for veggies instead.
Transition to Ingredients
Ready to dive into the yummy details? let's get into the nitty gritty of what you'll need! grab your medium saucepan , a mixing bowl , and those red onions .
You might already have everything else in your kitchen; who doesn’t have vinegar and sugar lying around?
Trust me, once you get the hang of this, you’ll be the go-to pickler in your friend group. Let’s get started!
Essential Ingredients Guide: Pickling Made Easy
Listen up, fellow foodies! if you’re curious about how to make pickling onions or maybe pickle vegetables in general, you're in the right spot.
Let’s delve into this essential ingredients guide that'll have you hooked on pickling in no time!
Premium Core Components
When you're diving into pickling, a solid foundation is key. Start with your core ingredients for the pickling brine.
- Liquid Base: Typically, you’ll want 1 cup of white vinegar (or swap in apple cider vinegar for a sweeter bite) and an equal part of water.
- Sweetness & Saltiness: Add 2 tablespoons of sugar and 1 tablespoon of salt . Kosher or sea salt works best as it enhances flavors without being too harsh.
- Freshness Tip: Always choose the freshest ingredients. You know that feeling when you bite into a crisp pickle on a hot summer day? That’s the freshness you want! Pick fresh herbs and spices for an even better zing.
Signature Seasoning Blend
You wouldn’t go to a BBQ without your favorite sides, right? The same goes for your pickling brine!
- Essential Spices: Think mustard seeds, peppercorns , and maybe a touch of crushed red pepper flakes if you’re feeling adventurous. These add complexity to your flavors.
- Herb Pairings: Fresh herbs like dill or thyme can brighten up your brine. It’s like sunshine in a jar!
- Flavor Enhancers: A splash of garlic or ginger can elevate your pickling game, giving it a hint of warmth.
Smart Substitutions
Life happens, and maybe you don’t have everything on hand. No worries!
- Common Alternatives: Instead of white vinegar, rice vinegar can be a great stand-in. It’s milder and adds a unique twist.
- Emergency Replacements: Ran out of sugar? No problem! Substitute with honey or maple syrup , but adjust your amounts a bit.
- Seasonal Options: If you can’t find red onions, don’t stress! Use scallions or shallots for a different but still fabulous taste.
Kitchen Equipment Essentials
Okay, let’s talk shop. You’ll need a few tools to make this happen.
- Must Haves: A medium saucepan and a mixing bowl are essential for your brine. Grab a sharp knife for slicing those onions thin you want them to soak up all that goodness!
- Alternative Options: No mandoline? A good ole knife works fine as long as you can get those onion slices to a consistent thickness. Aim for 1/8 inch if you can.
- Storage Solutions: Keep your pickled onions well contained. Use a canning jar or a tight sealing glass container to maintain their crunch and flavor.
Your Flavor Adventure Awaits
Now that you've got the essential knowledge under your belt, it’s time to get your hands a little dirty. the journey of how to pickling onions can be super rewarding.
It’s about more than just making a side; it’s about enjoying vibrant flavors that take your meals up a notch whether it’s on tacos or a simple salad.
We’re talking about brilliantly pickled onions here, folks! with a zesty sweetness, these little wonders are bound to become a staple in your kitchen.
You’ll find yourself reaching for them often, whether you’re adding a crunch to a sandwich or just snacking on them straight from the jar.
It’s like a party for your taste buds!
So, roll up those sleeves and let's dive into pickling! Happy cooking, and stay tuned for the step-by-step instructions to bring this delightful recipe to life.
Mastering the Art of Pickling: Your Guide to Brilliantly Pickled Onions
So, you’re ready to dive into the world of pickling, huh? awesome! one of my favorite ways to spice up meals is with quick pickled onions .
They’re colorful, flavorful, and seriously simple to whip up. and guess what? you don’t need to be a pro chef to do it! with a few basic steps and a touch of creativity, you can make these zingy delights to elevate everything from tacos to salads.
Let’s chat about the professional cooking method to make this happen.
Essential Prep Steps: Get Ready to Pickle!
' mise en place ' is a fancy term that just means having everything in its place. before you start slicing your onions, gather all your ingredients: white vinegar , water , sugar , and salt .
Measure them out so you don’t scramble around later. trust me, you’ll thank yourself later!
Now, time management is key. the whole process from prep to chilling takes about 50 minutes , but most of that time is just those onions soaking up the goodness.
Set yourself a timer after each step to keep things flowing smoothly.
Next up, organization strategies . i like to use a good old sandwich bag for my onions. slice them nice and thin, and toss them in while preparing your brine.
That way, you keep your workspace tidy and have less cleanup later.
Oh, and don’t forget about safety! When thinly slicing, I always keep my fingers back don’t want to give the paramedics a reason to visit during a food project!
Step-by-step Process: Let’s Get Pickling!
Prepare the Onions: Slice 2 medium red onions thinly using a sharp knife or a mandoline. Try to get them as uniform as possible for even pickling.
Make the pickling brine: bring 1 cup of white vinegar , 1 cup of water , 2 tablespoons of sugar , and 1 tablespoon of salt to a boil in a medium saucepan.
Stir it until everything dissolves takes about 5 minutes .
Combine Onions and Brine: Pour your hot brine over the sliced onions in that mixing bowl you prepared earlier. Toss them gently so every piece gets coated.
Cool and chill: let that mixture sit for about 10 minutes at room temperature. then, pack it all neatly into a canning jar or airtight container and pop it into the fridge for at least 30 minutes .
Serve and Enjoy: Once the time is up, your pickled onions are good to go! Use them on sandwiches, burgers, or just eat them straight out of the jar no judgment here!
Expert Techniques: Elevating Your Pickling Game!
Now, let’s talk about some expert techniques . a critical step in pickling is making sure your brine is balanced. that mixture of vinegar, sugar, and salt is where the magic happens.
If you taste your brine and it’s too tangy, add a bit more sugar. too sweet? splash in more vinegar.
You’re the boss of your pickling!
Quality checkpoints ? Make sure your onions stay crisp by not overcooking them in the brine. If you start to see them go mushy, toss 'em!
Oh, and if something goes wrong like your pickles not tasting quite right try adding a splash of lemon juice for brightness or some fresh herbs like dill for a unique twist.
Honestly, sometimes the best pickles come from little mistakes turned brilliant.
Success Strategies: Tips for Perfect Pickled Onions
There are some common mistakes to avoid when pickling. one of the biggest is not slicing your onions thin enough.
Aim for that gossamer like quality. the thinner they are, the quicker they pickle!
Quality assurance tips ? Always taste test! Never be shy about snagging a piece of that onion after it’s marinated a bit. You’ll know when it’s just right!
Want to make ahead ? You can easily double this recipe and keep a stash ready for the week. They’ll last in your fridge for about 2 to 3 weeks, so you can “pickle vegetables” to your heart's content!
Wrapping It All Up: Your Pickling Adventure Awaits!
So there you have it! how to make pickling onions that’ll make any meal pop. with the right prep, timing, and a sprinkle of your flair, you’ll be a master at pickling.
These quick pickled onions are a fantastic condiment or snack any time of the day.
Now, if you're curious to explore more about pickling and utilizing these beauties in your meals, make sure to check out the last section on Additional Information . Let's get pickling!
Pro Tips & Secrets for Pickling Perfection
Oh my gosh, when i first dove into how to make pickling onions , it was a bit of a culinary adventure.
But let me tell ya, i’ve learned some really helpful tricks along the way that will make your pickling experience smooth sailing.
Chef’s Insights: First off, always use fresh onions . The better the onion, the better the pickle, people! A good red onion adds that beautiful color and a slight sweetness when pickled.
Time saving techniques: if you’re pressed for time, you can slice your onions ahead of time and store them in the fridge.
This means less prep when it's time to whip up that zesty snack!
Flavor enhancement tips: want to amp up your pickled onion game? toss in some herbs or spices into the brine.
I love adding a few sprigs of dill or a couple of garlic cloves for a flavor kick. trust me , it takes your onions to new heights.
Presentation advice: let’s be real how a dish looks matters! for a fun serve on taco tuesday, pile your pickled onions in a cute bowl and garnish with some fresh herbs.
Color is key; those vibrant purple onions against a green garnish? chef’s kiss!
Perfect Presentation: Eye Candy for Your Plate

Now, let's chat about how to serve those beauties. Plating is it, folks! You can’t just dump pickled onions on the plate and call it a day.
Plating Techniques: Use a tongs or a fork to neatly stack those onions on top of your dish. For tacos, place them to the side so they’re easy to grab.
Garnish Ideas: Add a sprinkle of sesame seeds or chopped green onions on top of your pickles. A little visual interest never hurt anyone!
Color Combinations: Contrast is everything! The bright pink of your pickled onions pairs beautifully with greens, yellows, and browns. Think of it like accessorizing an outfit it just makes everything pop!
Visual appeal tips: try to avoid clutter on your plate. balance is key! a few pickled onions on a slice of grilled chicken or sandwich will catch the eye without overwhelming the main star of your dish.
Storage & make-ahead: Prep Like a Pro
Alright, let’s talk storage. You might be thinking, “Can I save some of these guys for later?” And the answer is absolutely !
Storage Guidelines: If you pack your pickled onions in a sterilized container, they can last up to two weeks in the fridge!
Preservation Methods: If you want them to last longer, consider canning. But let’s keep it simple for now typical fridge storage works just fine, babe.
Reheating Instructions: You can enjoy your pickled onions straight from the fridge or toss a few into a pan with some veggies if you want to warm them up a bit.
Freshness Duration: The longer they sit, the more flavor they develop. Just keep an eye out for any funky smells after the two-week mark.
Creative Variations: Get Funky with Your Pickling
No one wants boredom in their pantry! Here’s the fun part: tweak and twist your pickles to suit your taste.
Flavor Adaptations: Want something sweet? Add honey or maple syrup. Feeling adventurous? Try using a bit of citrus zest in the brine.
Dietary Modifications: For gluten-free folks, this recipe is naturally gluten-free. High five for that!
Seasonal Twists: In the summer, toss in some fresh berries for a fruity pickle. You can’t go wrong with some seasonal flair!
Regional Variations: Pickling styles vary by region. If you’re from the South, try adding some cayenne pepper or hot sauce for that extra kick!
Complete Nutrition Guide: Health Meets Flavor
Eating your veggies never tasted so good, right? Here’s what you need to know.
Detailed Breakdown: Each serving of these pickled onions is about 40 calories . They’re low in calories but high in flavor, which is a win-win.
Health Benefits: Onions are rich in antioxidants and may help boost your immune system. Plus, vinegar is known for its potential metabolic benefits. No bad vibes here!
Dietary Considerations: This recipe is vegan, vegetarian, and gluten-free. Perfect for anyone trying to eat more plants or just mix things up a bit!
Portion Guidance: A serving for me is just a handful. Depending on the dish, you might find you want more!
So grab your onions, roll up those sleeves, and let’s get pickling! your taste buds will thank you later, i promise.
Happy cooking, and remember, the world of pickling is vast so experiment, have fun, and enjoy every zesty bite!
Frequently Asked Questions
How do I know how to make pickling onions the right way?
To ensure your pickling onions turn out perfectly, start by slicing the onions thinly for even pickling and flavor absorption. Follow the recipe closely for the brine ratio of vinegar, water, sugar, and salt. Letting them sit in the brine for at least 30 minutes is crucial for developing that delicious tang!
Can I use other types of onions for pickling?
Absolutely! While red onions are popular for their colour and sweetness, you can experiment with shallots or white onions for a milder flavor. Just keep in mind that different onions may yield slightly different taste profiles!
What types of vinegar can I use to make pickling onions?
You can use white vinegar, apple cider vinegar for a sweeter touch, rice vinegar, or even malt vinegar for a unique flavor twist. Each type will provide a different taste, so feel free to mix it up based on what you have on hand!
How should I store my pickled onions?
Store your pickled onions in an airtight jar or container in the refrigerator. They can last for up to two weeks, but they’ll taste even better as they sit and the flavors meld together. Just make sure to use clean utensils to avoid contamination!
Can I add spices or herbs to my pickling onions?
Definitely! Adding spices like whole peppercorns, mustard seeds, or red pepper flakes can elevate the flavor. Fresh herbs like dill or thyme can also infuse an aromatic twist. Just toss them into the brine before pouring it over the onions!
Are pickled onions healthy?
Pickled onions can be a healthy addition to your meals, but remember to enjoy them in moderation due to their sodium content from the brine. They can add vibrant flavor and a probiotic boost if fermented, which is great for your gut health!
Brilliantly Pickled Onions A Zesty Snack Or Cond